


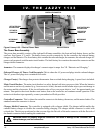


22 www.pridemobility.com Jazzy 1133 Owner’s Manual Rev B 03-03
V. DISASSEMBLY
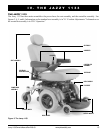
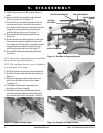
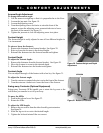
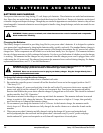
Figure 13. Seat Bars in Carrying Position
FRONT SEAT-FRAME BAR
BACK SEAT-FRAME BAR
LEFT REAR
SEAT TOWER
FRONT SEAT-FRAME BRACKET
BACK SEAT-FRAME
BRACKET
RIGHT FRONT SEAT TOWER
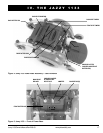
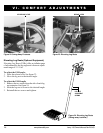
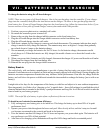
Figure 14. Crossbar
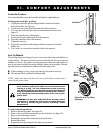
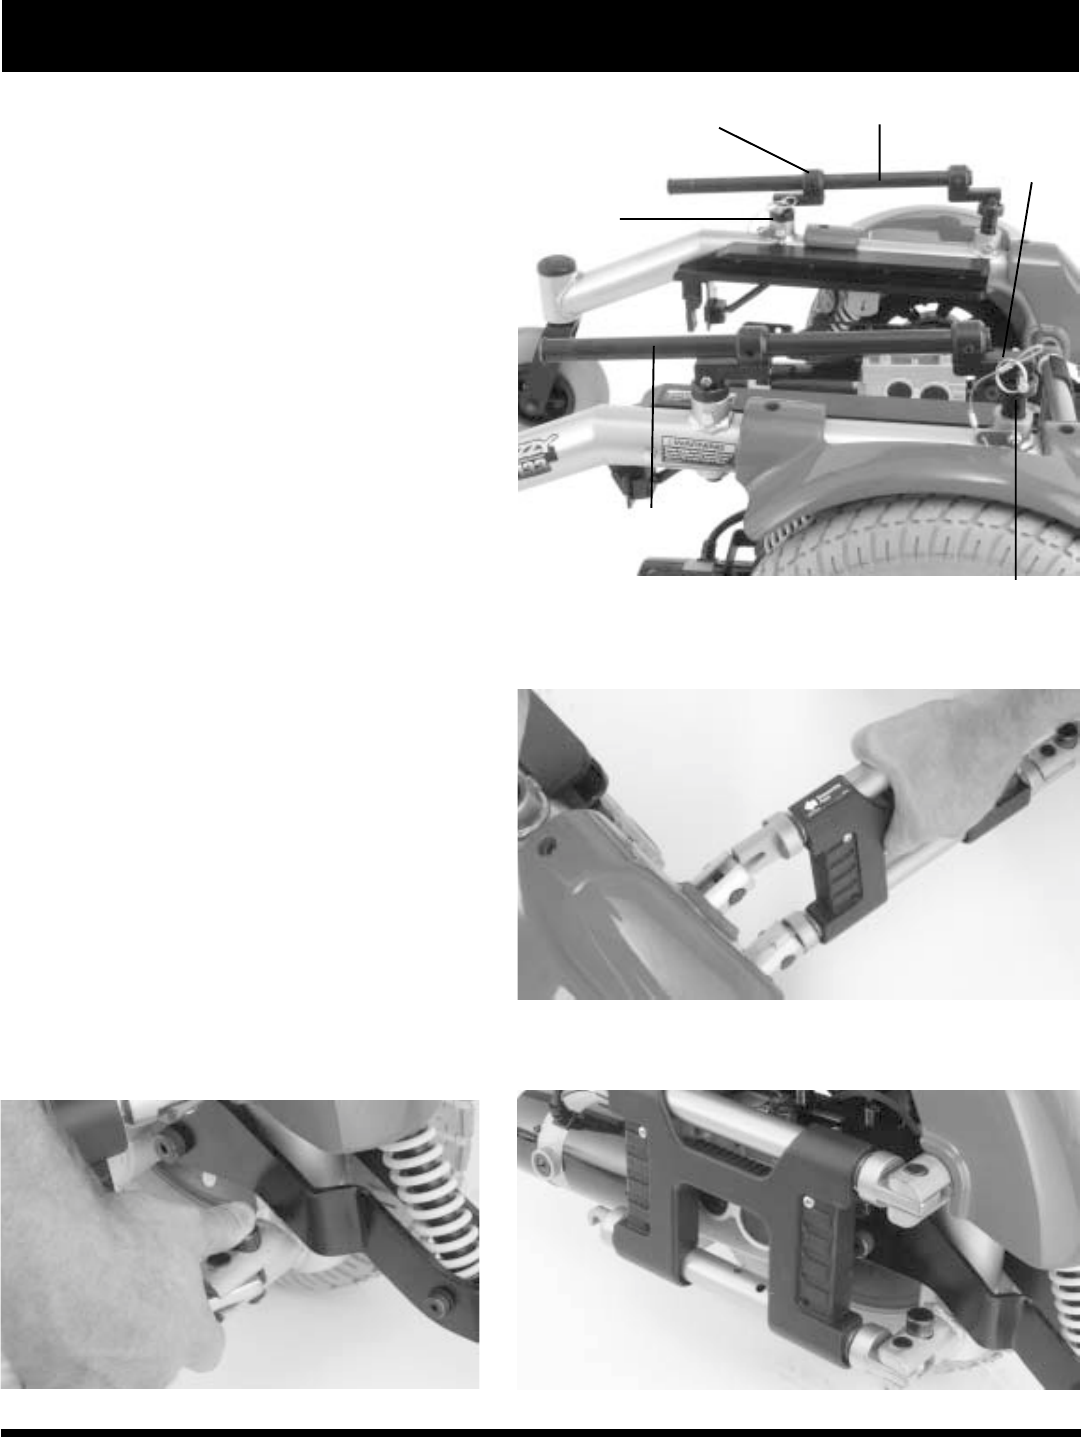
Figure 16. Crossbar in Folded PositionFigure 15. Crossbar Release Latch
15. Pull the footrest up and off the frame and set it
aside.
16. Remove the ball detent pin from the right and
left rear seat towers. See figure 12.
17. Rotate the front seat-frame bar back to the left
rear seat tower until it is parallel to the power
base frame and slide the front seat-frame bracket
along the front seat-frame bar until it lines up
with the left rear seat tower. See figure 13.
18. Reinstall the ball detent pin into the left rear
seat tower.
19. Rotate the back seat-frame bar back to the right
front seat tower until it is parallel to the power
base frame and slide the back seat-frame bracket
along the back seat-frame bar until it lines up
with the right front seat tower. See figure 13.
20. Reinstall the ball detent pin into the right front
seat tower.
NOTE: If necessary, rotate the seat towers until they
line up with the seat frame brackets.
NOTE: The seat-frame bar now serves a handle to
carry each power base frame.
21. Hold the right power base by the seat frame bar.
22. Hold the front crossbar with the other hand. See
figure 14.
23. Rotate the right power base frame down and
pull it away from the left power base frame.
See figure 14.
24. Lift up the crossbar until it separates from
the right power base assembly.
25. Press the crossbar release latch and rotate the
crossbar toward the left power base frame until
the cross bar latch clicks. See figures 15 and 16.