20 www.pridemobility.com Go-Chair
Figure 10. Go-Chair Components
IV. ASSEMBLY/DISASSEMBLY
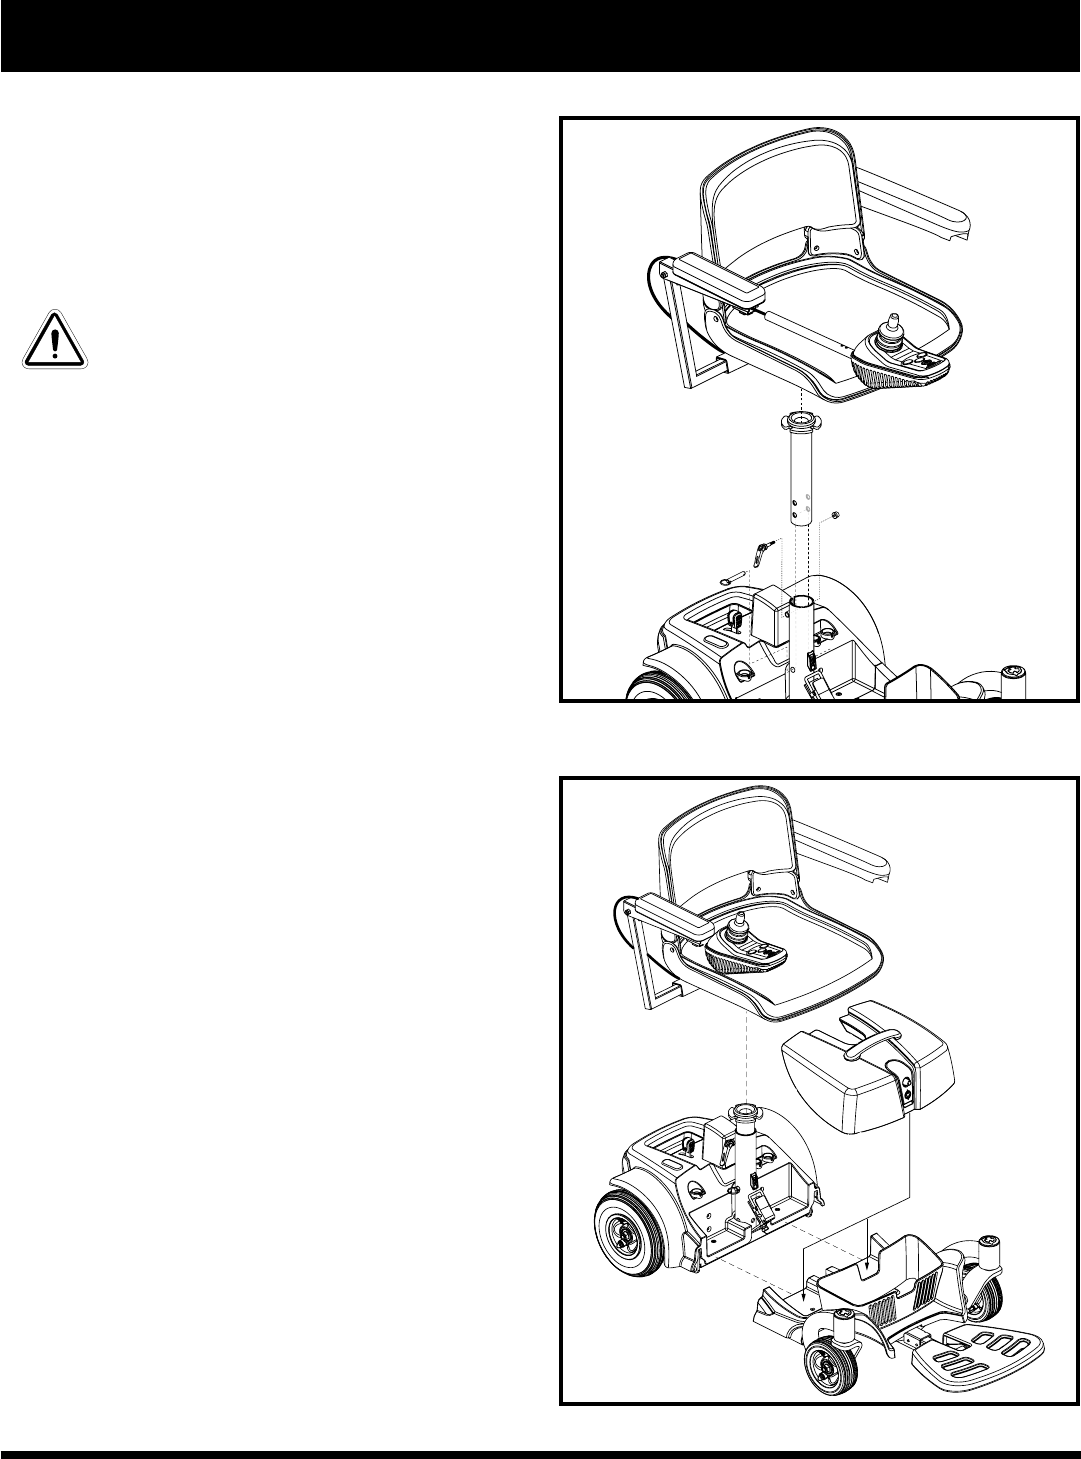
Figure 9. Seat Installation
SEAT INSTALLATION
It may be necessary to install the seat either prior to initial
operation or after transporting your Go-Chair. The seat is
attached to the power base by a height-adjustable seat
pedestal.
WARNING! Do not pick up the seat frame
by the armrests. They are free to pivot,
and you may lose control of the seat if
they do so, resulting in personal injury
or damage to the chair.
To install the seat:
1. Adjust the seat height if necessary. See V. “Comfort
Adjustments.”
2. Set the seat onto the seat pedestal. See figure 9.
3. Install the controller into the armrest, and tighten the
setscrew under the armrest.
4. Plug the controller connector into the power base. See
figure 6.
DISASSEMBLY
The Go-Chair disassembles into four components: the seat,
the battery box, the rear section of the power base and the
front section of the power base. See figure 10.
To disassemble the Go-Chair:
1. Turn off power to the controller. See VII. Operation.
2. Place the Go-Chair in drive mode. See III. “Your Go-Chair.”
3. Disconnect the controller from the power base.
4. Remove the seat.
5. Grasp the battery box handle and lift up to disengage the box
from the power base, then tilt the box forward slightly and pull
it away from the power base.
6. Push in the toggle latch release button while pulling forward
on the toggle latch. See figure 11.
7. Rotate the toggle latch buckle over the top of the toggle latch
until it snaps into its retainer. See figure 12.
8. Lift the front section up and off of the rear section.
ASSEMBLY
1. Tilt the Go-Chair rear section rearward onto the anti-
tip wheels. See figure 13.
2. While holding the front section parallel to the floor, align
the curved locking brackets on the front section with the
corresponding pegs on the rear section. See figure 14.


