


45
Operation
English
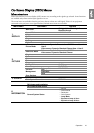
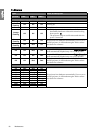
The INFORMATION menu shows you the current operating status of the projector.
FUNCTION
(default setting / value)
DESCRIPTION
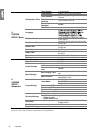
Lamp Settings
Lamp Mode (Dual-Brightest)
See "Setting the lamp mode" on page 39 for details.
Reset Lamp #1 Timer
Reset Lamp #2 Timer
Once the lamp is renewed, select Reset to return the corresponding lamp
timer to '0'. See "Resetting the corresponding lamp timer" on page 49 for
details.
Equivalent Lamp #1 Hour
Equivalent Lamp #2 Hour
Displays the number of hours the lamp has been used. See "Getting to
know the lamp hour" on page 46 for details on how the total lamp hour is
calculated.
Security Settings
Change Password
You will be asked to enter the current password before changing to a new
one. See "Utilizing the password function" on page 25 for details.
Change Security Settings
Power On Lock (Off)
Splash Screen Lock (Off)
See "Utilizing the password function" on page 25 for details.
Baud Rate (115200)
For service personnel and professional technicians use. The baud rate
should be adjusted to fit your equipment.
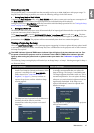
Test Pattern
(Off)
Displays the grid test pattern. It helps you adjust the image size and the
focus to ensure that the projected image is free of distortion.
Reset All Settings
Returns all settings to the factory preset values.
The following settings will still remain: Position, Phase, H. Size,
User 1, User 2, Color Space Conversion, Language, Projector
Position, My Screen, High Altitude Mode, Lamp Settings,
Security Settings.
FAQ-Image and
Installation
Displays possible solutions to problems you may encounter.
FAQ-Features and
Service
Current System
Status
Source
Shows the current signal source.
Picture mode
Shows the selected mode in the PICTURE menu.
Resolution
Shows the native resolution of the input signal.
Color system
Shows input system format, NTSC, PAL, SECAM, or RGB.
Lamp Mode
Shows the current lamp mode status.
Equivalent Lamp #1 Hour
Equivalent Lamp #2 Hour
Displays the number of hours the lamp has been used.
5. SYSTEM SETUP: Advanced menu 6. INFORMATION menu