HW-G Instruction Manual Page 9
HW-G OZIM v1a
5 Installing the Scale
This procedure includes all of the steps for installing the HW-G series scales
Step 1 Unpacking
Remove the weighing pan from the carton and
place to one side. Remove the base unit and
column from the carton, taking care not to pull
on the loadcell cable.
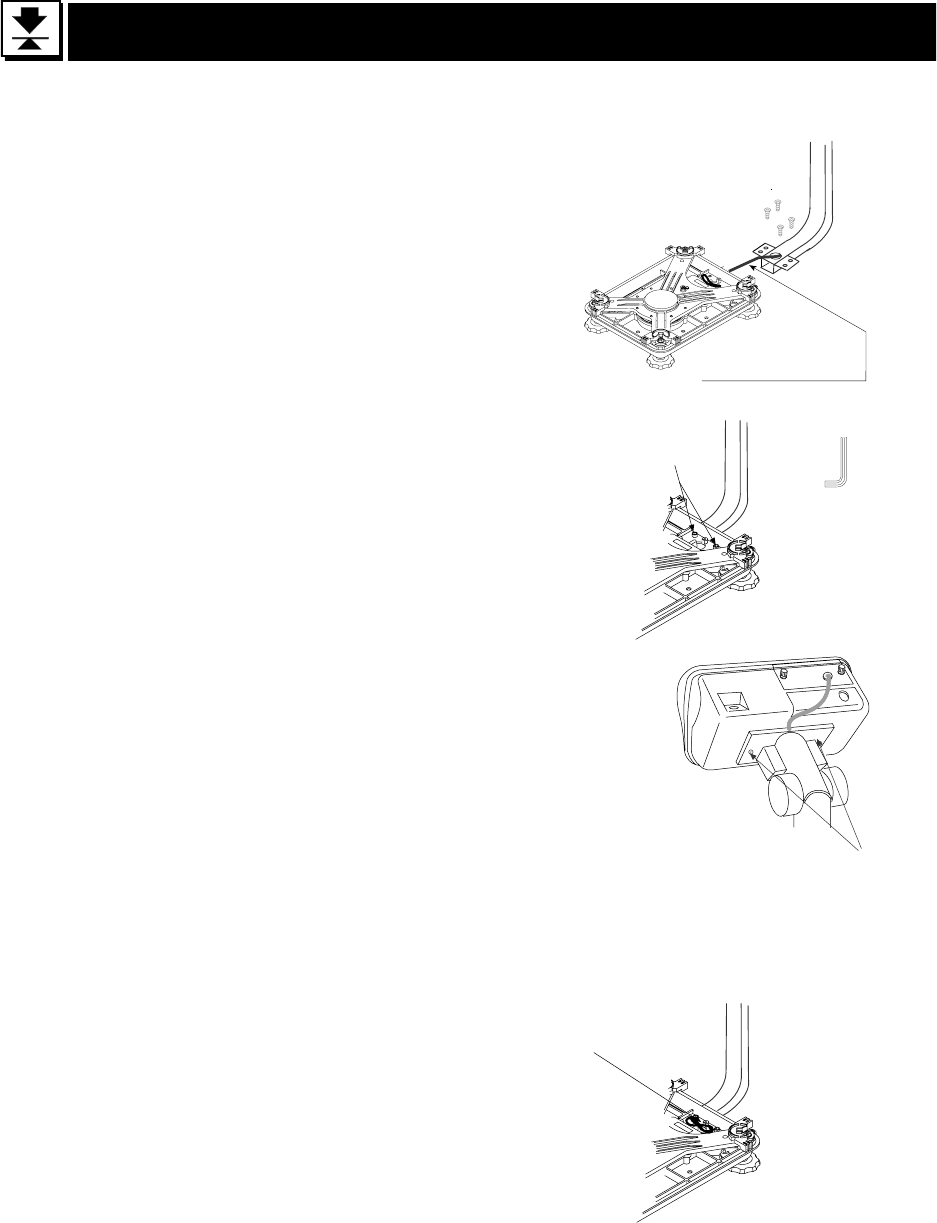
Step 2 Secure the Column
Step 2a Remove the 4 Allen screws from
the column lower bracket.
Step 2b Pull the excess loadcell cable
through the column as you position the col-
umn to the base unit, so as not to damage
the loadcell cable. Affix the column to the
base unit using four 5mm Allen screws.
Stpe 3 Secure the Display Unit
Step 3a Remove the 2 screws from the rear
of the display unit, position the display unit
onto the column bracket and pull the excess
cable back down the centre of the column to
the base unit. Ensure that the cable exits via
the cut out in the display unit column bracket
and secure the headwork with the 2 screws.
Step 3b Carefully make the connection
between the cable connector and J1 inside
the headwork, then secure the rear display
panel.
Step 4 Fit the Pan
Step 4 Fold the excess cable at the
basework end and secure with the ‘twist and
tie’ strip provided.
Fit the pan to the base unit.
Base unit
Column
Load-cell cable
Step 1
Step 2a
5mm allen screws
Step 2b
Allen wrench
Step 3
Screws
Tie excess cable here
Step 4


