


Before each use, ensure that the openings in
the air junction are not blocked. Any deposits
must be removed. For the exhalation system
to function properly, it is essential that the
mask cushion is assembled correctly. To ensure
this, push the round opening of the mask
cushion [12] over the air junction up to the
limit stop [see “Assembly” section].
• The exhalation system operates only with the
use of the insert tube, since otherwise too
much air would escape, thus reducing the
efficacy of the therapy.
• Do not use or repair a defective mask. Use
only original spare parts manufactured by MAP
Medizin-Technologie GmbH.
• When using replacement parts, please note
the color of the mask cushion: use only mint-
green mask cushions with the Silent Papillon
model. The mint-green mask cushion for the
Silent Papillon nasal mask may under no
circumstances be replaced by the arctic-blue
mask cushion with integral exhalation vents
for the Papillon nasal mask.
• The Silent Papillon nasal mask exhalation
system may under no circumstances be
exchanged for the Papillon nasal mask
connection system.
• The mask should be taken off as soon as you
switch off your respiratory therapy device, or
alternatively the mask and air tubing should
be disconnected. This will prevent you from
rebreathing exhaled air.
• External pressure measurement is possible only
if the external pressure measurement
connector [10] is clean and dry.
• If the external pressure measurement
connector is not in use, it must always be sealed
by the connector cover [9].
• Avoid excess formation of condensation,
particularly at low therapeutic pressures. If
necessary, reduce the settings of the air
humidifier accordingly.
• To remove the mask safely, first open the clip
fastener [17] on the headgear [18] and sepa-
rate the tubing connector [21] from the
exhalation system air junction [8]. Do not pull
on the mask.
• Follow the instructions on regular cleaning of
the mask to prevent possible respiratory tract
infections.
Disassembly of the Nasal Mask
Detach the forehead frame [3] from the frame
base [4] by pressing together the hinge grip
pressure points [5] on the frame base [4].
Detach the forehead pad [1] from the forehead
frame.
Detach the tubing connector [21] from the
exhalation system air junction [8].
Remove the exhalation system insert tube [15]
from the air junction [8].
Push the mask cushion [12] backwards out of the
frame base.
Detach the exhalation system air junction [8] from
the frame base by turning it counterclockwise to
release it, and then pulling it out.
Pull off the connector cover [9] from the external
pressure measurement connector [10].
Assembly
Always wash your hands before assembling the
components after cleaning. You will find
information on cleaning the nasal mask in the
“Cleaning in the Home Environment” section.
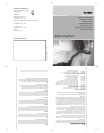
Follow the steps shown in Figures A to H on the
inside front cover.
Fig. B: Press together the hinge grip pressure points
[5] so that the forehead frame [3] can be pushed
into the guide rail of the frame base [4].
Fig. D: Press the exhalation system air junction [8]
from above into the round opening in the frame
base. Insert the two different-sized catches into
the corresponding slots. Secure the air junction
by turning it clockwise to the limit stop.
Fig. E: Push the round opening of the mask cushion
[12] over the air junction to the limit stop. There is
a catch under the mask cushion; this has to lock
into the frame [Fig. E-a]. Make sure that the
tongue joints [13] snap into the matching groove
joints [14] on the sides of the mask cushion [Fig.
E-b].
Fig. F: It is easier to attach the mask cushion [12]
first, and then attach the exhalation system insert
tube [15]. Feed it through the mask cushion from
behind and insert it from below into the exhalation
system air junction to the limit stop.
Fig. H: Lay out the AeroFix II headgear [18] in
front of you, so that the side with the washing
instructions is facing away from you. Connect the
longer straps to the upper slots on the mask frame
and the shorter ones to the lower slots, and to
the clip fastener.
Optional: Attach the middle of each upper strap
of the headgear by the AeroFix plus tubing clip
[19], available separately
(REF 632 006).
Fitting the Nasal Mask
Always wash your face and hands before fitting
the mask. Follow the steps shown in Figures I to
M on the inside front cover.
Tip: Stand in front of a mirror when fitting your
Silent Papillon nasal mask.
Deutsch
GB