


51
NOTE: If the back upholstery HEIGHT is being changed,
the back canes must also be changed. Refer to
CHANG-
ING BACK HEIGHT in this procedure of the manual.
NOTE: If the back upholstery HEIGHT is being changed,
it may be necessary to replace the recliner cable assem-
blies as well. Refer to
REPLACING RECLINER CABLES
in this procedure of the manual.
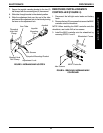
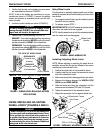
Replacing Headrest Upholstery
1. Remove the six (6) phillips screws that secure the
headrest upholstery to the headrest extensions.
2. Remove the existing headrest upholstery from the
headrest extensions.
3. Install the new headrest upholstery onto the headrest
extensions.
4. Install the six (6) phillips screws that secure the head-
rest upholstery to the headrest extensions.
5. Adjust the headrest upholstery to the desired taut-
ness. Refer to
ADJUSTING BACK OR HEADREST
UPHOLSTERY in this procedure of the manual.
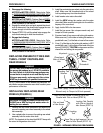
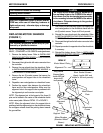
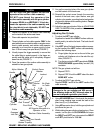
FIGURE 2 - REPLACING BACK OR HEADREST
UPHOLSTERY
R
E
C
L
I
N
E
R
RECLINER PROCEDURE 14
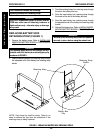
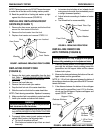
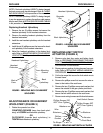
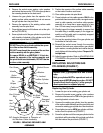
FIGURE 3 - ADJUSTING BACK OR HEADREST
UPHOLSTERY
ADJUSTING BACK OR HEADREST
UPHOLSTERY (FIGURE 3)
1. Rotate the spreader bar either:
COUNTERCLOCKWISE (away from back uphol-
stery) to LOOSEN back/headrest upholstery
OR
CLOCKWISE (towards back upholstery) to
TIGHTEN back/headrest upholstery
Spreader
Bar
Headrest Upholstery
Back Upholstery
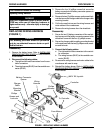
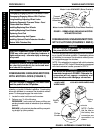
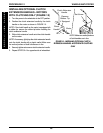
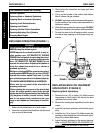
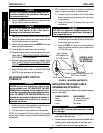
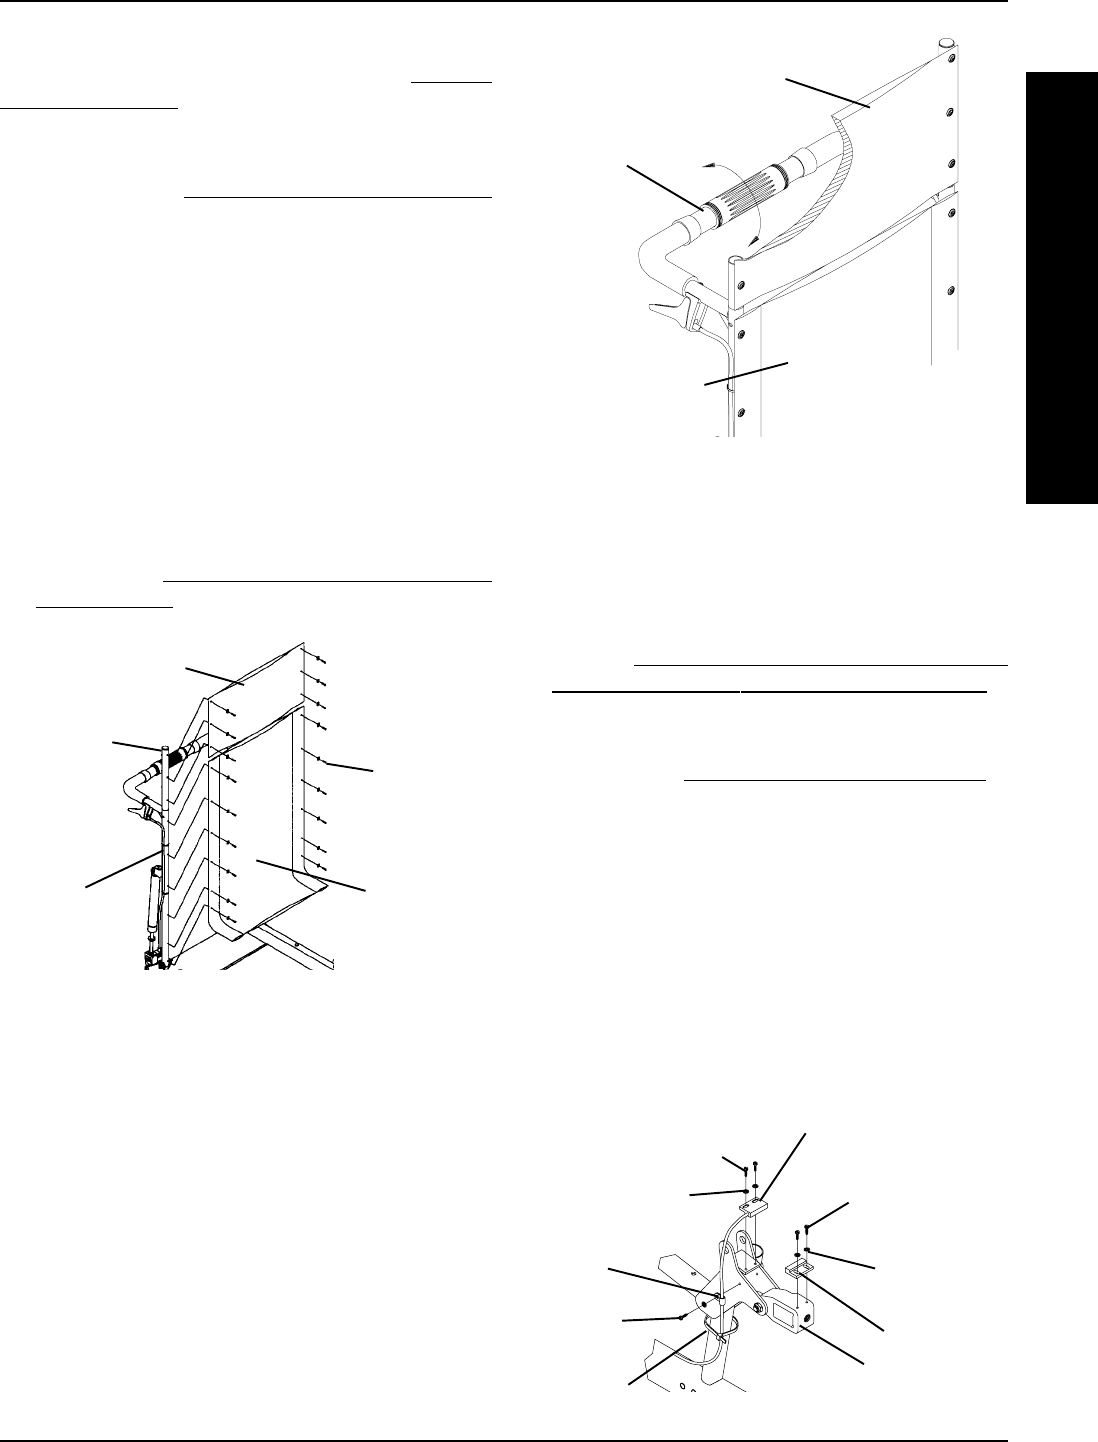
REPLACING LIMIT SWITCH/
ACTUATOR (FIGURE 4)
1. Remove nylon boot from motor and battery leads.
Refer to DISCONNECTING/CONNECTING MKIV
CONTROLLER MOTOR AND BATTERY LEADS in
PROCEDURE 9 of this manual.
2. Remove primary portion of wiring harness from con-
troller. Refer to
REPLACING WIRING HARNESS in
PROCEDURE 11 of this manual.
3. Cut the tie wraps that secure the limit switch wire to
the seat frame.
4. Remove the phillips screw that secures the wire re-
tainer to the inside of the seat frame.
5. Remove the two (2) phillips screws and washers that
secure the actuator to the gas cylinder pivot block.
6. Remove the two (2) phillips screws and washers that
secure the limit switch sensor to the seat frame.
7. Remove main wiring harness and limit switch sensor.
Washers
Phillips
Screws
Wire
Retainer
Washers
Phillips Screws (DO
NOT Over-Tighten)
Limit Switch Sensor
Phillips Screws (DO
NOT Over-Tighten)
Actuator
Pivot Block
FIGURE 4 - REPLACING LIMIT SWITCH/ACTUATOR
Tie Wraps
Mounting
Screws
Back
Cane
Headrest
Extension
Headrest Upholstery
Back
Upholstery