


27
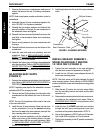
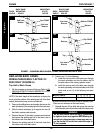
CHANGING BACK HEIGHT
Wheelchairs Built Before 10/2000
(FIGURE 4)
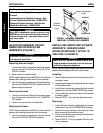
NOTE: If changing the back height, new back upholstery
may be needed as well. Refer to the following chart to
determine if new back upholstery is needed:
BACK UPHOLSTERY HEIGHT RANGES
16-17-INCHES OR 18-20-INCHES
If the back height required is within the range of the origi-
nal back height, only new back canes will be needed.
If the back height required is NOT within the range of the
original back height, new back upholstery and new back
canes will be needed.
NOTE: Existing hardware and inserts will be reused.
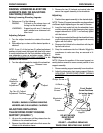
1. Remove the armrests from the wheelchair.
NOTE: Note position of the four (4) hex screws that se-
cure the back canes to the wheelchair frame to ensure
proper back angle during installation of new back canes.
2. Cut the tie wraps that secure the bottom of the back
upholstery to the wheelchair frame.
3. Remove the four (4) hex bolts that secure the existing
back canes to the seat frame.
4. Remove the back canes, back upholstery and
spreader bar from the wheelchair.
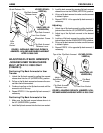
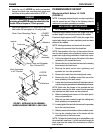
5. Remove the inserts from the existing back canes.
6. Remove the two (2) phillips screws that secure the
back upholstery to the back canes.
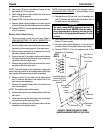
7. Loosen, but do not remove the two (2) hex bolts and lock-
nuts securing the spreader bar to the existing back canes.
NOTE: Make sure the clamps on the spreader bar are
loose before removing the back canes from the spreader
bar, otherwise the back canes can be scratched.
8. Slide the existing back canes out of the back uphol-
stery and spreader bar.
9. Slide the new back canes through the existing/new
back upholstery and spreader bar.
10. Loosely tighten the hex bolts that secure the spreader
bar to the new back canes.
11. Slide the inserts into the bottom of the new back canes.
12. Line up the mounting holes of the inserts with the
mounting holes in the back canes.
NOTE: To keep the inserts lined up for reinstallation onto
the wheelchair, install one (1) of the hex bolts through the
back cane from the inside of the wheelchair to hold the
insert in place.
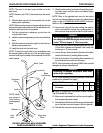
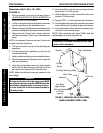
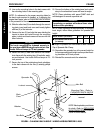
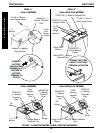
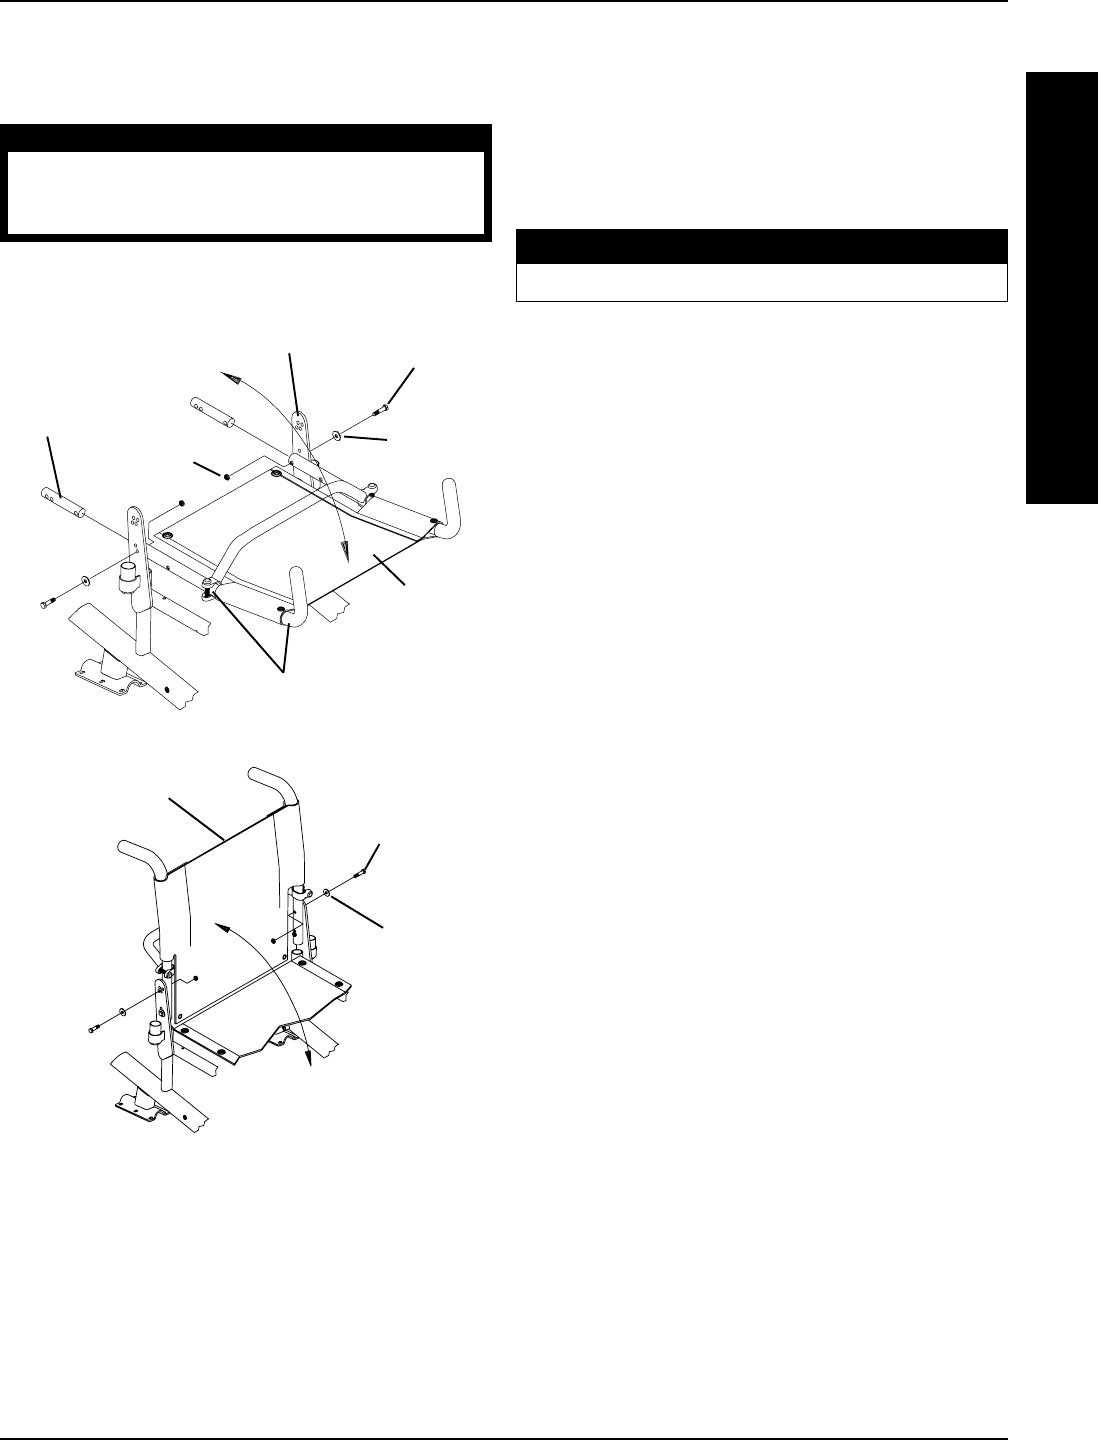
FIGURE 3 - INSTALLING BACK ASSEMBLY -
WHEELCHAIRS BUILT BEFORE 10/2000 ONLY
Washers
Locknuts
Inserts
Back Cane Mounting Plates
Back Cane and Spreader
Bar (Pointed UP)
LOWER
Hex Bolts
Washers
UPPER
Hex Bolts
Back Assembly
in UP Position
Back
Assembly
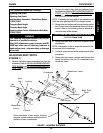
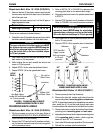
8. Install the two (2) UPPER hex bolts and washers
through the back cane mounting plate, back cane
and insert at the position determined in STEP 4.
WARNING
The back canes MUST be fastened securely to the
mounting plates BEFORE using the wheelchair. Use
Loctite 242 and torque to 75-inch pounds.
9. Secure the hardware in STEP 8 with two (2) locknuts.
Use Loctite 242 and tighten to 75-inch pounds.
PROCEDURE 7FRAME
F
R
A
M
E