


SECTION 9—ANTI-TIPPERS/WHEEL LOCKS
Part No. 1114811 53 Lightweight, Standard and Heavy Duty Wheelchairs
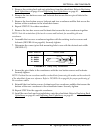
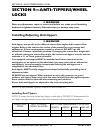
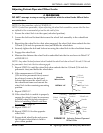
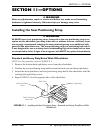
FIGURE 9.1 Installing/Adjusting Anti-tippers - Anti-Tipper Length
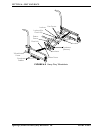
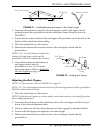
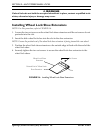
1. Press the release buttons and insert the anti-tippers with the anti-tipper wheels
pointing toward the ground/floor into the wheelchair frame tubing as shown in
FIGURE 9.2.
2. Ensure that the release button of the anti-tipper fully protrudes out of the hole in the
bottom of the wheelchair frame tubing.
3. Place the wheelchair on a flat surface.
4. Measure the distance between the bottom of the anti-tipper wheels and the
ground/floor.
NOTE: A 1½ to 2-inch clearance between the
bottom of the anti-tipper wheels and the
ground/floor MUST be maintained at all times.
5. If the distance between the bottom of
anti-tipper wheels and the
ground/floor is not 1½ to 2-inches,
adjust anti-tippers. Refer to Adjusting
the Anti-Tippers on page 53.
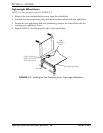
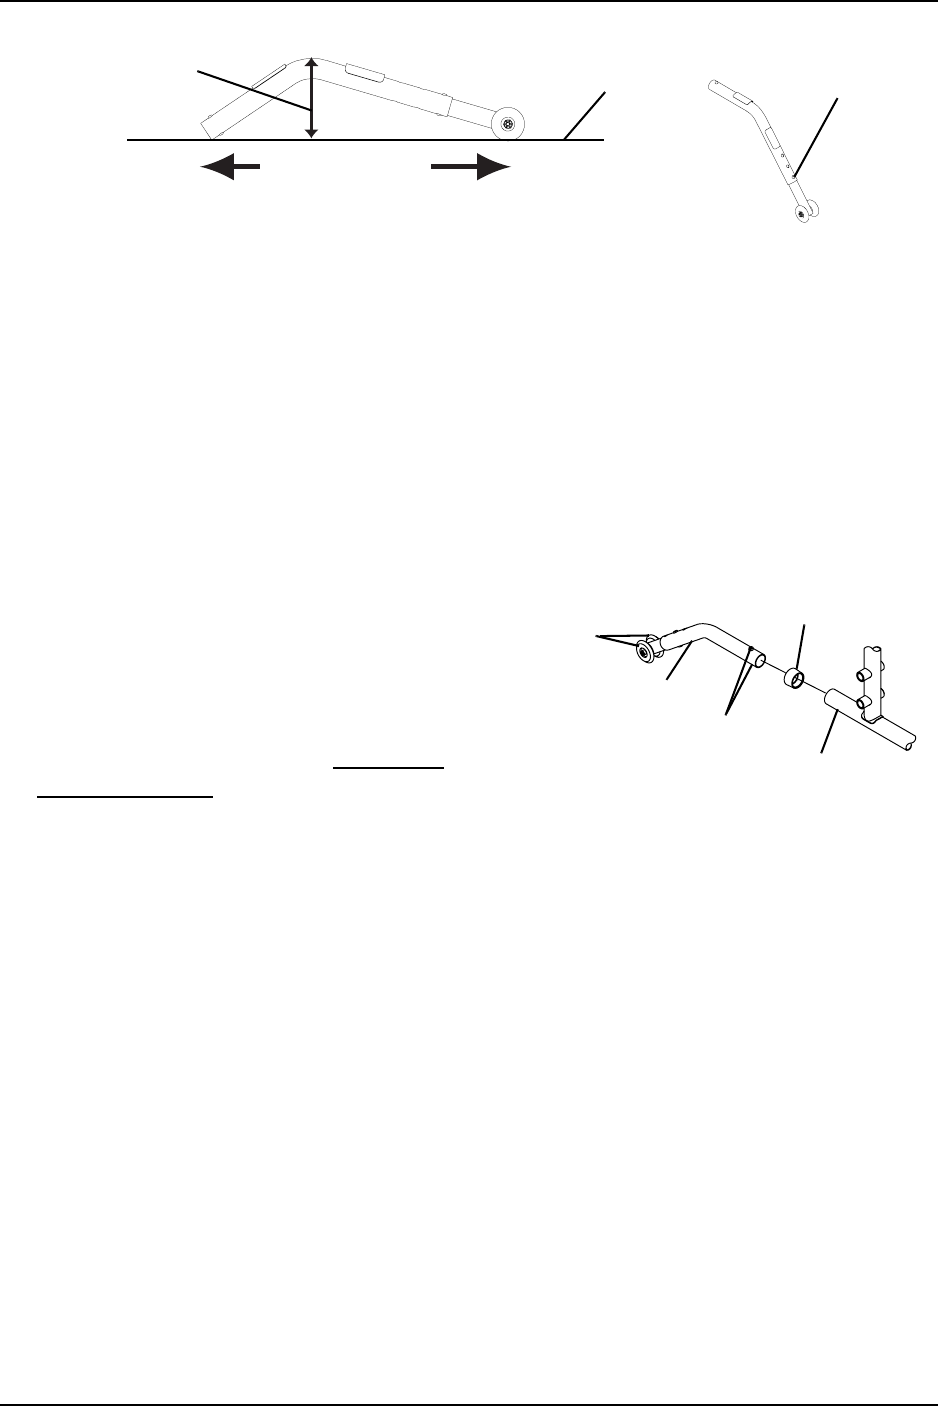
FIGURE 9.2 Installing Anti-Tippers
Adjusting the Anti-Tippers
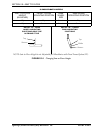
NOTE: For this procedure, refer to FIGURE 9.3 on page 54.
NOTE: A 1½ to 2-inch clearance between the bottom of the anti-tipper wheels and the ground/floor
MUST be maintained at all times.
1. Place the wheelchair on a flat surface.
NOTE: If adjusting anti-tippers on recliner models, ensure back canes are in the upright position
before making adjustments.
2. Press the release buttons on the wheeled portion of the anti-tipper and slide it up or
down to the desired adjustment hole.
3. Check to make sure that the release buttons are fully engaged in adjustment holes.
4. Ensure both anti-tippers are adjusted to the same height.
5. Measure the distance between the bottom of the anti-tipper wheels and the
ground/floor.
Anti-Tipper Height
Anti-Tipper Length
Flat Surface
Bottom Position
Anti-Tipper
Wheels
Anti-Tipper
Release Buttons
Rear Frame
Tubing
Anti-Rattle