2. Press the SEL button until the desired
mode’s name appears in the display.
3. Press the MENU button until "CHANNEL"
appears in the display.
4. Press the SEL button until the desired chan-
nel’s name appears in the display.
5. Press the EXIT button to switch radio opera-
tion to the new mode and channel, and exit
the menu.
6. Select the desired Channel Guard using the
CONTROL KNOB. The "CG" status flag will
turn on if the selected position has CG
programmed. Position fifteen (15) is a non-
CG position; it may not be programmed with
a Channel Guard. Position sixteen (16) is a
default channel CG position; selecting it will
switch CG to the CG programmed for the
selected channel.
RECEIVING A MESSAGE
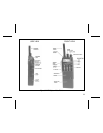
1. Slide the ON/OFF SWITCH on the battery
pack to the on position. The radio will initiate
and complete the power-up self-test and
beep if the power-up alert tone is pro-
grammed on.
2. Select the desired operating mode, chan-
nel, and/or Channel Guard. See the
MODE/CHANNEL/CG SELECTION for de-
tails.
3. Press the MONITOR BUTTON to disable
squelch and adjust the VOLUME CON-
TROL KNOB for the approximate desired
speaker audio level. Pressing the MONI-
TOR BUTTON may affect Channel Guard
and/or Type 99 tone operation if pro-
grammed for the selected channel.
4. When a transmission is received, the re-
ceiver will unsquelch and it will be heard in
the speaker. However, if the selected chan-
nel is programmed for Channel Guard or
Type 99 tone operation, the receiver will not
unsquelch unless the correct CG or T99
tone is received.
5. Adjust the volume as necessary.
17


