


Aruba Mobility Controller Configuration Guide
VIEW Certified
Page 18
Ensure that both switches have IP connectivity. A simple ping from each of the switches to the
other switch can be used to verify connectivity. In a master local setup all AP, authentication,
and firewall configurations will be made on the master and pushed down to the local switch.
In the configuration tested, all APs with location code 1.1.0 were configured to boot off of the
master switch and all APs with location code 1.2.0 were configured to boot off of the local
switch.
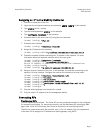
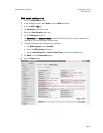
To use the Web interface to configure the switches for subnet roaming, do the following:
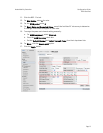
1. From the master switch navigate to the Configuration > WLAN > Advanced tab.
2. Add a new location 1.1.0 and click the Apply button.
3. In the next page click General and set the LMSIP to the switch IP address of the master.
4. Apply the configurations.
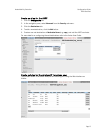
5. Configure location 1.2.0 in a similar manner and set the LMSIP address to the switch IP
address of the local switch.
6. Create a default route for multicast traffic re-direction on the switch that acts as the
Mobility Home Agent for the Voice group (this was done on the master switch in the test
example).
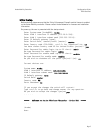
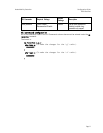
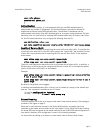
CLI commands to set up subnet roaming
Commands for the master switch (the Aruba 800):
Configure terminal
ip default-gateway <ip_addr of router>
ap location 1.1.0 (AP connected to the Aruba 800)
lms-ip <ip_addr of 800 switch>
ap location 1.2.0 (AP connected to the Aruba 6000)
lms-ip <ip_addr of 6000 switch>
ip route 224.0.0.0 255.0.0.0 <ip_addr of
NetLink Gateway
>
exit
write mem