


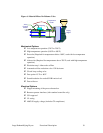


Large Dehumidifying Dryers Mechanical Installation 22
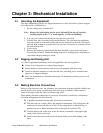
Chapter 3: Mechanical Installation
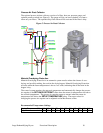
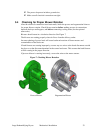
3-1 Uncrating the Equipment
The large dehumidifying dryers are shipped mounted on a skid, enclosed in a plastic wrapper,
and contained in a cardboard box.
1. Pry the crating away from the skid.
Note: Remove the nails holding the box to the skid and lift the box off carefully;
avoiding staples in the 1’ x 4’ wood supports. Cut the steel banding.
2. Use a pry bar to remove the blocks securing the unit to the skid.
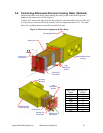
3. Lift unit from sides, inserting forklift under the base. The forks must be equidistant
from the centerline of the unit and the unit must be balanced on the forks. Lift slowly
and only high enough to clear the skid. Use a pry bar if necessary to carefully remove
the skid from the unit.
4. Lower slowly.
5. Remove the temporary hardware that has been installed to prevent the side panels
from shifting in transit. Retain the crating material for reshipping the components in
case hidden shipping damage is found.
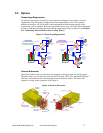
3-2 Rigging and Placing Unit
As with all equipment installations, follow all applicable codes and regulations.
Locate close to the process to reduce piping expense.
Locate adjacent to drain and city water sources (If equipped with aftercooler).
Consult a structural engineer to assure that the floor, mounting pad or structural steel
support is of adequate strength.
Allow for required service clearances necessary for maintenance and easy access to all
components.
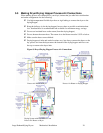
3-3 Making Electrical Connections
Refer to local electrical codes, the schematic, and connection diagrams supplied with this unit
and the serial tag for wiring considerations. Run all wiring in conduit if codes require it.
Label all wiring to make any future troubleshooting easier.
When making electrical connections to your dryer, ensure that you take into consideration
and make arrangements for the following:
; A qualified electrician should make all electrical connections.
; The serial tag lists voltage, phase, and amp draw information. Line voltage must be
within plus or minus ten percent (±10%) of the voltage listed on the serial tag, or
damage may occur. Phase imbalance must be less than five percent (5%).
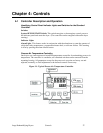
; Connect main power to the dryer at the disconnect or terminals in the upper right
corner of the control enclosure.
; Install a fused disconnect with a lockout feature in the power main leading to the
dryer.