


33
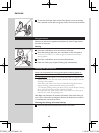
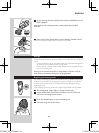
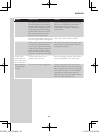
2 Press the on/off button on the Jet Clean System to start the cleaning
program.
The battery symbol on the Jet Clean System goes out. ,
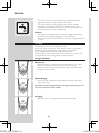
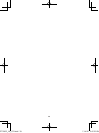
, During the cleaning program, the cleaning symbol starts to fl ash and
the shaver is automatically lowered into the cleaning fl uid.
The shaver automatically switches on and off several times ,
and moves up and down.
The cleaning symbol fl ashes throughout the cleaning program, which ,
takes approx. 8 minutes.
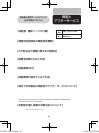
After the cleaning program, the battery symbol on the Jet Clean ,
System goes on to indicate that the shaver is being charged.
Note: If you press the on/off button of the Jet Clean System during the cleaning
program, the program aborts and resets. In this case, the cleaning symbol stops
fl ashing and the shaver returns to its starting position. The shaver may still be
wet and dirty, because the cleaning program has not been fi nished.
Note: If you remove the adapter from the wall socket during the cleaning
program, the program aborts. The shaver holder remains in its current position.
When you put the adapter back into the wall socket, the shaver holder moves
to its highest position.
Note: When the fl uid level drops below the minimum level, the cleaning symbol
and the ‘fl uid low’ symbol start to fl ash and the shaver holder returns to its
starting position.
Cleaning the Jet Clean System
Empty the cleaning chamber and clean it thoroughly by rinsing it with hot
tap water every 15 days if you use the Jet Clean System daily. Otherwise
empty and clean the cleaning chamber at least once a month.
1 Clean the outside of the Jet Clean System with a moist cloth.
Never immerse the Jet Clean System in water, nor rinse it under the tap.
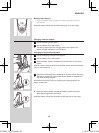
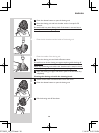
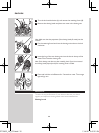
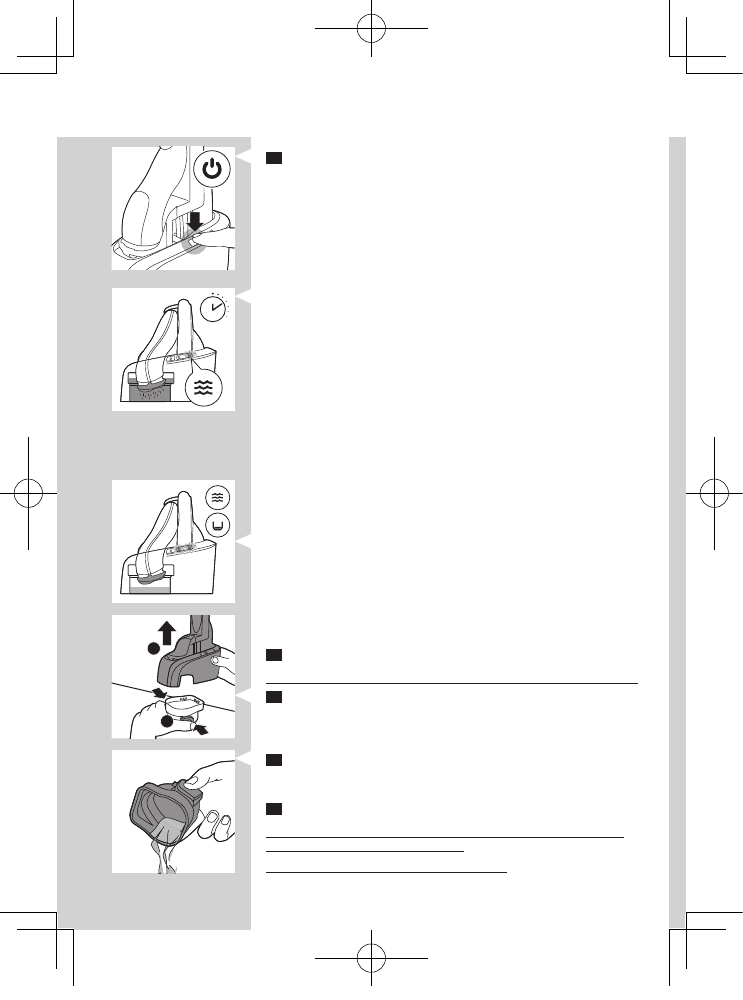
2 Simultaneously press the release buttons on both sides of the Jet
Clean System (A). Then lift the Jet Clean System off the cleaning
chamber (B).
The cleaning chamber remains behind. ,
3 Pour any remaining cleaning fl uid out of the cleaning chamber.
You can simply pour the cleaning fl uid down the sink, this is not harmful to
the environment.
4 Rinse the cleaning chamber under a hot tap.
Be careful with hot water. Always check if the water is not too hot, to
prevent your hands from getting burnt.
The cleaning chamber is not dishwasher-proof.
8 min.
B
A
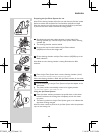
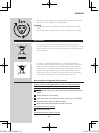
5 Fill the cleaning chamber with Jet Clean solution (HQ200) up to the
MAX indication.
Note: Make sure the cleaning chamber is always fi lled above the MIN
indication.
6 Place the Jet Clean System back onto the cleaning chamber (‘click’).
Make sure that the release buttons snap back into place.
Storage
There are several ways to store the shaver or to take it with you when you
travel:
Put the protection cap on the shaver after use to prevent damage and -
to avoid dirt accumulation in the shaving heads.
Put the shaver in the Jet Clean System. Make sure the protection cap is -
not on the shaving unit.
Note: If you do not want the shaver to charge while it is stored it in the Jet
Clean System, just leave the locking lever in upright position
Replacing the shaving heads
For maximum shaving performance, we advise you to replace the shaving
heads every two years. The shaving head symbol will light up to indicate
that the shaving heads need to be replaced. Replace damaged shaving
heads right away.
Only replace the shaving heads with original HQ8 Philips Shaving Heads.
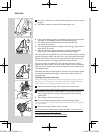
1 The shaving head symbol lights up orange continuously.
2 Switch off the shaver. Disconnect the shaver from the mains and
remove it from the Jet Clean System.
3 Press the release button to open the shaving unit.
4 Pull the shaving unit off the shaver.
ENGLISH ENGLISH
2 Press the on/off button on the Jet Clean System to start the cleaning
program.
The battery symbol on the Jet Clean System goes out. ,
, During the cleaning program, the cleaning symbol starts to fl ash and
the shaver is automatically lowered into the cleaning fl uid.
The shaver automatically switches on and off several times ,
and moves up and down.
The cleaning symbol fl ashes throughout the cleaning program, which ,
takes approx. 8 minutes.
After the cleaning program, the battery symbol on the Jet Clean ,
System goes on to indicate that the shaver is being charged.
Note: If you press the on/off button of the Jet Clean System during the cleaning
program, the program aborts and resets. In this case, the cleaning symbol stops
fl ashing and the shaver returns to its starting position. The shaver may still be
wet and dirty, because the cleaning program has not been fi nished.
Note: If you remove the adapter from the wall socket during the cleaning
program, the program aborts. The shaver holder remains in its current position.
When you put the adapter back into the wall socket, the shaver holder moves
to its highest position.
Note: When the fl uid level drops below the minimum level, the cleaning symbol
and the ‘fl uid low’ symbol start to fl ash and the shaver holder returns to its
starting position.
Cleaning the Jet Clean System
Empty the cleaning chamber and clean it thoroughly by rinsing it with hot
tap water every 15 days if you use the Jet Clean System daily. Otherwise
empty and clean the cleaning chamber at least once a month.
1 Clean the outside of the Jet Clean System with a moist cloth.
Never immerse the Jet Clean System in water, nor rinse it under the tap.
2 Simultaneously press the release buttons on both sides of the Jet
Clean System (A). Then lift the Jet Clean System off the cleaning
chamber (B).
The cleaning chamber remains behind. ,
3 Pour any remaining cleaning fl uid out of the cleaning chamber.
You can simply pour the cleaning fl uid down the sink, this is not harmful to
the environment.
4 Rinse the cleaning chamber under a hot tap.
Be careful with hot water. Always check if the water is not too hot, to
prevent your hands from getting burnt.
The cleaning chamber is not dishwasher-proof.
8 min.
B
A
5 Fill the cleaning chamber with Jet Clean solution (HQ200) up to the
MAX indication.
Note: Make sure the cleaning chamber is always fi lled above the MIN
indication.
6 Place the Jet Clean System back onto the cleaning chamber (‘click’).
Make sure that the release buttons snap back into place.
Storage
There are several ways to store the shaver or to take it with you when you
travel:
Put the protection cap on the shaver after use to prevent damage and -
to avoid dirt accumulation in the shaving heads.
Put the shaver in the Jet Clean System. Make sure the protection cap is -
not on the shaving unit.
Note: If you do not want the shaver to charge while it is stored it in the Jet
Clean System, just leave the locking lever in upright position
Replacing the shaving heads
For maximum shaving performance, we advise you to replace the shaving
heads every two years. The shaving head symbol will light up to indicate
that the shaving heads need to be replaced. Replace damaged shaving
heads right away.
Only replace the shaving heads with original HQ8 Philips Shaving Heads.
1 The shaving head symbol lights up orange continuously.
2 Switch off the shaver. Disconnect the shaver from the mains and
remove it from the Jet Clean System.
3 Press the release button to open the shaving unit.
4 Pull the shaving unit off the shaver.
ENGLISH ENGLISH
PT729CC_A6_CS3.indd 33 13.4.26 2:47:20 PM