16
7. Assembly
Coaxial incident light
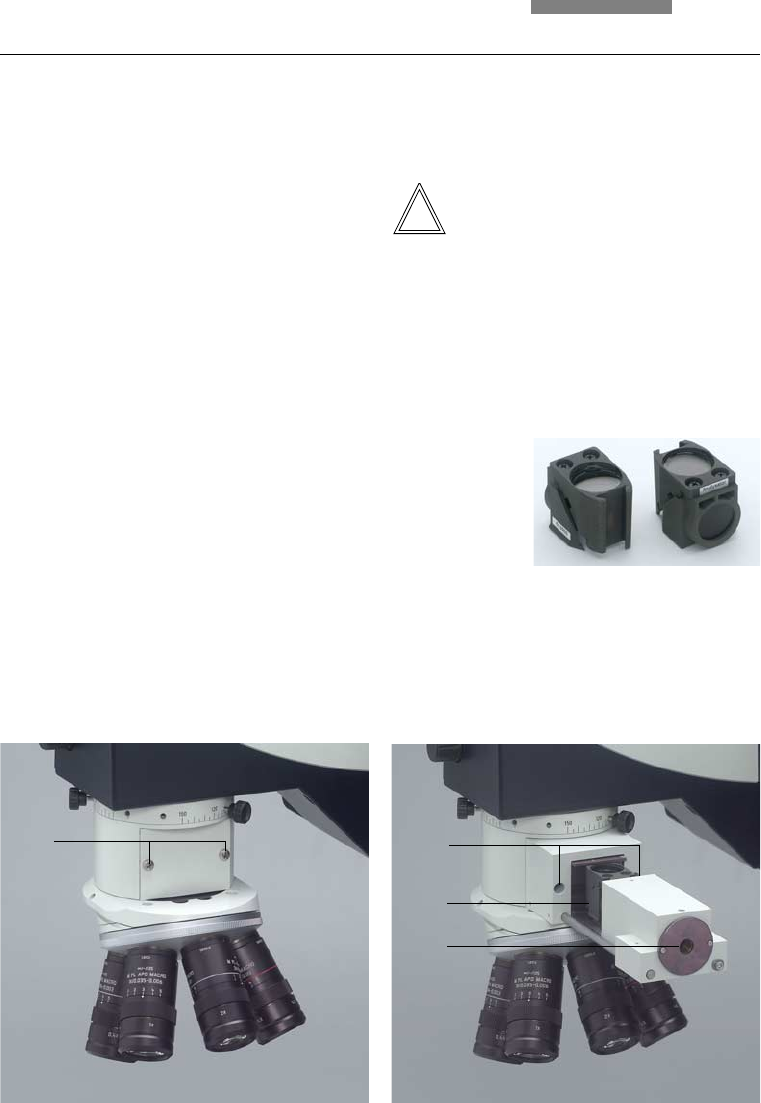
• Remove the cover plates (9.1) to the rear left
and right on the macroscope carriers.
• In their place, screw on the coaxial
illuminator (11.1)
• Screw the light guide with ø 9 mm (Fig. 12)
onto the cold light illuminator (8.1).
• Place the cold light source next to the stand
or onto the shelf that is to be screwed onto
the base of the comparison macroscope (7.1).
• Insert the polarization filter cube (Fig. 10).
To do so, attach the filter cube onto the side
and push it into the holder (11.2).
Fig. 9 Fastening the coaxial illuminator
1 Fastening screws for the cover plate
Fig. 11 Coaxial illuminator
1 Fastening screws for the coaxial illuminator
2 Filter cube inserted
3 Receptacle for light guide
Fig. 10 Polarizing
filter cube
1 From the rear
2 From the front
1
1
2
3
1
2
• Insert the two light guide ends into the left and
right receptacles on the coaxial illuminator
(11.3).
Note:
If, after installation, point-like objects are ap-
pear in the image, the light guide must be pulled
1 to 2 mm out of the coaxial illuminator. The
point-like objects are caused by the fibers of the
light guide.


