


2
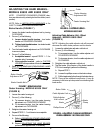
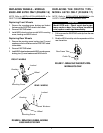
Adjusting the Push Handles
NOTE: When making this adjustment, ensure the users
shoe height is the same as shoe style worn most fre-
quently when using the rollator. This will provide the most
comfortable push handle position.
1. Position the push handle so that when the users arm
is down to their side, the hand grip is at wrist height.
NOTE: This will ensure the arms are at an approximate
20
o
- 30
o
bend when using the rollator.
2. Install screw into one (1) of the six (6) adjust-
ment holes.
3. Secure with adjustment knob by turning CLOCKWISE.
4. Repeat STEPS 1 - 3 for the other side.
5. Securely tighten.
NOTE: When securely tightened, the push handles should
not move.
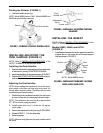
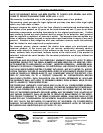
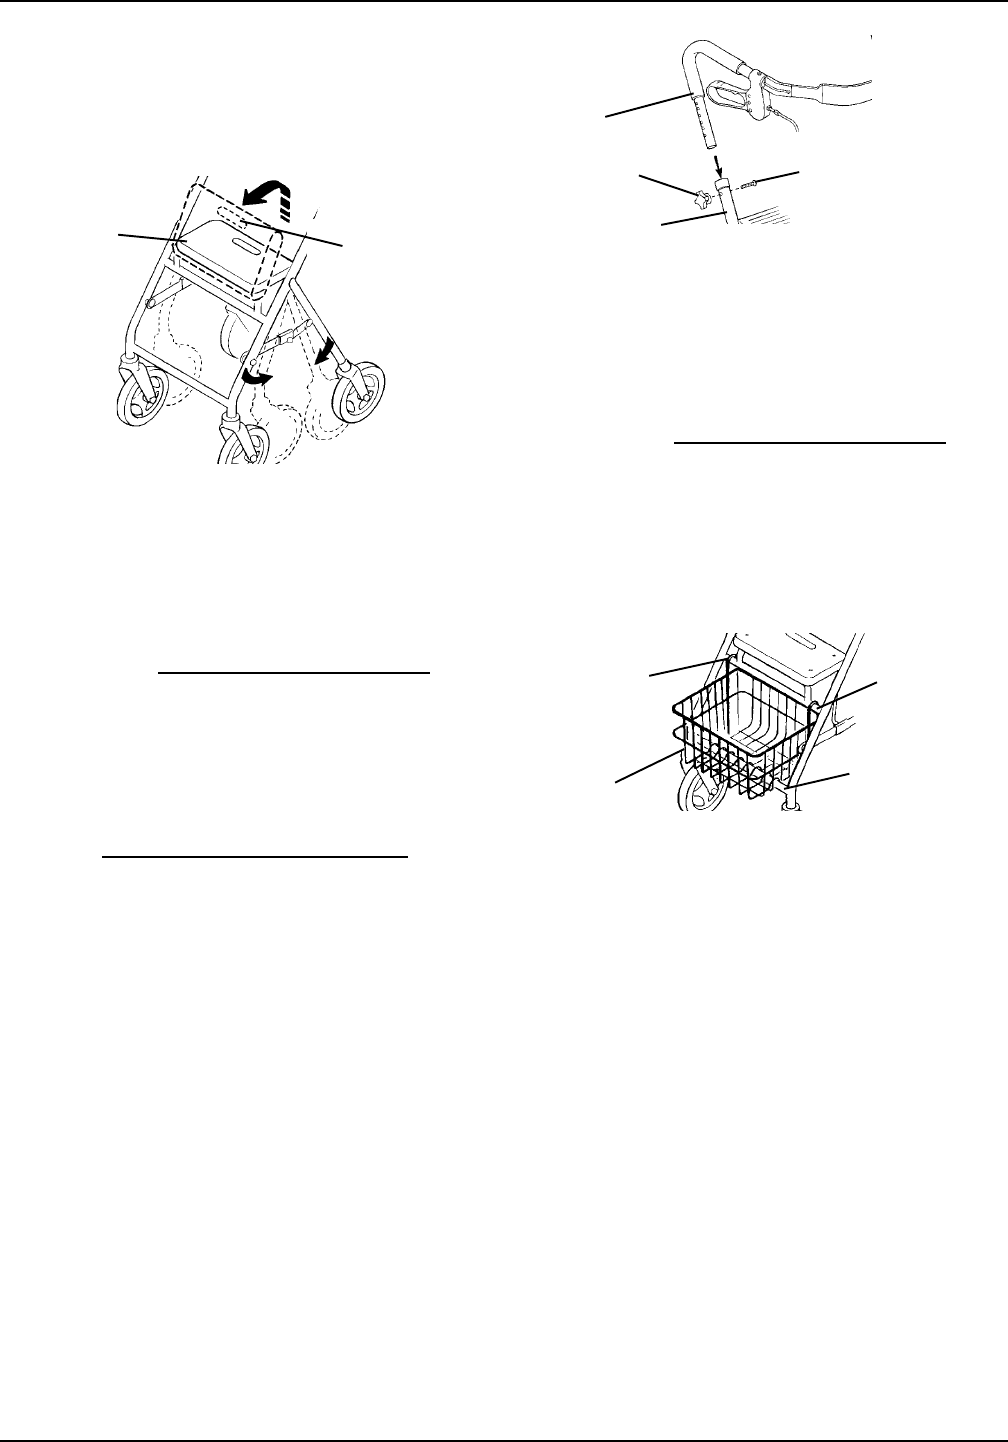
INSTALLING THE BASKET
NOTE: Refer to INSTALLATION WARNINGS in the
SAFETY SUMMARY in this instruction sheet.
Models 65900, 65800 and 65700
(FIGURE 3)
1. Install basket between the seat support tube and the
support tube so the hooks are on the seat support
tube as shown in FIGURE 3.
FIGURE 3 - INSTALLING THE BASKET - MODELS
65900, 65800 AND 65700
Seat
Support
Tube
Basket
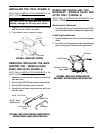
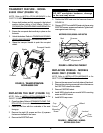
FIGURE 2 - INSTALLING/ADJUSTING THE PUSH
HANDLES
Push
Handle
Adjustment
Knob
Screw
Frame
Hooks
Support
Tube
NOTE: Model 65900 shown.
INSTALLING/ADJUSTING THE
PUSH HANDLES (FIGURE 2)
NOTE: Refer to INSTALLATION WARNINGS in the
SAFETY SUMMARY in this instruction sheet.
Installing the Push Handles
1. Remove adjustment knobs and screws from both sides
of the frame by turning COUNTERCLOCKWISE.
2. Insert push handles into frames as shown in FIGURE 2.
3. Refer to
ADJUSTING THE PUSH HANDLES in this pro-
cedure of the instruction sheet.
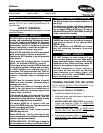
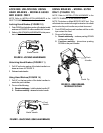
FIGURE 1 - OPENING/FOLDING THE ROLLATOR
Seat
Seat Handle
Folding the Rollator (FIGURE 1)
1. Hold seat handle and pull up.
NOTE: Model 65900 shown ONLY. Models 65800 and
65700 will open/fold the same way.