


38
PROCEDURE 8 BATTERIES
B
A
T
T
E
R
I
E
S
REPLACING BATTERIES
WARNING
Most batteries are not sold with instructions. How-
ever, warnings are frequently noted on the cell
caps. Read them carefully, otherwise injury or
damage can occur.
NOTE: Invacare recommends that both batteries be re-
placed if one (1) battery is defective.
Recommended Battery Types
WARNING
The waranty and performance specifications
contained in this manual are based on the use
of deep cycle gel cell or sealed lead acid
bateries. Invacare strongly recommends their use
as the power source for this unit.
CAUTION
Failure to use the correct battery size and/or volt-
age may cause damage to your wheelchair
and give you unsatisfactory performance.
NOTE: All R2
250-S
wheelchairs use U1 batteries. Refer to
the chart below for R2
BASIC
and R2
STANDARD
wheelchairs.
SEAT WIDTH QTY VOLTS BCI REMARKS
OF CHAIR STOCK NO.
14-inches 2 12 U1 Deep Cycle
16,18, 20-
inches 2 12 22NF Deep Cycle
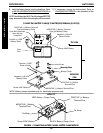
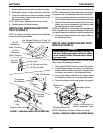
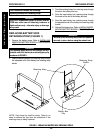
1. Remove the battery boxes from the wheelchair. Re-
fer to
REMOVING/INSTALLING BATTERY BOXES
in this procedure of the manual.
2. Remove existing batteries from battery boxes. Refer to
INSTALLING/REMOVING BATTERIES INTO/FROM
BATTERY BOXES in this procedure of the manual.
3. Clean the new battery terminals.
4. Install new batteries into battery boxes. Refer to
IN-
STALLING/REMOVING BATTERIES INTO/FROM
BATTERY BOXES in this procedure of the manual.
2. Plug the charger’s AC power cord, or extension, into
the grounded 120 VAC wall outlet.
3. Wait until charging is complete.
NOTE: Allow eight (8) hours for normal charging. Larger
batteries (greater than 55 ampere-hours) or severely dis-
charged batteries may require up to sixteen (16) hours to
be properly charged and equalized.
NOTE: R2
BASIC/STANDARD
Only - If charger operates for six-
teen (16) hours and is unable to fully charge batteries, an
internal timer turns charger off and begins to fast blink green
light.
NOTE: If the batteries need to be charged more often or
take longer to charge than normal, they may need to be
replaced. Contact an Invacare dealer for service.
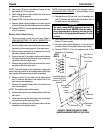
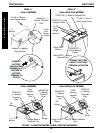
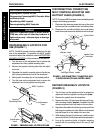
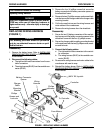
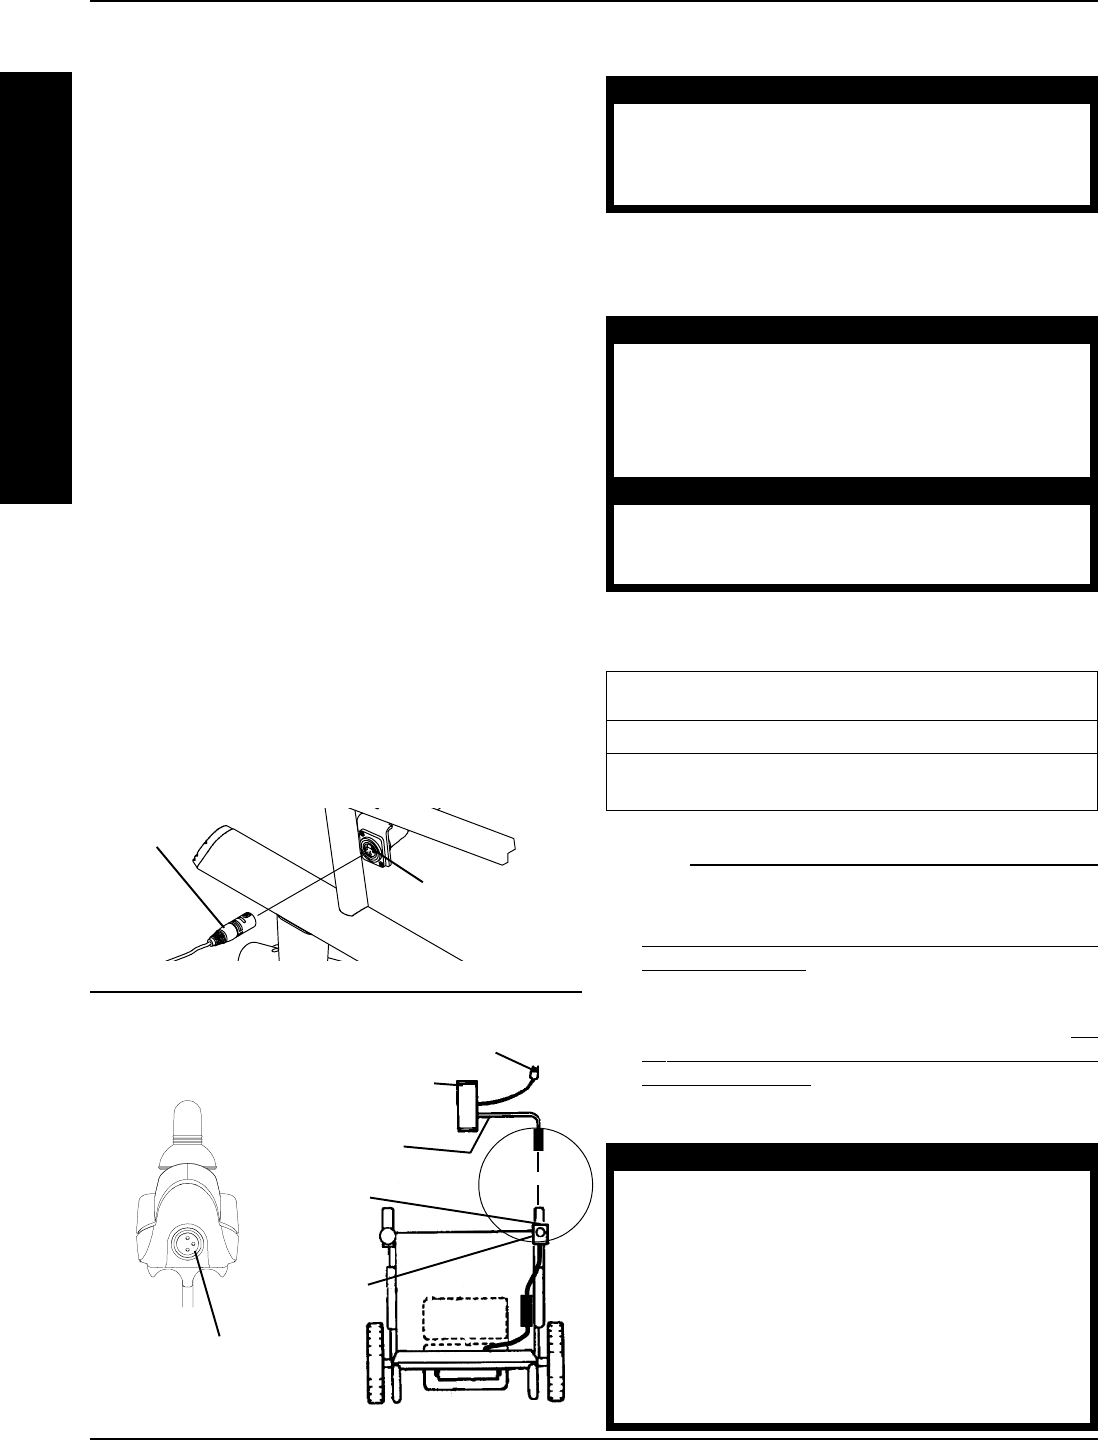
Wheelchairs Equipped With Mark IV RII
Joystick (Detail "B" of FIGURE 6)
1. Attach the battery charger connector to the charger
port on the FRONT of the joystick.
2. Plug the charger’s AC power cord, or extension, into
the grounded 120 VAC wall outlet.
3. Wait until charging is complete.
NOTE: Allow eight (8) hours for normal charging. Larger
batteries (greater than 55 ampere-hours) or severely dis-
charged batteries may require up to sixteen (16) hours to
be properly charged and equalized.
From Battery
Charger
Battery Charger
Connector
DETAIL "B"
Front View of
Joystick
Battery Charger
Three (3) Pronged Plug
From Battery
Charger
Top View of Wheelchair
Charger
Port
Joystick
Battery
Boxes
DETAIL "A"
Charger Port
FIGURE 6 - CHARGING BATTERIES
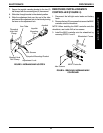
Cleaning Battery Terminals
WARNING
DO NOT allow the liquid in the battery to come
in contact with skin, clothes or other possessions.
It is a form of acid and harmful or damaging
burns may result. Should the liquid touch your
skin, wash the area immediately and thoroughly
with cool water. In serious cases or if eye contact
is made, seek medical attention IMMEDIATELY.
NEVER smoke or strike a match near batteries. If
the caps of the battery cells are removed, NEVER
look directly into them while charging batteries.