25
This Procedure Includes the Following:
Adjusting Seat Width
Adjusting Seat Depth
Installing Back Assembly - Wheelchairs Before
10/2000 ONLY
Changing Back Height
Changing Back Angle
Replacing Back Canes - Wheelchairs Built After
10/2000 ONLY
FRAME PROCEDURE 7
F
R
A
M
E
2. Remove the existing back and seat upholstery from
the wheelchair. Refer to
REPLACING BACK UPHOL-
STERY and REPLACING SEAT UPHOLSTERY in
PROCEDURE 6 of this manual.
NOTE: If adjusting the seat width of the wheelchair, the
back and seat upholstery MUST be changed as well.
3. Remove the hex screws and locknuts that secure the
two (2) pivot links to the wheelchair frame and cross-
braces. Refer to the following chart to determine if
new pivot links will be needed:
PIVOT LINK SEAT WIDTH RANGE (in inches)
14-15, 16-18 and 19-20
4. Remove the black dust covers from the bottom of the
crossbraces.
NOTE: Note position of the tie wraps that secure the wir-
ing harness to the crossbraces.
5. Cut the tie wraps that secure the wiring harness to the
crossbrace.
6. Remove the hex screws, washers and locknuts that
secure the bottom of the two (2) crossbraces to the
wheelchair frame.
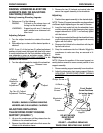
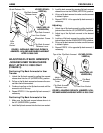
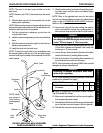
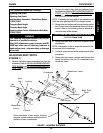
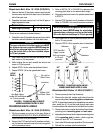
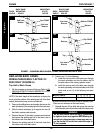
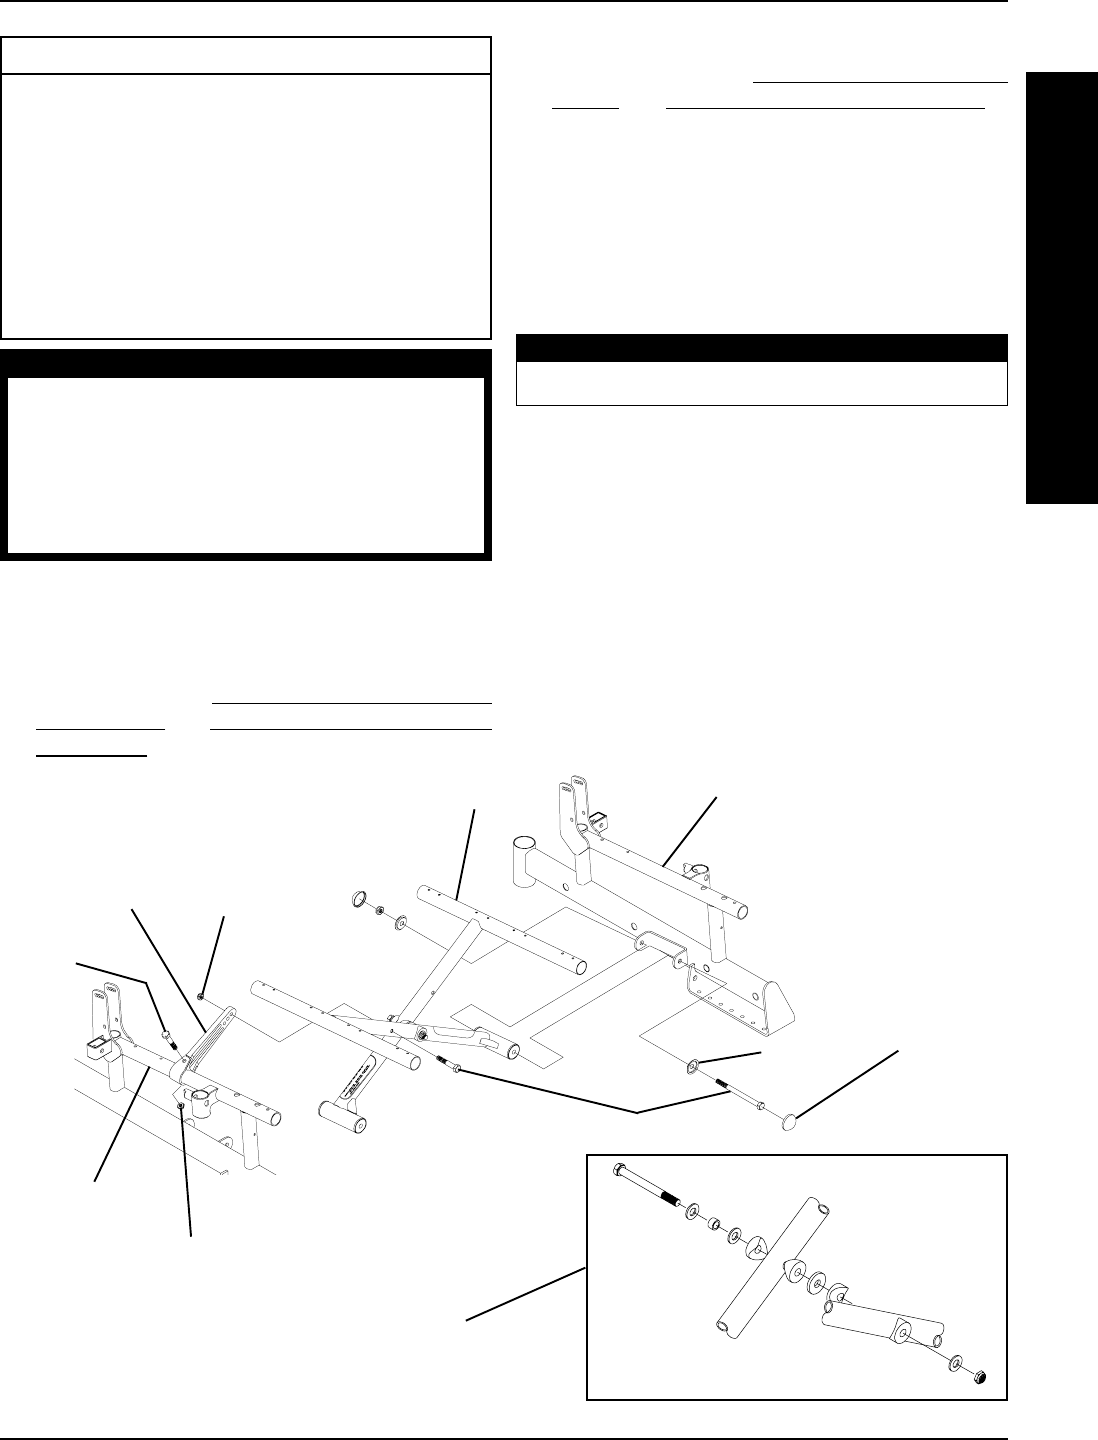
FIGURE 1 - ADJUSTING SEAT WIDTH
Note orientation of hex screw, bushing,
washers, coved washers and locknut for in-
stallation of new crossbraces.
Locknut
Hex
Screw
Locknut
Pivot
Link
Black Dust
Cover
Wheelchair
Frame
Hex Screws
Washer
Crossbrace
WARNING
The following procedures should only be per-
formed by a qualified technician.
After ANY adjustments, repair or service and BE-
FORE use, make sure all attaching hardware is
tightened securely - otherwise injury or damage
may result.
ADJUSTING SEAT WIDTH
(FIGURE 1)
1. Remove the battery boxes and battery tray from the
wheelchair. Refer to INSTALLING/REMOVING BAT-
TERY BOXES and INSTALLING/REMOVING BAT-
TERY TRAY in PROCEDURE 8 of this manual.
Wheelchair Frame


