Invacare Scooters 26 Part No. 1090132 Rev F
BATTERIES/CHARGINGPROCEDURE 4
BATTERIES/CHARGING
This Procedure Includes the Following:
Removing/Installing the Batteries with Cables
Replacing the Batteries
Charging the Batteries
WARNING
After ANY adjustments, repair or service and BEFORE use, make sure that all
attaching hardware is tightened securely - otherwise, injury or damage may
result.
REMOVING/INSTALLING THE BATTERIES WITH CABLES
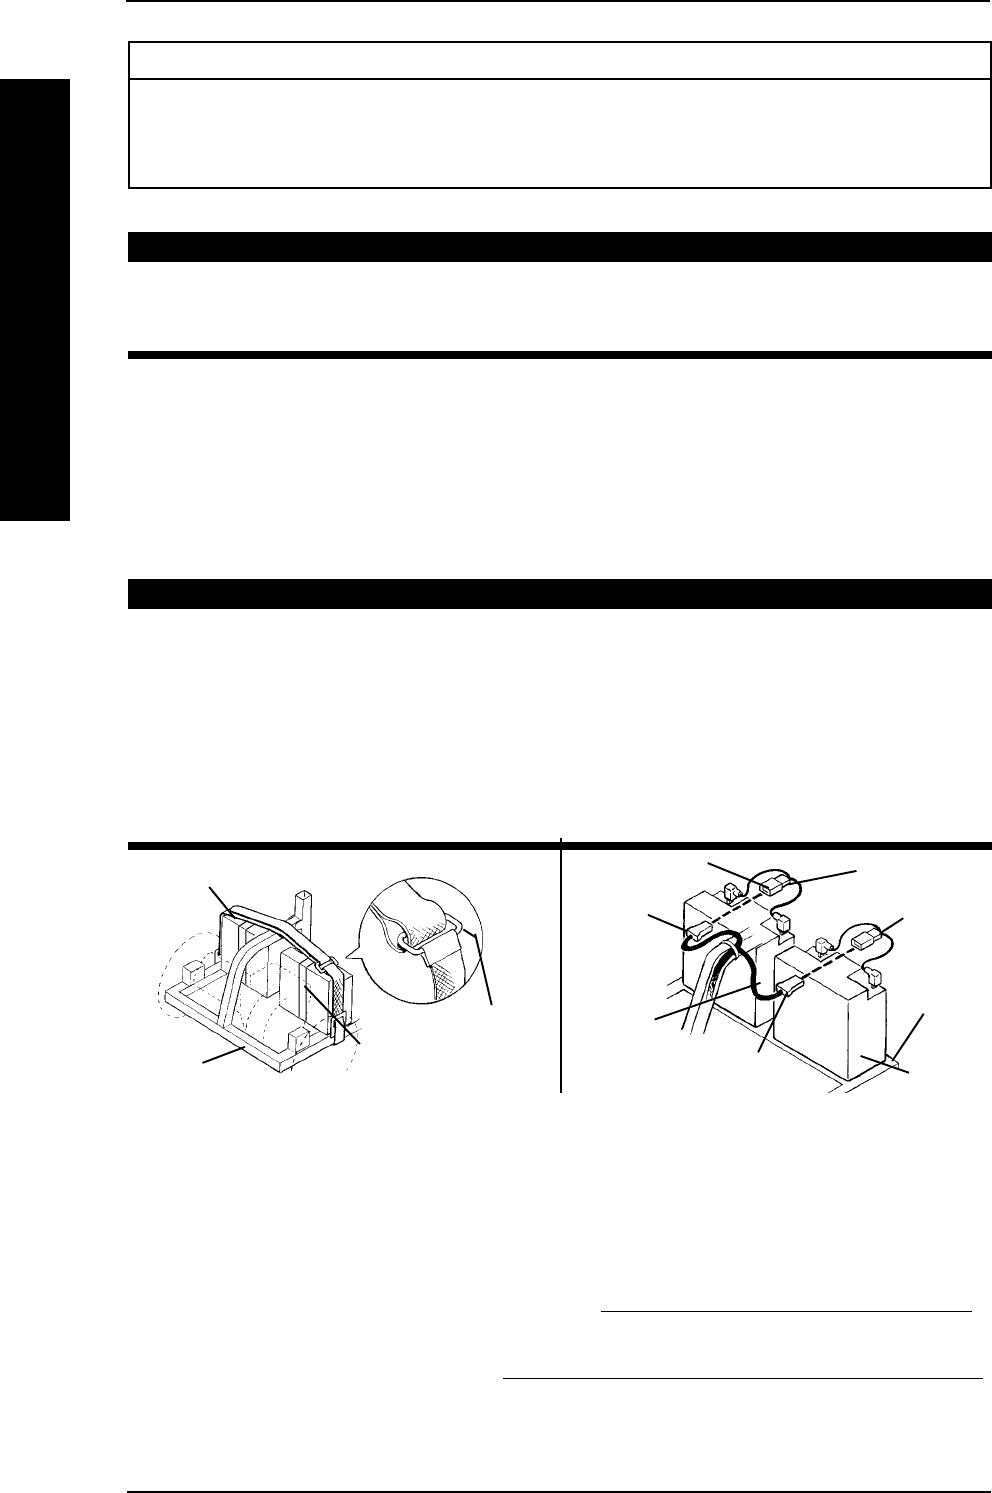
(FIGURE 1)
NOTE: To install batteries, reverse the following procedure.
NOTE: When removing/installing batteries keep all foreign objects, especially metal, clear of battery terminals.
REMOVING
WARNING
Turn Power OFF and remove key from ignition.
Where applicable, ALWAYS use a battery lifting strap when moving a battery.
It is the most convenient method. It also helps to prolong the life of the bat-
tery.
DO NOT tip the batteries. Keep the batteries in an upright position.
The use of rubber gloves and chemical goggles is recommended when
working with batteries.
FIGURE 1 - REMOVING/INSTALLING THE BATTERIES WITH CABLES
NOTE: Hardware is in included with batteries.
NOTE: Only Model LYNX SX-3 battery cable assemblies shown for clarity.
Rear
Sub-Frame
Top Battery
Fastening Strap
Retaining
Ring
Battery
Lifting Strap
Battery Wiring Harness
Controller
Wiring
Harness
Red Connector
Black
Connector
Red
Connector
Black
Connector
Rear
Sub-Frame
Batteries
1. Turn Power OFF and remove key from ignition.
2. Remove the seat from the scooter. Refer to REMOVING/INSTALLING THE SEAT
in PROCEDURE 5 in this manual.
3. Remove the rear shroud. Refer to REMOVING/INSTALLING THE REAR SHROUD
in PROCEDURE 9 in this manual.
4. Disconnect top battery fastening strap and pull through retaining ring.


