24
B
A
C
K
/
S
E
A
T
FIGURE 3 - SLIDING SEAT ADJUSTMENT -
EXCELERATROR XLT/XLT 2000
BACK/SEATPROCEDURE 9
3. Remove the locknuts from the threaded studs from
seat rails on both sides of seat.
4. Remove seat from seat rails.
5. Reverse STEPS 3-4 to install NEW seat onto seat
rails.
6. Reverse STEPS 1-2 to install sliding seat and seat
rails onto the seat frame.
Excelerator XLT/XLT 2000 (FIGURE 3)
1. Activate parking brake.
2. Loosen, but do not remove the six (6) socket screws
that secure the seat frame to the handcycle frame.
NOTE: There are three (3) socket screws on the right
and left side of the handcycle.
3. Loosen, but do not remove the hex bolts and lock-
nuts that secure the two (2) seat angle adjustment
clamps to the rear seat supports.
NOTE: There is one (1) clamp on the right and left
side of the handcycle.
4. Perform one (1) of the following:
A. Moving the seat rearward - While lifting up on
the back support tubes, push the seat rearward
to the desired position.
B. Moving the seat forward - While pushing
down on the back support tubes, pull the seat
forward to the desired position.
5. Tighten the six (6) socket screws that secure the
seat frame to the handcycle frame securely.
Socket
Screw
Socket Screws
Handcycle Frame
Seat Frame
6. Tighten the hex bolts and locknuts that secure the
two (2) seat angle adjustment clamps to the rear seat
supports securely.
EXCELERATOR XLT/XLT 2000
BACK ANGLE ADJUSTMENT
(FIGURE 4)
1. Activate parking brake.
2. Loosen, but do not remove the four (4) rear socket
screws that secure the seat frame to the handcycle
frame.
NOTE: There are two (2) socket screws on the right and
left side of the handcycle.
3. Loosen, but do not remove the hex bolts and lock-
nuts that secure the two (2) seat angle adjustment
clamps to the rear seat supports.
NOTE: There is one (1) clamp on the right and left side of
the handcycle.
4. Perform one (1) of the following:
A. Increasing Back Angle - While lifting up on the
back support tubes, pull the seat upward to the
desired position.
B. Decreasing Back Angle - While pushing down
on the back support tubes, push the seat down
to the desired position.
5. Tighten the three (3) socket screws that secure the
seat frame to the handcycle frame securely.
6. Tighten the hex bolts and locknuts that secure the
two (2) seat angle adjustment clamps to the rear seat
supports securely.
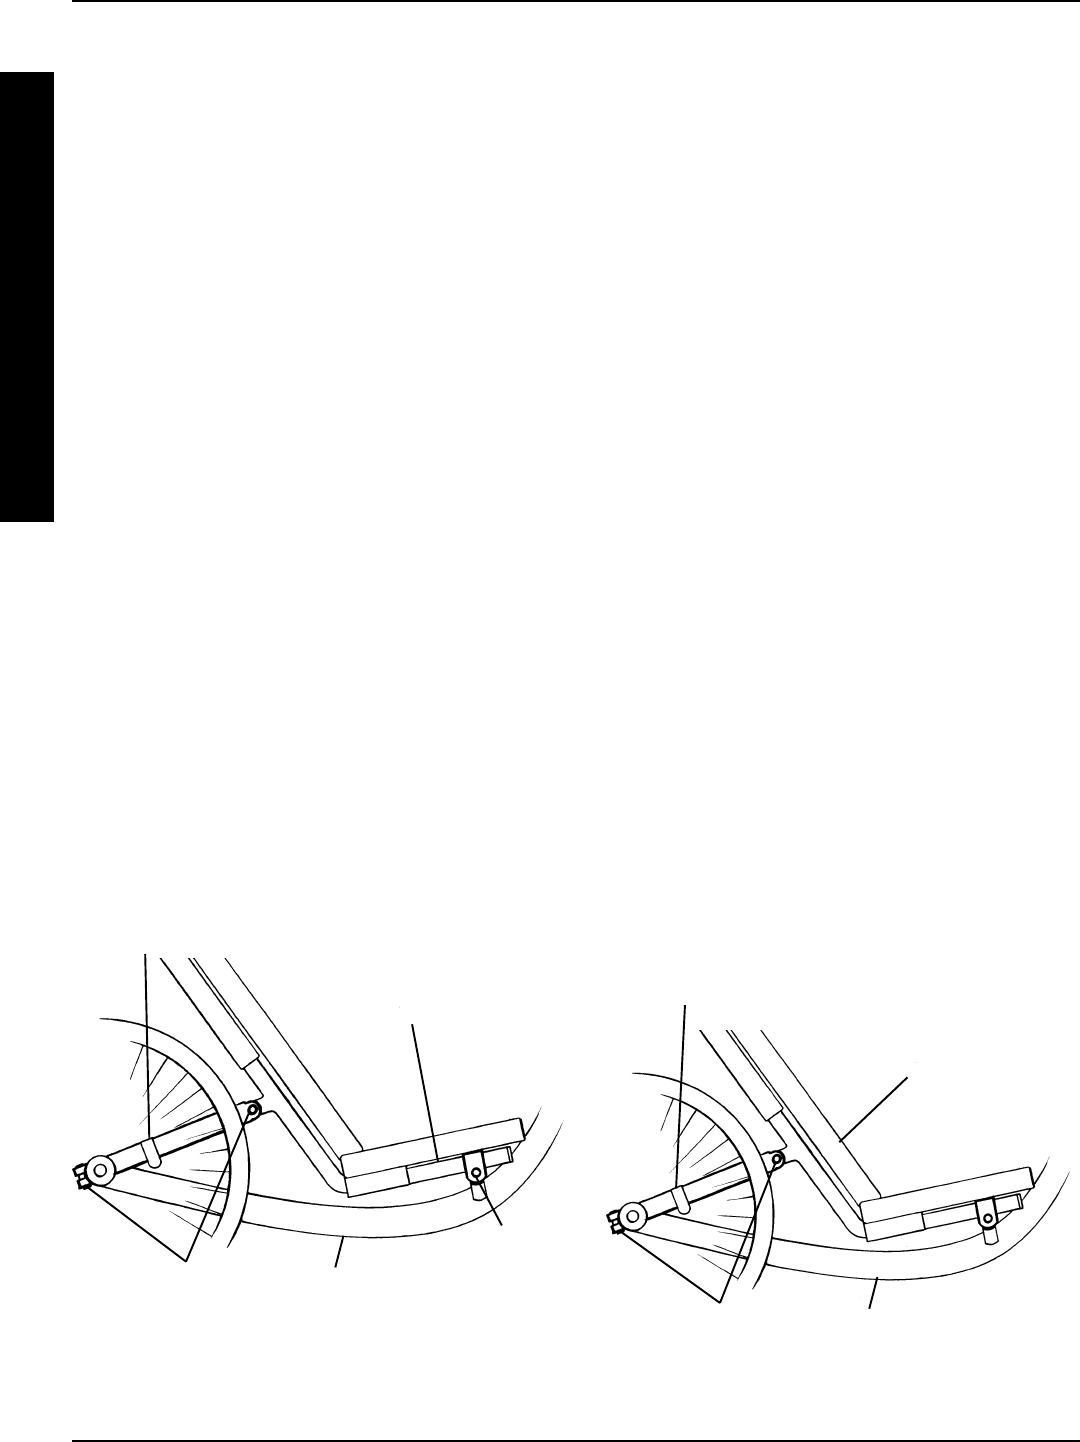
Socket
Screws
Handcycle Frame
Seat
FIGURE 4 - EXCELERATROR XLT/XLT 2000 BACK
ANGLE ADJUSTMENT
Seat Angle Adjustment Clamps
Seat Angle Adjustment Clamps


