


20
CHAINPROCEDURE 7
5. Place chain over the top of the bottom chain tensioner.
6. Attach the chain together using the master link (w/
clip) provided.
EXCELERATOR/LI'L EXCELERATOR
CHAIN ADJUSTMENT
1. Move the hand crank assembly up and down on the
fork stem until you are comfortable with the position
for operational purposes (PROCEDURE 2).
NOTE: Positioning of the hand crank assembly loosens
or tightens the chain in an UP/DOWN position.
2. Tighten the hex screw to secure the hand crank as-
sembly (PROCEDURE 2).
3. Adjust the tautness of the chain by moving the ad-
justable chain idler IN or OUT (PROCEDURE 2).
4. Tighten the hex screw to secure the adjustable chain
idler in place (PROCEDURE 2).
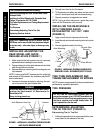
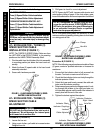
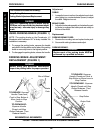
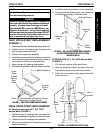
EXCELERATOR CHAIN STAY
ADJUSTMENT (FIGURE 2)
1. Loosen button screw and adjust bracket upward.
Retighten button screw.
This Procedure includes the following:
EXCELERATOR/LI'L EXCELERATOR:
Chain Installation w/Seven (7) Speed Hub
Chain Adjustment
Chain Stay Adjustment
EXCELERATOR XLT/XLT 2000:
Chain Adjustment
Chain Installation w/Twenty-Four (24) or Twenty-
Seven (27) Speed Cassette
Button
Screw
FIGURE 2 - EXCELERATOR CHAIN STAY ADJUSTMENT
Bracket
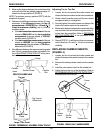
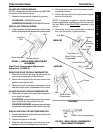
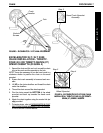
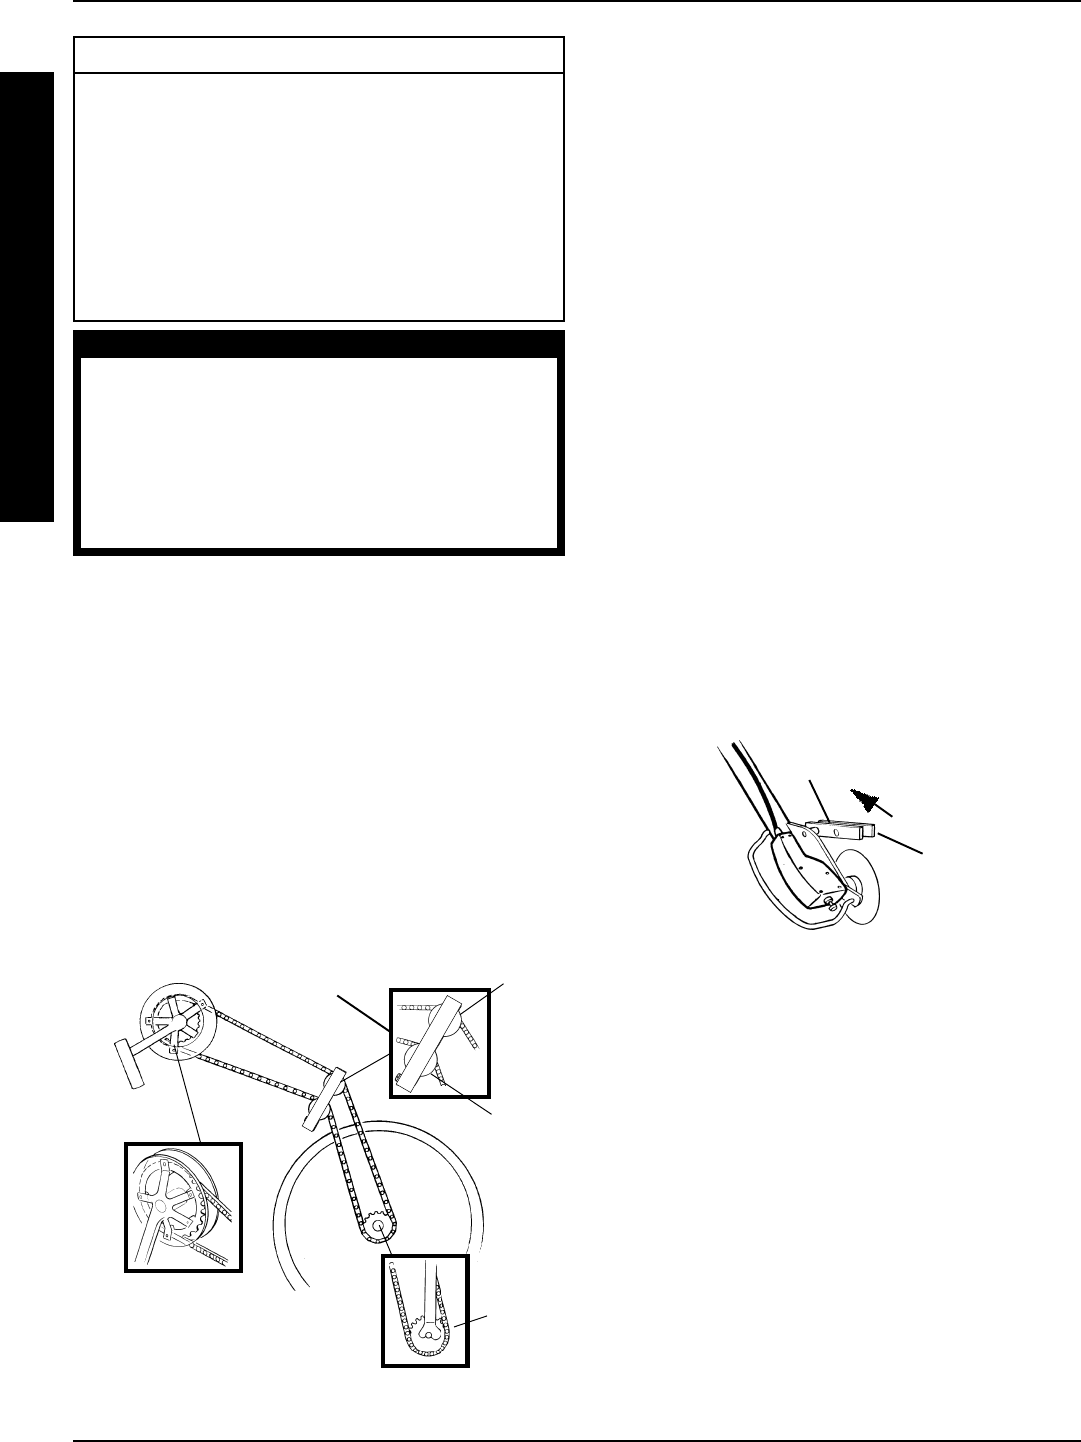
FIGURE 1 - EXCELERATOR / LI'L EXCELERATOR/
CHAIN INSTALLATION W/SEVEN (7) SPEED HUB
Wheel Sprocket
Hand Crank
Sprocket Assembly
Step 2
Step 4
Bottom
Chain
Tensioner
Top Chain
Tensioner
Chain
Tensioners
EXCELERATOR/ LI'L EXCELERATOR
/CHAIN INSTALLATION W/SEVEN (7)
SPEED HUB (FIGURE 1)
1. Spread the chain out flat and run it over the BOT-
TOM chain tensioner upwards to the hand crank
sprocket assembly.
2. Position chain over the hand crank assembly sprocket.
NOTE: It may be necessary to turn the hand crank in a
clockwise motion to position the chain on the sprocket.
3. Run the chain over the top chain tensioner.
4. Position the chain around the wheel sprocket and
back up towards the bottom chain tensioner.
WARNING
Chain MUST be tight. If noisy, loosen. After chain
is assembled, start in first gear and on straight-
away.
After ANY adjustments, repair or service and BE-
FORE use, make sure all attaching hardware is tight-
ened securely - otherwise injury or damage may
result.
C
H
A
I
N
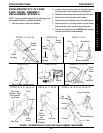
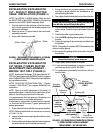
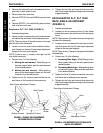
EXCELERATOR XLT/XLT 2000
CHAIN ADJUSTMENT (FIGURE 3)
1. Loosen, but do not remove the two (2) socket screws
that secure the crank handles to the fork.
2. Slide the crank handles up and/or down until the
proper tension on the chain is achieved.
NOTE: The proper chain tension will be approximately 1/
2-inch of chain slack.
NOTE: If crank is in desired position but chain tension is
not correct, links must be added to or removed from the
chain to correct the tension.
3. Tighten the two (2) socket screws that secure the
crank handles to the fork securely.
C
H
A
I
N