


SECTION 7—SEAT AND ARMS
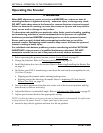
Part No. 1125053 29 Zoom
220
SECTION 7—SEAT AND ARMS
ƽ WARNING
After ANY adjustments, repair or service and BEFORE use, make sure that all
attaching hardware is tightened securely - otherwise injury or damage may result.
Before performing any maintenance, adjustment or service, turn power off and
remove key from ignition.
NOTE: Refer to Label Locations on page 11 for pinch point location.
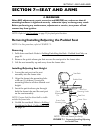
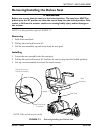
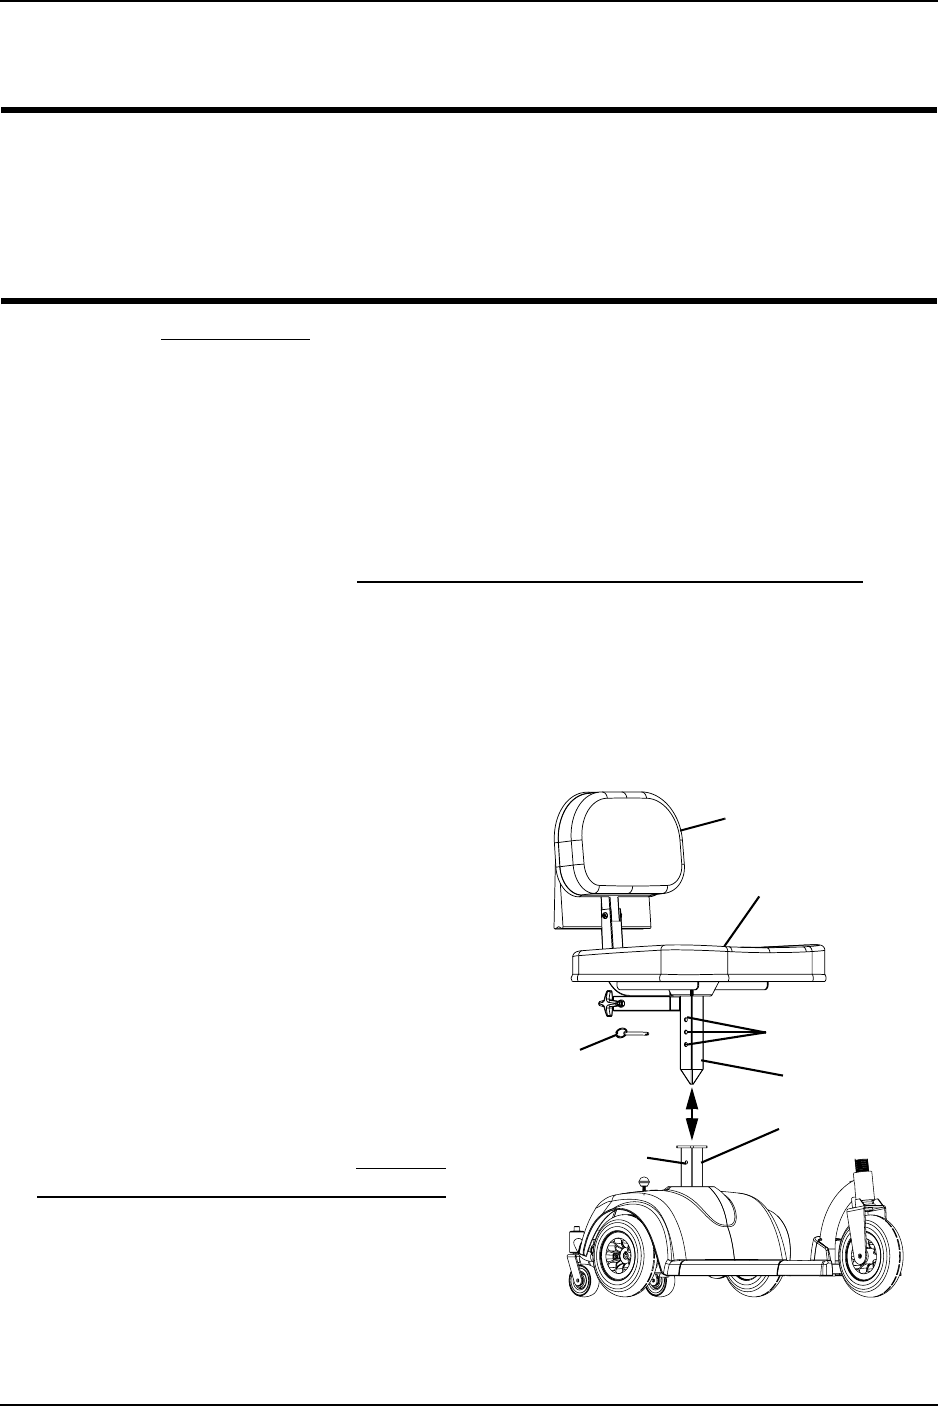
Removing/Installing/Adjusting the Padded Seat
NOTE: For this procedure, refer to FIGURE 7.1.
Removing
1. Fold down seat back. Refer to Folding/Unfolding the Back - Padded Seat Only on
page 30.
2. Remove the quick-release pin that secures the seat post to the frame tube.
3. Lift the seat assembly up and away from the frame tube.
Installing/Adjusting Seat Height
1. Lower the seat post on the seat
assembly into the frame tube.
2. Align the frame tube mounting hole
with one (1) of three (3) seat post
mounting holes to achieve desired seat
height.
3. Insert the quick-release pin through
both the frame tube and the seat post
on the seat assembly.
NOTE: Ensure that the detent ball is visible
outside the frame tube.
4. Unfold the seat back. Refer to Folding/
Unfolding the Back - Padded Seat Only
on page 30.
FIGURE 7.1 Removing/Installing/Adjusting
the Padded Seat
Frame Tube
Seat Post
Mounting Holes
Padded Seat
Seat Post
Seat Back
Quick-
Release
Pin
Frame Tube
Mounting Hole
NOTE: Tiller not shown for clarity.