Repair
3A0590G 19
Repair
Cartridge Assemblies
1. Follow Pressure Relief Procedure, page 12.
2. Use a wrench to remove the cartridge assemblies
(2) from the manifold.
3. Use a 90° allen wrench to pop the seat (2e) and
seal (2f) out of the housing, or tap them out from the
“A” and “B” inlet side.
NOTE: Seat retainer seal (2f) normally splits into two
pieces when it is fully torqued into the housing. The lip is
meant to retain the seat, spring, and ball during assem-
bly. The seat retainer seal (2f) must always be replaced
once it is disassembled.
4. Use a soft bristle brush to clean the manifold pas-
sageways.
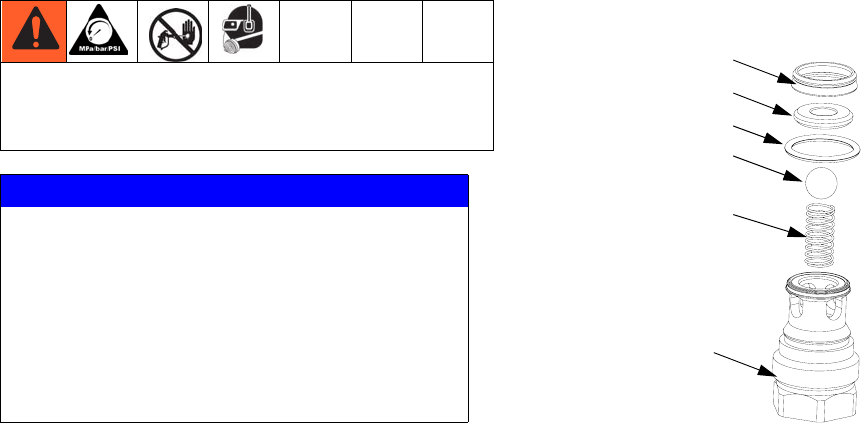
5. Remove the seat (2e), ball (2d), spring (2c), and
o-ring (2b) from housing (2a).
6. Inspect parts for damage and replace as necessary.
7. Assemble parts in reverse order from steps above.
Press the assembly against a flat clean surface until
seal (2f) snaps into place on the end of housing
(2a). The seal (2f) will hold the spring (2c), ball (2d),
seat (2e), and o-ring (2b) in place during assembly.
8. Apply lubricant to o-ring (2b) and end seal (2f).
9. Apply anaerobic sealant to external threads of car-
tridge.
10. Install cartridge assemblies in manifold and torque
to 125 ft-lbs (170 N•m).
NOTE: The high torque crushes the seal (2f) for a
reliable seal up to 7250 psi (50 MPa, 500 bar).
Follow pressure relief procedure when you stop
spraying or dispensing; and before cleaning,
checking, servicing, or transporting equipment.
NOTICE
Be sure to label all fluid parts “resin” or hardener”
when disassembling them. Doing so prevents inter-
changing resin and hardener parts during reassem-
bly and prevents contamination of the materials and
fluid path through the equipment.
Color-coded chemically resistant tape may be used
to label the parts. Use blue for resin and green for
hardener.
2f
2a
2e
2b
2c
2d


