


DR
®
TRIMMER/MOWER
™
Safety & Operating Instructions 29
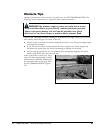
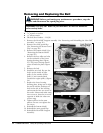
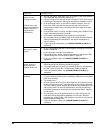
Figure 24
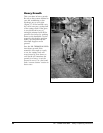
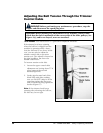
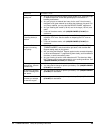
Figure 25
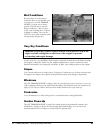
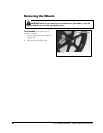
Figure 26
Removing and Replacing the Belt
Tools needed: You will need the tools listed below.
■
9
⁄16″ wrench or socket
■
3
⁄16″ Allen wrench
■ DR
belt (Part Number – 114431)
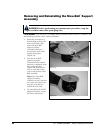
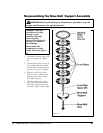
1. Remove the Mow-Ball
Support assembly. (See “Removing and Reinstalling the Mow-Ball
Assembly” on page 26.)
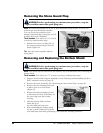
2. Remove the stone guard flap.
(See “Removing the Stone Guard
Flap” on page 28.)
3. Remove the bottom shield. (See
“Removing the Bottom Shield”
on page 28.)
4. Remove the four Allen set bolts
on the underside of the lower
bearing housing plate (Figure
25). The lower bearing should
come off with the plate (Figure
26).
5. Remove the belt.
6. Install the new belt. Be sure the
belt is on the inside of idler
pulley 2, the outside of idler
pulley 1 and correctly fitted
around the engine pulley (Figure
24).
7. Replace the lower bearing
housing plate, being sure to align
the notch with the locking tool
hole in the side of the housing
and mount the four set screws in
this order: Mount and make snug
one set screw, then the set screw
opposite it. Make the other two
screws snug.
8. Tighten all four in the same
pattern. Do not over tighten the
set screws
9. Reinstall the bottom shield.
10. Reinstall the stone guard flap.
11. Reinstall the Mow-Ball
Support
Assembly.
WARNING! Before performing any maintenance procedure, stop the
engine and disconnect the spark plug wire.
Important! Use only DR
belts on your machine. Do not use hardware
store variety belts.