


CONAIR
MARTIN
05-15-96 79 13
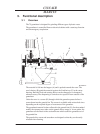
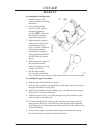
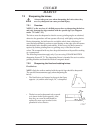
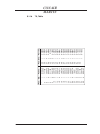
Assembling the rotating knives
1. Clean the cutter's knife
location and place a rotating
knife there.
2. Screw in the fastening
screws (C) with washers
and gently tighten the
screws. NOTE:␣ Check that
the washers do not bear
against the fixed knives.
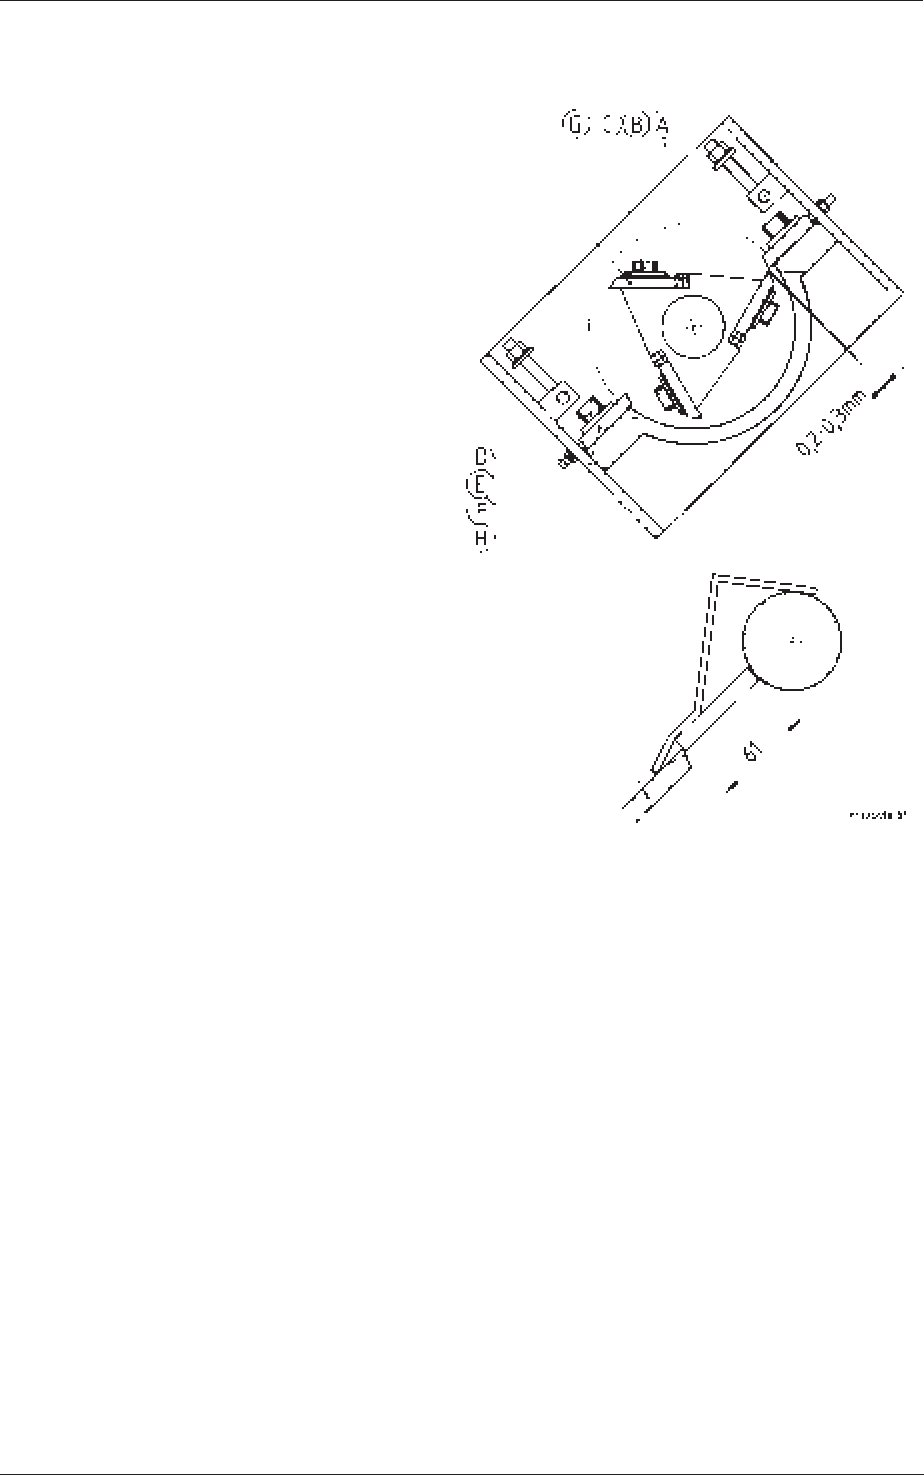
3. Adjust the knife using the
setting screws (B) until the
correct amount of play,
0.20 - 0.30 mm, is obtained
between the fixed and
rotating knife. Using the
feeler gauge inlcuded in the
tool kit, check the amount
of play.
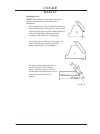
4. When the correct amount of
play has been obtained,
tighten the screws (C) using
a torque of 220 Nm.
5. Set the other rotating
knives in place in the same
way. To turn the cutter easily, use the socket-head screw in the motor shaft.
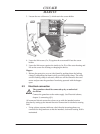
Assembling the upper fixed knife
6. Push the upper fixed knife into its groove.
7. Turn the cutter so that the rotating knife's cutting edge is directly in front of
the upper fixed knife's cutting edge.
8. Adjust the fixed knife using the setting screws (F) until the correct amount
of play, 0.20 - 0.30 mm, is obtained.
9. Tighten the screws (E), 5 pcs, along the upper long side, and the two that
were loosened on one short side.
10. To ensure that the knife's setting on the cutter does not change, turn the
setting screws (B)␣ back 1/6 turn and hold in this position while tightening
the locking nuts (A). Then tighten the locking nuts (E)␣ on the setting screws
for the fixed knives.
13. Using a feeler gauge, check the distance between the fixed and rotating
knives. The distance should not fall below 0.20 mm.