


5
English
You have chosen the smartest toothbrush
in the world – with Oral-B SmartGuide.
Oral-B Triumph with SmartGuide is the first
toothbrush with a wireless display, designed to
go beyond ordinary clean to improve your oral
health. With its many state-of-the-art features
powered by Braun technology and inspired by
the dental experts at Oral-B, you can feel
confident that you are brushing at your best.
New Oral-B Triumph now with SmartGuide
uses an interactive wireless display to help
you optimize your brushing experience. Its
innovative brushing technology delivers ultimate
plaque removal and its advanced Oral-B
FlossAction brushhead features MicroPulse
bristles to gently penetrate between teeth.
It provides such a thorough clean that you won’t
believe how great you feel about your teeth.
Oral-B Triumph with SmartGuide is brought to
you by Oral-B, the brand more dentists use
themselves worldwide.
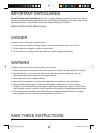
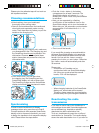
Important
• To avoid electromagnetic interference and/or
compatibility conflicts, deactivate the radio
transmission of your toothbrush before
carrying or using it in restricted surroundings
such as aircrafts or specially marked areas
in hospitals (see «Deactivating the radio
transmission»).
• Persons with pacemakers should always
keep the toothbrush more than six inches
(15 centimeters) from the pacemaker when
turned on. If at any time you suspect
interference is taking place, deactivate the
radio transmission of your toothbrush before
using it (see «Deactivating the radio
transmission»).
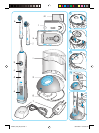
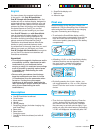
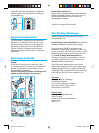
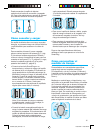
Description
a Oral-B FlossAction brushhead
b On/off button
c Mode button
d Handle
e Handle display
f SmartPlug charger (includes charging ring
and SmartPlug)
g Base plate
h Base station
i Protective cover
j Oral-B Pro White brushhead (not with all
models)
k SmartGuide display unit
l Wall mount
m Adhesive tape
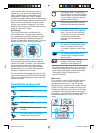
First use
Before brushing for the first time, charge your
toothbrush. Plug the SmartPlug into an electrical
outlet and place the handle (d) on the charging
ring (see «Connecting and charging»).
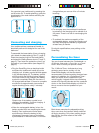
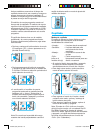
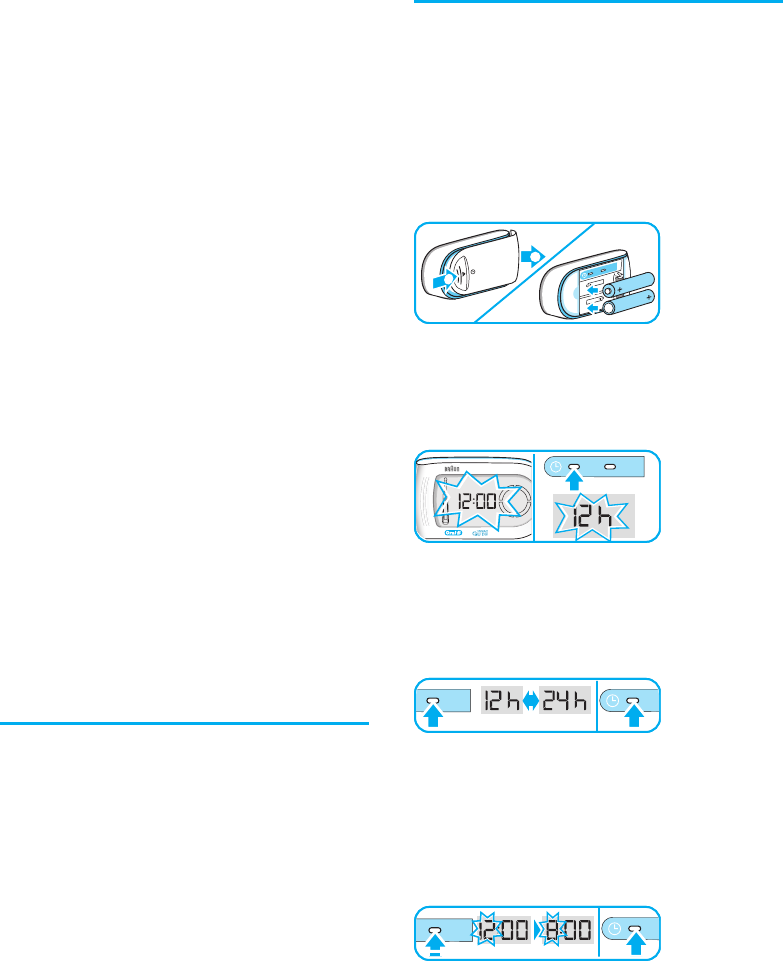
• To activate the SmartGuide display unit (k),
remove the battery compartment cover on the
back and insert the two batteries (type AA)
with correct polarity (see symbol in the battery
compartment).
• A flashing «12:00» on the SmartGuide display
indicates that time can be adjusted. Press
the «set» button, located in the battery
compartment, until «12h» is displayed.
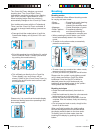
• By briefly pressing the «h/min» button, you
can toggle between a «12h» or «24h» daytime
format. Push the «set» button to confirm your
choice.
• Then the hour digit starts flashing. Press the
«h/min» button until the right hour appears
and confirm with the «set» button. Proceed
the same way to set both minute digits. If you
prefer not using this clock feature, the flashing
«12:00» will disappear automatically after 24h.
set
h/min
set
h/min
1
2
set
h/min
set
h/min
1
2
set
h/min
set
h/min
t
h/min
set
t
h/min
set
t
h/min
set
t
h/min
set
3738161_D30_NA.indd 53738161_D30_NA.indd 5 15.05.2007 15:00:03 Uhr15.05.2007 15:00:03 Uhr