


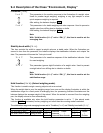

42
10. ID NUMBER AND GLP REPORT
The ID number is used to identify the balance when Good Laboratory Practice (GLP) is used.
The ID number is maintained in non-volatile memory even if the AC adapter is removed.
The GLP output format is selected at “GLP output (info)” of the function table and can be
output to a personal computer or printer using the RS-232C serial interface.
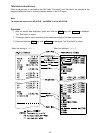
The GLP output format includes the balance manufacturer, model, serial number, ID number
and space for signature for weight data, and the weight used and results for calibration or
calibration test data.
When the AD-8121B is used, the date and time can be printed using the AD-8121B clock and
calendar function. In this case, set the “GLP output ( info )” parameter to “1”.
The balance can output the following reports for GLP.
“Calibration report” of the calibration, using an external weight.
“Calibration test report” of the calibration test, using an external weight.
“Title block” and “End block” for the weight data.
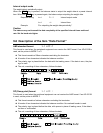
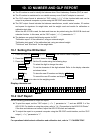
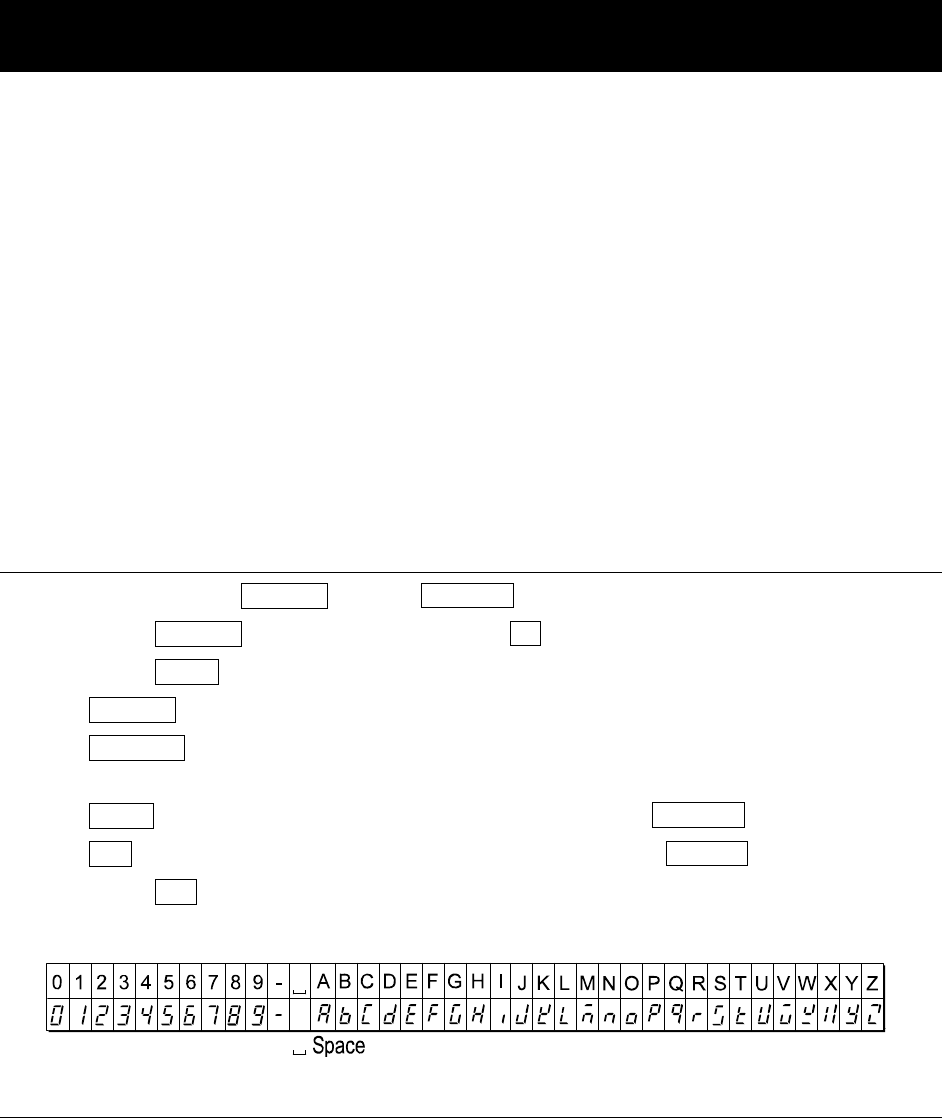
10-1 Setting the ID Number
1 Press and hold the SAMPLE key until ba5fnc of the function table is displayed.
2 Press the SAMPLE key several times to display id .
3 Press the PRINT key. Set the ID number using the following keys.
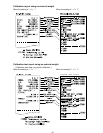
SAMPLE key To select the digit to change the value.
RE-ZERO key To set the character of the digit selected. Refer to the display character
set shown below.
PRINT key To store the new ID number and display ap fnc
CAL key To cancel the new ID number and display ap fnc
4 Press the CAL key to return to the weighing mode.
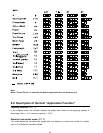
Display character set
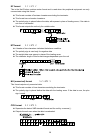
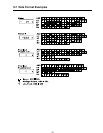
10-2 GLP Report
Set the following parameters to output the report.
To print the report, set the “GLP output ( info )” parameter to “1” and use MODE 3 of the
AD-8121B. For details on using the printer, refer to “14-1 Connection to the AD-8121B Printer”.
If the time and date are not correct, adjust the AD-8121B clock and calendar.
To output the report to a personal computer using the RS-232C serial interface, set the “GLP
output ( info )” parameter to “2”.
Note
For operational details about calibration and calibration test, refer to “7. CALIBRATION”.