


Quantum 610 Series www.pridemobility.com 27
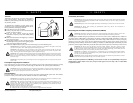
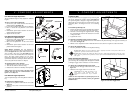
UNCLAMPED
BOLT
LEVER (OPEN)
NUT
CAM
LEVER (FULLY
CLOSED)
CLAMPED
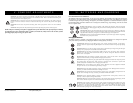
V. COMFORT ADJUSTMENTS
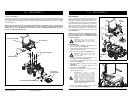
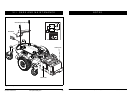
Foot Platform Height Adjustment
The foot platform height is easily adjusted to different
heights.
To raise or lower the foot platform:
1. Remove the quick release fasteners from the foot
platform bracket. See figure 20.
2. Loosen the foot platform securement nut one-half turn.
3. Raise or lower the foot platform to the desired
height.
4. Reinstall the quick release fasteners into the foot
platform bracket and tighten.
5. Tighten the nut to secure.
Foot Platform Depth Adjustment
To adjust the foot platform depth:
1. Remove the quick release fasteners from the foot
platform bracket. See figure 20.
2. Move the foot platform in or out to the desired
depth.
3. Reinstall the quick release fasteners into the foot
platform bracket and tighten.
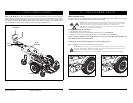
Quick Release Fasteners: The foot platform is
attached to the power base with two quick release fas-
teners. See figure 20. Each quick release fastener con-
sists of a bolt, a lever, and a nut. See figure 21. The
lever has a cam on the end that allows it to clamp into
place. The quick release fastener has two states:
clamped and unclamped. When the lever is open, the
quick release fastener is unclamped. When the lever is
closed, the quick release fastener is clamped.
To clamp the quick release fastener:
1. Make sure the lever is in the open position.
2. Turn the nut clockwise until it is snug.
3. Rotate the lever until it is in the fully closed position.
NOTE: If the lever will not rotate to the fully closed
position, then turn the nut counterclockwise one-
quarter or one-half turn.
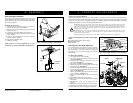
Foot Platform Angle Adjustment
You can adjust the angle of the foot platform with a hex
key.
To adjust the foot platform angle:
1. Flip up the foot platform and locate the screw. See
figure 22.
2. Turn the screw to raise or lower the front of the foot
platform.
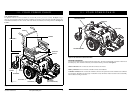
Figure 22. Underside of Foot Platform
SCREW
Figure 20. Foot Platform Adjustment
FOOT
PLATFORM
BRACKET
FOOT PLATFORM
RETAINING PIN
QUICK
RELEASE
FASTENERS
Figure 21. Quick Release Fastener Operation
SCREW
SECUREMENT NUT
28 www.pridemobility.com Quantum 610 Series
V. COMFORT ADJUSTMENTS
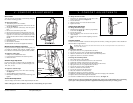
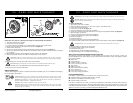
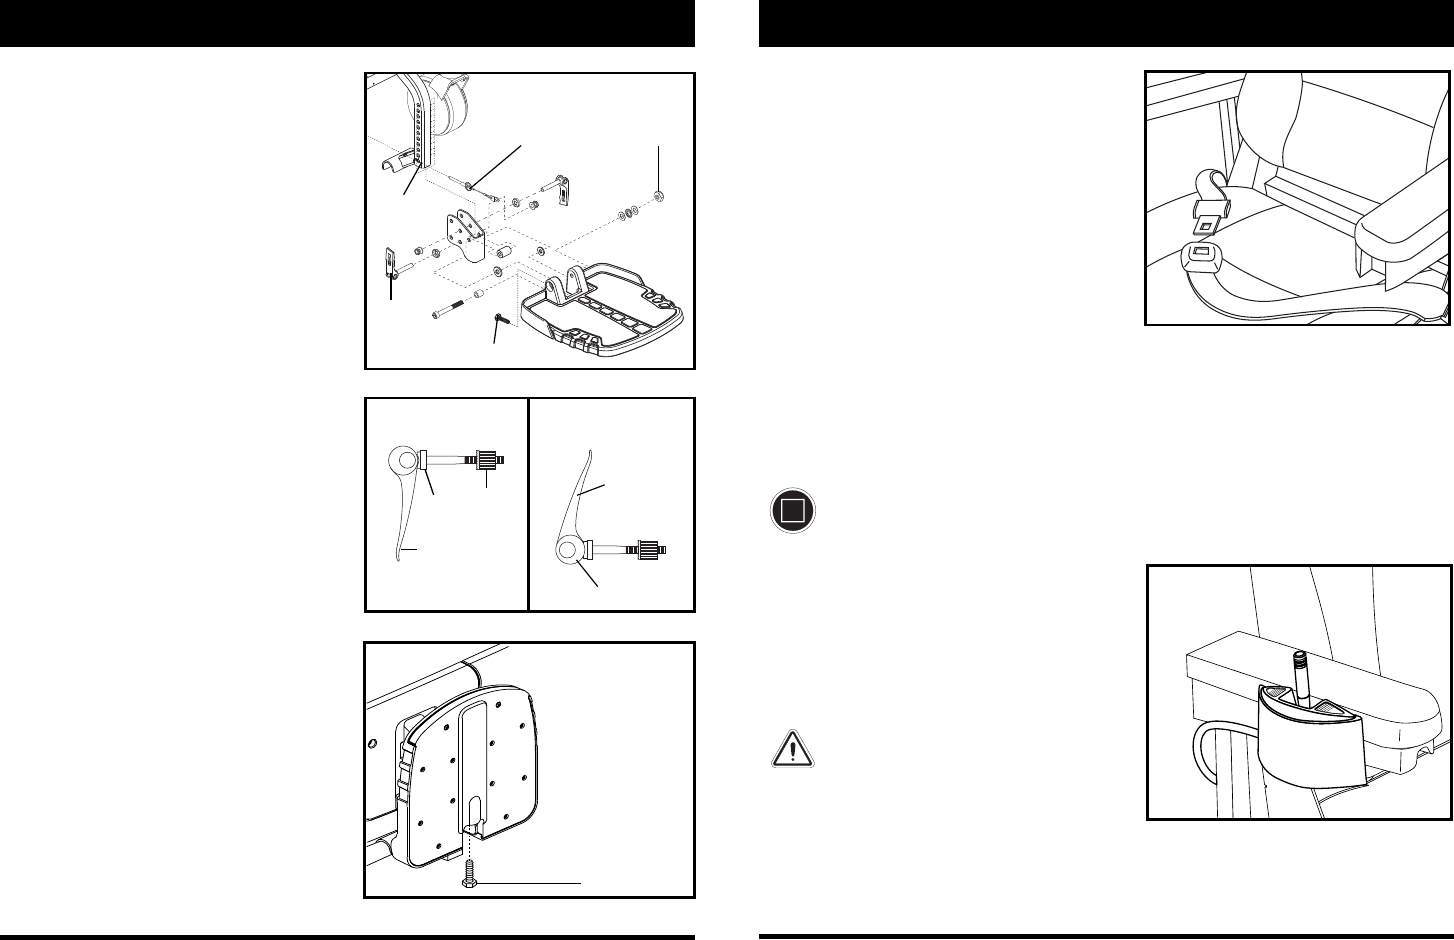
Positioning Belt
Your power chair may be equipped with a positioning belt
that can be adjusted for operator comfort. See figure 23.
The positioning belt is designed to support the operator so
that he/she does not slide down or forward in the seat. The
positioning belt is not designed for use as a restraining
device.
To install the positioning belt:
1. Remove the the rearmost screw that holds the seat hinge
to the seat base on both the left and right seat hinges.
2. Insert the screw through the supplied washer, through
the positioning belt, and into the seat base for each side
of the power chair.
3. Tighten both screws.
To adjust the positioning belt for operator comfort:
1. Once seated, insert the metal tab on one side of the belt into the plastic housing on the opposite side until you
hear a click. See figure 23.
2. Pull the excess strap attached to the metal tab until it is secure, but not so tight as to cause discomfort.
To release the positioning belt:
1. Press the push button mechanism on the plastic housing.
MANDATORY! Make sure the positioning belt is properly secured to the power chair and is
adjusted for operator comfort before each use.
MANDATORY! Inspect the positioning belt for loose or damaged parts before each use of the
power chair. If you discover a problem, contact your Quantum Rehab Provider for maintenance
and repair.
Figure 23. Positioning Belt Adjustment
Figure 24. Power Seat Toggle Switch
Power Elevating Seat (Optional)
If your power chair is equipped with a power elevating seat,
you can change the seat height either through the controller
or through a toggle switch mounted to one of the armrests.
To change the seat height through toggle switch:
1. Press forward on the toggle switch to raise the seat. See
figure 24.
2. Pull back on the toggle switch to lower the seat.
WARNING! Do not allow the motor to run
more than a few seconds after the
mechanism reaches the top or bottom
limit.
NOTE: For more information on operating the power ele-
vating seat through the controller, contact your Quantum
Rehab Provider.