


Jet 7 www.pridemobility.com 37
IX. CARE AND MAINTENANCE
Disposal of Your Power Chair
Your power chair must be disposed of according to applicable local and national statutory regulations. Contact your local
waste disposal agency or authorized Pride Provider for information on proper disposal of power chair packaging, metal
frame components, plastic components, electronics, and batteries.
Cleaning and Disinfection
! Use a damp cloth and mild, non-abrasive cleanser to clean the plastic and metal parts of your power chair. Avoid using
products that may scratch the surface of your power chair.
! If necessary, clean your product with an approved disinfectant. Make sure the disinfectant is safe for use on your pro-
duct before application.
WARNING! Prevent personal injury and product damage! Follow all safety instructions for the
proper use of the disinfectant before applying it to your product.
WARNING! Never hose off your power chair or place it in direct contact with water. Your power
chair has a painted, ABS plastic body shroud that allows it to be easily wiped clean with a damp
cloth.
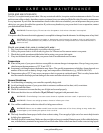
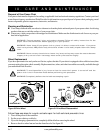
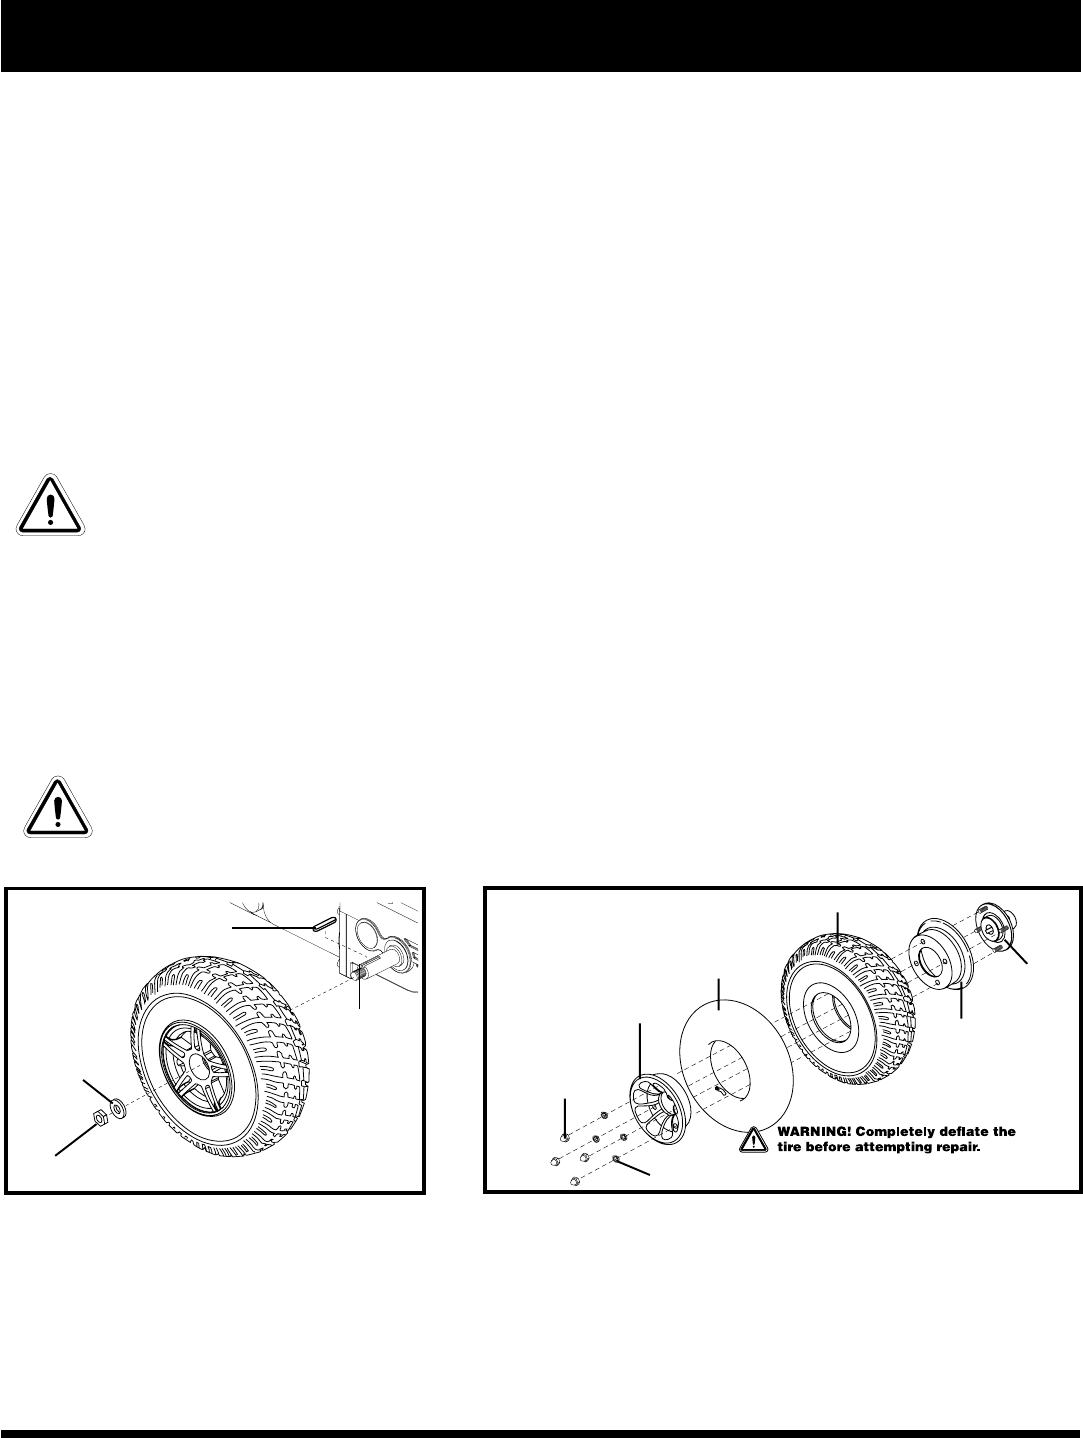
Figure 30. Drive Wheel
WARNING! Never use any chemicals to clean a vinyl seat, as they may cause the seat to become
slippery or dry out and crack. Use soapy water and dry the seat thoroughly.
Wheel Replacement
If you have pneumatic tires and you have a flat tire, replace the tube. If your chair is equipped with a solid tire insert, then
you must replace the entire wheel assembly. Replacement tires, tubes, and wheel assemblies are readily available through
your authorized Pride Provider.
WARNING! To avoid possible injury, be sure that the controller’s power is turned off and the
power chair is not in freewheel mode before performing this procedure.
WARNING! Completely deflate the tire before attempting repair.
Follow these easy steps for a quick and safe repair for both solid and pneumatic tires:
1. Turn off the power to the controller.
2. Set the power chair up on blocks.
3. If you are changing a pneumatic tire, completely deflate it before removing the wheel.
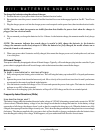
4. Remove the drive wheel nut and washer from the axle. See figure 30.
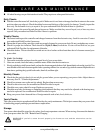
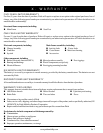
Figure 31. Drive Wheel Disassembled
DRIVE WHEEL NUT
DRIVE WHEEL
WASHER
AXLE SLOT
AXLE KEY
TUBE
TIRE
FRONT RIM
HALF
NUTS
WASHERS
REAR RIM
HALF
WHEEL
HUB