


Quantum Jazzy 1650 Series www.pridemobility.com 23
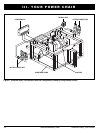
SEAT
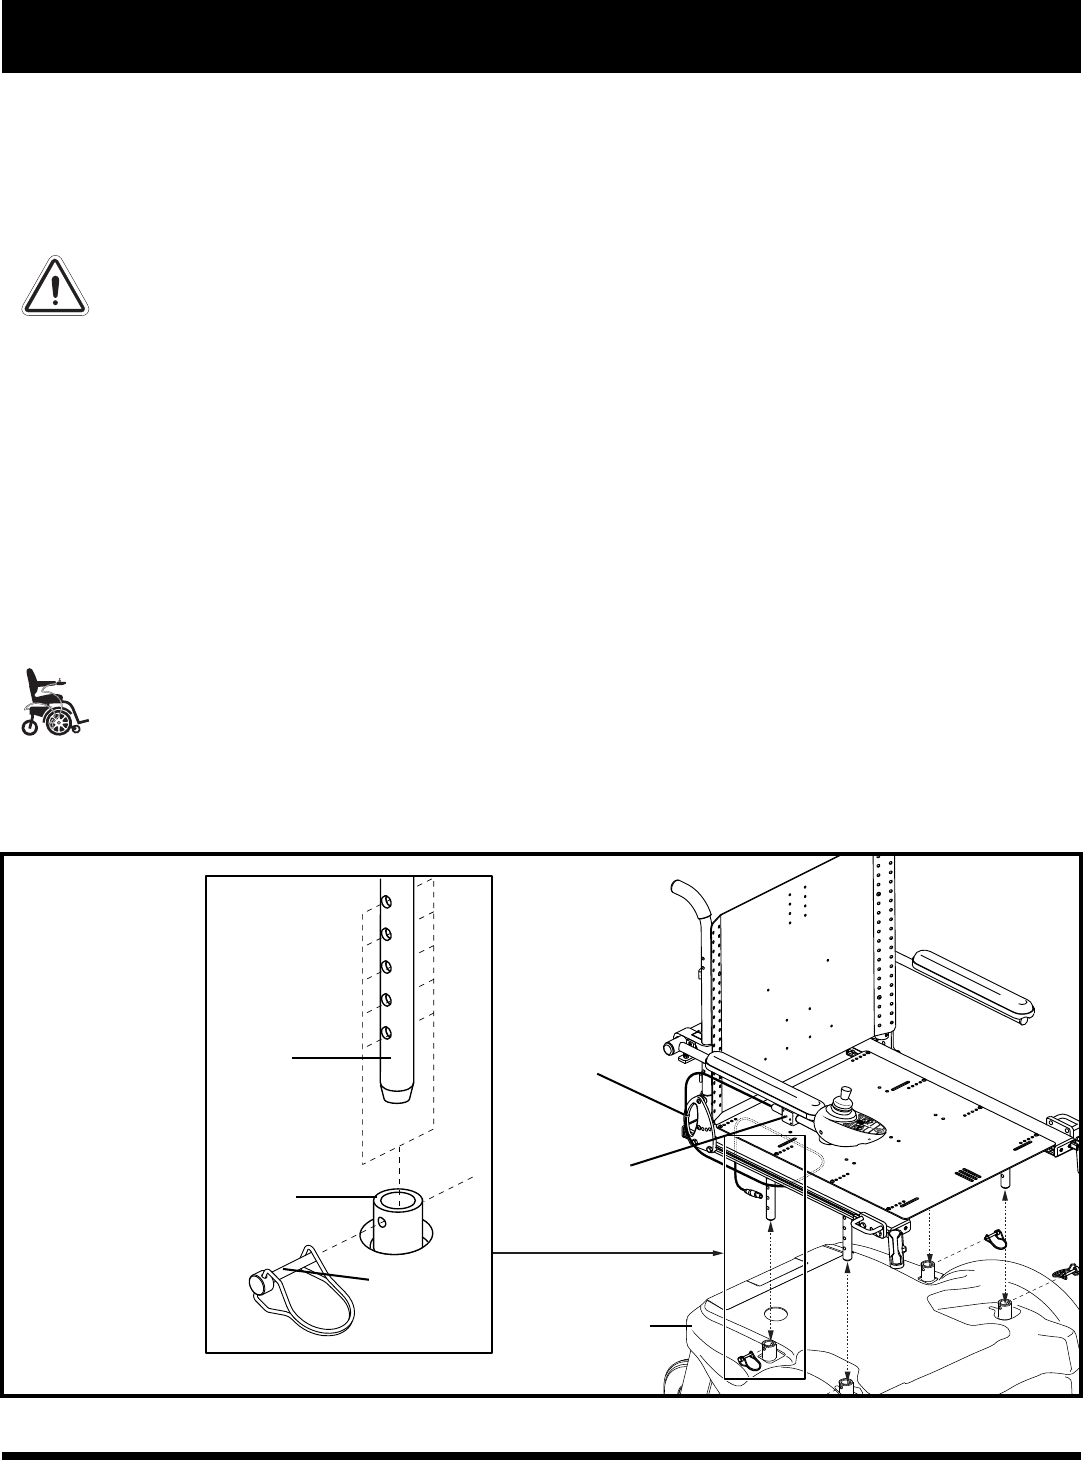
TOWER
SEAT
RECEIVER
SAFETY
SNAP PIN
POWER BASE
CONTROLLER
MOUNT
WIRE TIE
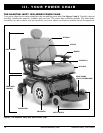
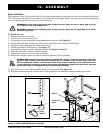
Seat Installation
The Quantum Jazzy 1650 seat has four (4) seat towers that connect to the seat receivers on the power base frame.
The seat towers have holes that enable you to adjust the seat height. Safety snap pins are inserted through the
receiver and through the seat towers to secure the seat.
WARNING! Do not pick up the seat frame by the armrests. They are free to pivot, and you may
lose control of the seat if they do so.
WARNING! Removing and installing your seating system should be accomplished by no fewer
than two (2) people.
To install the seat:
1. Remove the safety snap pins.
2. Lift the seat over the power base.
3. Align each seat tower with the corresponding seat receiver. See figure 10.
4. Gently allow the seat to slide into each receiver until the seat is at the desired height.
5. Insert the safety snap pins into each seat receiver.
6. Install the armrests (if necessary). See figure 11.
7. Loosen the setscrews on the controller mount. See figures 10 and 14.
8. Slide the controller into the controller mount.
9. Tighten the setscrews to secure the controller.
10. Route the controller harness so that it cannot be pinched in the seat hinge.
MANDATORY! Prevent controller harness damage! Use correct tie-down points for controller
harness. Avoid routing the controller harness on the outside of the armrest pad. Route the
harness under the armrest or toward the inside of the armrest pad. Use correct tie-down points
for the controller harness to prevent the harness from getting caught in the drive tires, pinched
in the seat frame, or damaged when passing through doorways.
11. Use a wire tie to secure the controller harness to the armrest. See figure 10.
12. Plug the controller harness into the back of the controller and into the connector on the power base.
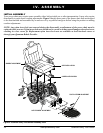
IV. ASSEMBLY
Figure 10. Seat Installation/Removal (Typical)