


34
www.pridemobility.com Hurricane
IX. DISASSEMBLY AND ASSEMBLY
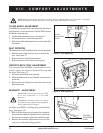
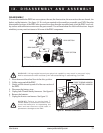
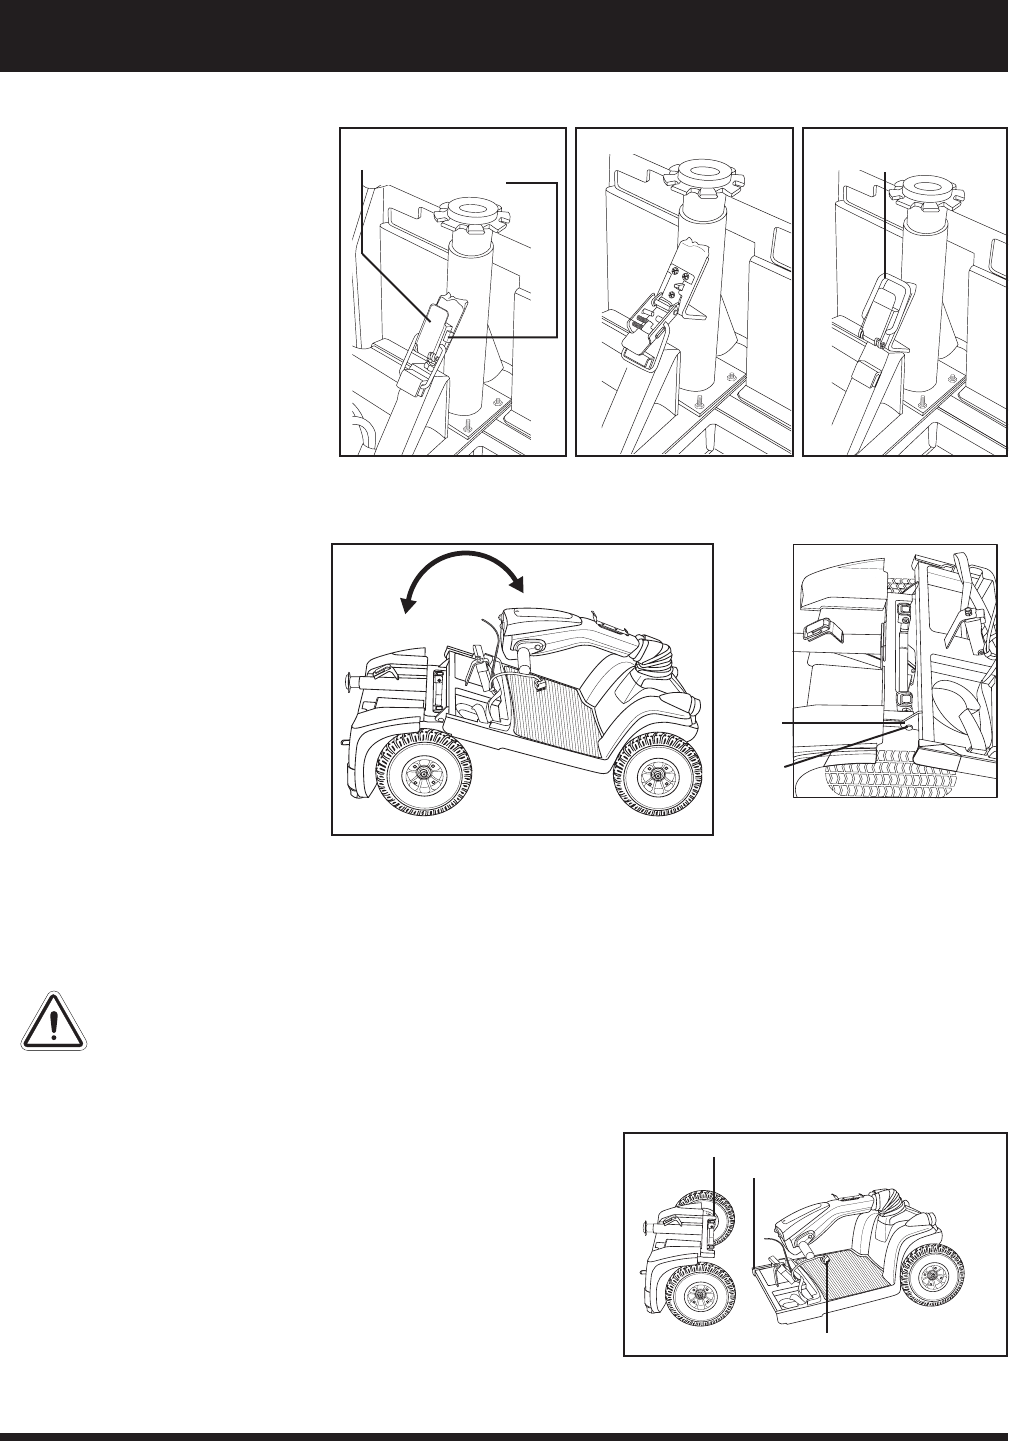
Toggle Latch Release
1. Push in the toggle latch release
button while pulling back the
toggle latch. See figures 16 and
16A.
2. Position the toggle latch buckle
over the top of the toggle latch.
See figure 16B.
TOGGLE
LATCH
TOGGLE LATCH
RELEASE
BUTTON
Figure 16. Toggle
Latch (Latched)
Figure 16B. Buckle
Secured
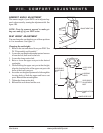
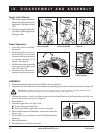
ASSEMBLY
1. Position the front and rear sections of your PMV as shown in figure 19.
2. Align the lower slots of the front section with the corresponding pegs on the front of the rear section. See figure 19.
3. Holding the seat post, slowly pivot the rear section forward until the curved locking brackets are fully con-
nected onto the top rear pegs. See figure 17.
4. Raise the tiller.
WARNING! Position the front-to-rear harness so it won’t become pinched between the
frame halves when pivoting the rear section forward. See figure 19.
Figure 19. Frame Sections
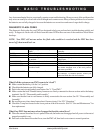
Frame Separation
1. Lower the tiller to the PMV
floorboard.
2. Push back on the seat post to
pivot the PMV’s rear section
rearwards until the rear section
is standing vertically on its
bumper. See figure 17.
3. Lift the front section up until the
lower pegs are no longer in the
slots. See figure 18.
4. Carefully move the front sec-
tion away from the rear section.
Figure 17. Frame Positioning
Figure 18. Separating The
Frame Sections
FRONT-TO-REAR HARNESS
5. Latch the toggle latch. See figure 16A.
! Lower the toggle latch buckle.
! Push back on the toggle latch so it locks into place.
6. Reinstall the batteries into the battery wells and reconnect the
battery strap.
7. Connect the front-to-rear harness and both T-handle battery
harnesses.
8. Reinstall the shroud.
9. Reinstall the seat, and lock it into place.
Figure 16A. Toggle
Latch (Unlatched)
TOGGLE LATCH
BUCKLE
CURVED LOCKING
BRACKET
PEG
PEG
SLOT