


23
Hurricane www.pridemobility.com
VI . BATTERIES AND CHARGING
Your PMV requires two long-lasting, 12-volt, deep-cycle batteries that are sealed and maintenance free. They are
recharged by an off-board charging system.
! Charge your PMV’s batteries prior to using it for the first time.
! Keep the batteries fully charged to keep your PMV running smoothly.
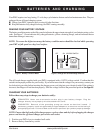
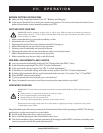
READING YOUR BATTERY VOLTAGE
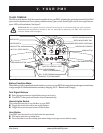
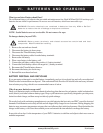
The battery condition meter on the tiller console indicates the approximate strength of your batteries using a color
code. See figure 7. Green indicates fully charged batteries, yellow a draining charge, and red indicates that an
immediate recharge is necessary.
NOTE: To ensure the highest accuracy, the battery condition meter should be checked while operating
your PMV at full speed on a dry, level surface.
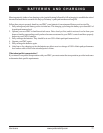
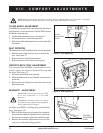
The off-board charger supplied with your PMV is equipped with a 115/230 voltage switch. Confirm that this
switch is in the proper position for your locality. If you are not sure what the voltage is in your country, contact your
local electricity provider before inserting the charger power cord plug into your electrical outlet. If the setting is
incorrect, the charger will not function properly. Slide the voltage switch to the prescribed position. See figure 8.
CHARGING YOUR BATTERIES
Follow these easy steps to charge your batteries safely:
PROHIBITED! Never use an extension cord to plug in your battery charger. Plug the
charger directly into a properly wired standard wall outlet.
PROHIBITED! Removal of the grounding prong can create an electrical hazard. If
necessary, properly install an approved 3-pronged adapter to an electrical outlet having 2-
pronged plug access. Failure to heed could result in personal injury and/or property damage.
NOTE: Ensure that both ends of the charger power cord are clean and dry before plugging the charger
power cord into the off-board charger port or the wall socket.
1. Position your PMV close to a standard wall outlet.
2. Remove the key from the key switch.
Figure 7. Battery Condition Meter
Figure 8. Charger On/Off and Voltage Switches
OFF ON
VOLTAGE SWITCH