


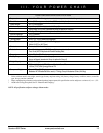

Quantum 6000Z Series www.quantumrehab.com 27
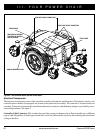
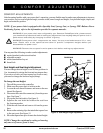
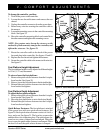
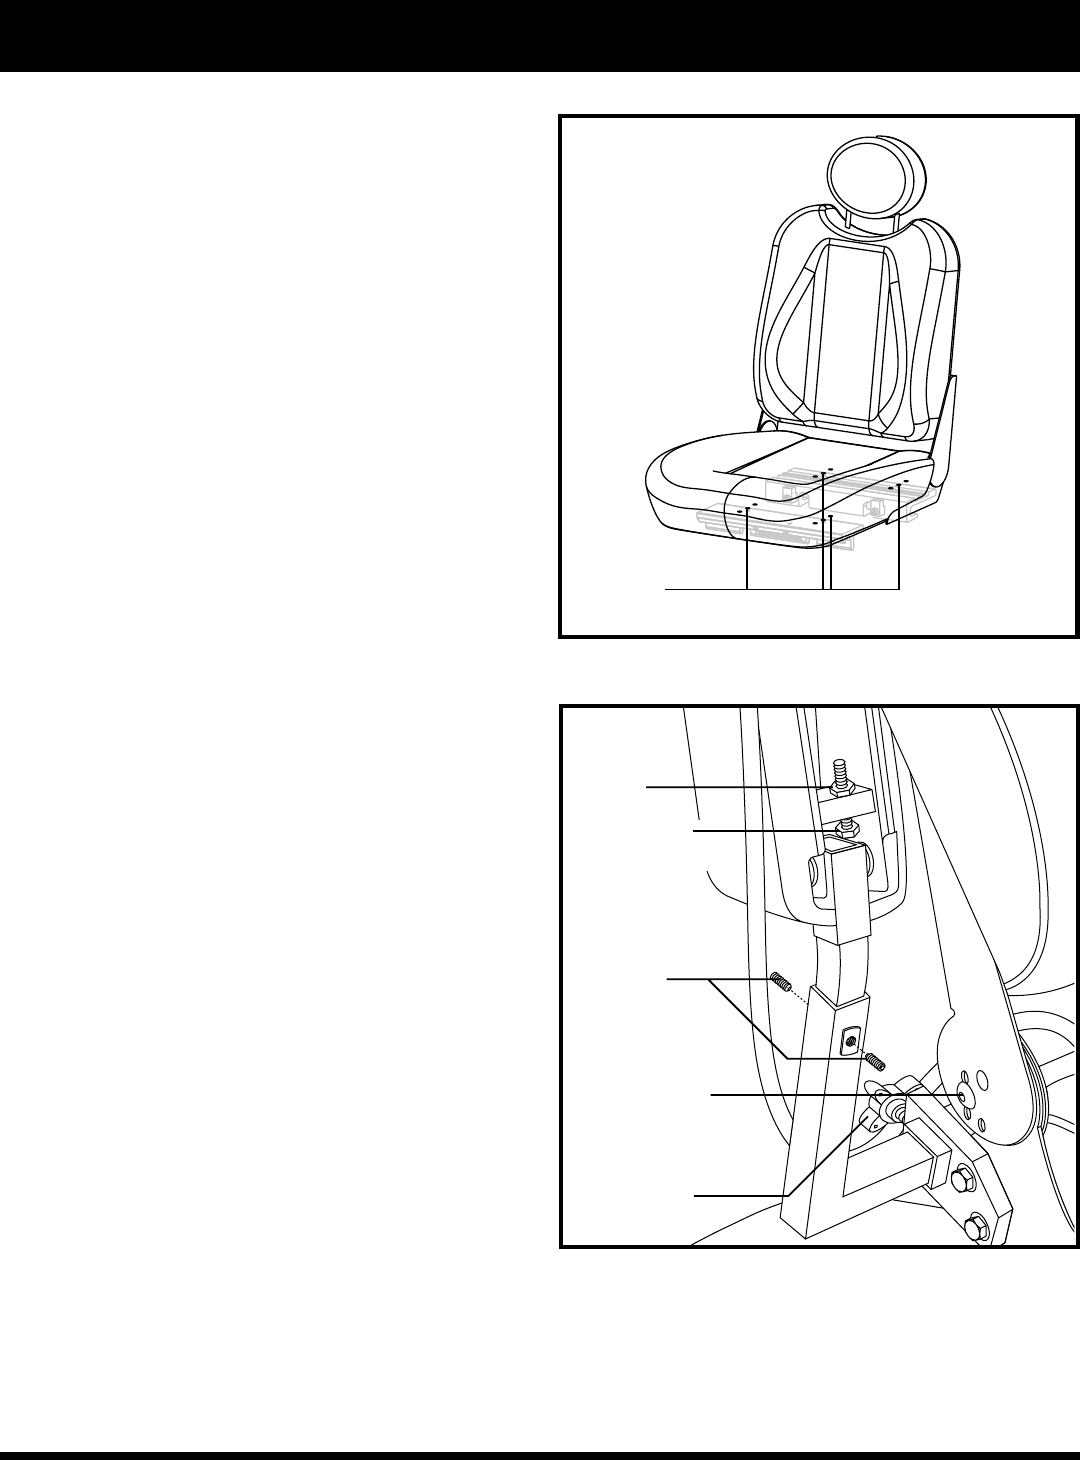
Figure 16. Seat Position Adjustment
10. Reinstall the retaining clips.
11. Reinstall the seat.
12. Reconnect the controller to the power base.
13. Reinstall the rear shroud and tighten the fasteners.
Seat Position
You can move the seat forward or rearward by changing
the extrusion mounting position.
To change the position:
1. Turn off the power to the controller.
2. Make sure the power chair is in drive mode.
3. Loosen the rear shroud fasteners and remove the rear
shroud.
4. Unplug the controller connector(s) from the power base.
5. Remove the seat from the power base.
6. Remove both extrusions from the bottom of the seat.
7. Reposition the extrusions on a different set of mounting
holes. You must move both extrusions the same number
of holes either forward or backwards. See figure 16.
8. Fasten the extrusions back onto the bottom of the seat.
9. Reinstall the seat.
10. Reconnect the controller to the power base.
11. Reinstall the rear shroud and tighten the fasteners.
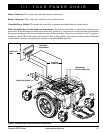
Manual Recline Seatback Adjustment
If your power chair is equipped with a reclining seat, you
can adjust the seatback angle with the seatback release le-
ver. The lever is located on the right side of the seat base.
To adjust the recline angle:
1. Pull up on the seatback release lever.
2. Lean forward or backwards to the desired position.
3. Release the lever.
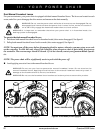
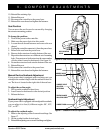
Seatback Angle Adjustment
If your power chair is equipped with an adjustable seatback,
you can adjust it to four (4) different angles: 90°, 102°,
105°, or 107°.
To adjust the seatback angle:
1. Remove the adjusting screws from each seat hinge. See
figure 17.
2. Set the seatback at the desired angle.
3. Reinstall the adjusting screws to each seat hinge and tighten.
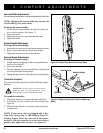
V. COMFORT ADJUSTMENTS
SEAT MOUNTING
HOLES
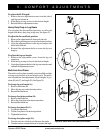
Figure 17. Seatback/Armrest Adjustment
ARMREST KNOB
JAM NUT
SEATBACK ANGLE
ADJUSTING SCREW
ARMREST HEIGHT
ADJUSTING
SETSCREWS
ARMREST ANGLE
ADJUSTING SCREW