


Erwin Sabio Philips CM12 Alignment & Setup Manual Page 10
Condenser Aperture Adjustment
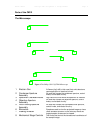
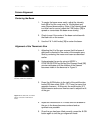
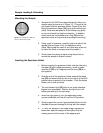
Figure 11 A non-concentric beam is
seen when the condenser aperture is not
aligned.
1.
The condenser aperture controls the beam that passes
through the condenser lens. If the aperture is not
aligned, the beam will not spread concentrically on
either side of the cross-over when the intensity knob is
turned. Start aligning by spreading the beam on one
direction past the crossover.
2.
Adjust the knobs found on the condenser aperture
assembly [2] until the beam becomes centered.
3.
Spread the beam toward the other direction and adjust
the condenser aperture knobs once more.
4.
Repeat the above steps until the beam spreads
concentrically on either direction past the cross-over.
Condenser Astigmatism Correction
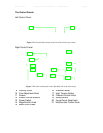
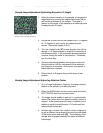
Figure 12 Schematic of the symptom of
condenser astigmatism
1.
Asymmetric magnetic fields around the condenser lens
results in an unbalanced focus of the beam. This
phenomenon is called astigmatism. When this
happens, the beam spreads as asymmetric ellipses on
either direction past the cross-over when the intensity
knob is turned. Start correcting astigmatism by
spreading the beam on one direction past the crossover.
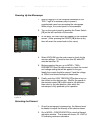
2.
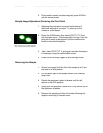
Press the STIG button found near the ALGN button
shown in Figure 10 then select condenser from the
menu that appears onscreen.
3.
The STIG button once again activates the multifunction
X/Y knobs. Use these to adjust the beam so that it
becomes circular.
3.
Spread the beam toward the other direction and adjust
the multifunction X/Y knobs once more.
4.
Press the STIG button once the astigmatism has been
corrected to exit stigmation mode.