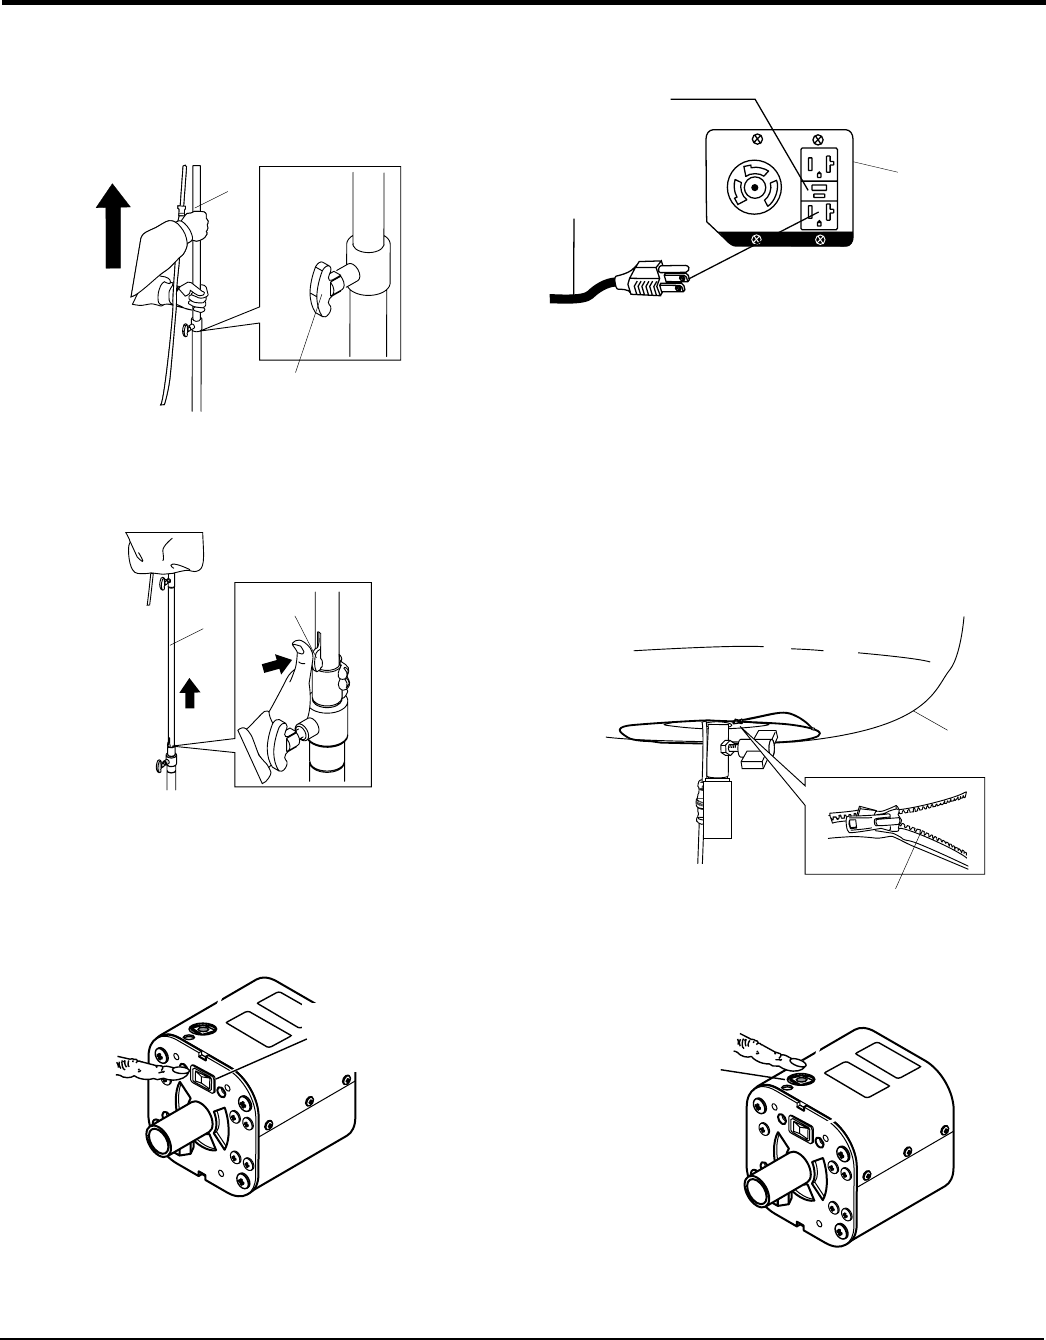
1. Loosen the T-bolt holding the second mast and push
mast all the way down. Tighten T-bolt securely. See
Figure 20.
Figure 20. Lowering Second Mast
2. Push the lock/release tab on the third mast to release
it and lower third mast. See Figure 21.
Figure 21. Lowering Third Mast
1. Before applying power, make sure that the Power
switch (Figure 22) is in the OFF position.
Figure 22. ON/OFF Switch
T-BOLT
SECOND
MAST
THIRD
MAST
LOCK/
RELEASE
TAB
0
1
POWER
ON/OFF
SWITCH
OPERATION
2. Connect the AC power cable to the 120 VAC receptacle
on the generator used. See Figure 23.
Figure 23. Connecting to Power Source
3. Start the generator as indicated in the generator
manual.
4. Turn on the Power switch (Figure 22). The
balloon will start to inflate and the lamp will turn on.
1. Slightly unzip the bottom of the balloon to gain access
to the dimmer switch (Figure 24).
Figure 24. Unzipping Balloon
2. Press the dimmer switch lightly (Figure 25). The LED
will blink. The lamp should dim to about 75% brightness.
Figure 25. Dimmer Switch
20A
120V
120 VAC
RECEPTACLE
POWER
CABLE
TYPICAL
GENERATOR
FRONT P
BALLOON
0
1
DIMMER
SWITCH
