


10
Load Chain and Bottom Hook
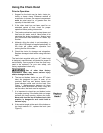
Load Chain Inspection (all models)
Over time, the load chain will wear or elongate.
This can cause damage to the hoist, breakage, or
non-engagement of the load sheave.
Do not operate the hoist with a
twisted, kinked or damaged load chain. Do not
splice the load chain. Check the chain for
excessive wear or stretch. Failure to comply
may cause serious injury.
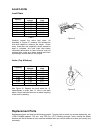
To inspect the load chain for wear:
1. Test the hoist under load in both the lifting and
lowering directions, observing the operation of
chain and sprockets. Chain should feed
smoothly into and away from the sprockets.
2. If the chain binds, jumps, or is noisy, make
sure it is clean and properly lubricated. If the
trouble persists, inspect the chain and mating
parts for wear, distortion, or other damage.
3. Clean the chain before inspection. Examine for
gouges, nicks, weld splatter, corrosion, and
distorted links. Slacken the chain and move
adjacent links to one side, looking for wear at
the contact points. If you see wear or suspect
stretching, measure the chain as follows:
• Select an unworn, unstretched length of
chain (i.e. at the slack end).
• Suspend the chain vertically under tension
and, using a caliper type gauge, measure
the outside length of several links about 12
to 24 inches.
• Measure the same number of links in used
sections and calculate the percentage of
the increase in length.
4. If the length of used chain exceeds 2-1/2
percent of the unused chain, replace the chain.
Do not add to the load chain.
Replace the entire chain. Failure to comply may
cause serious injury.
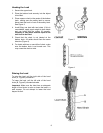
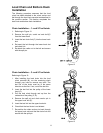
Load Chain Removal (all models)
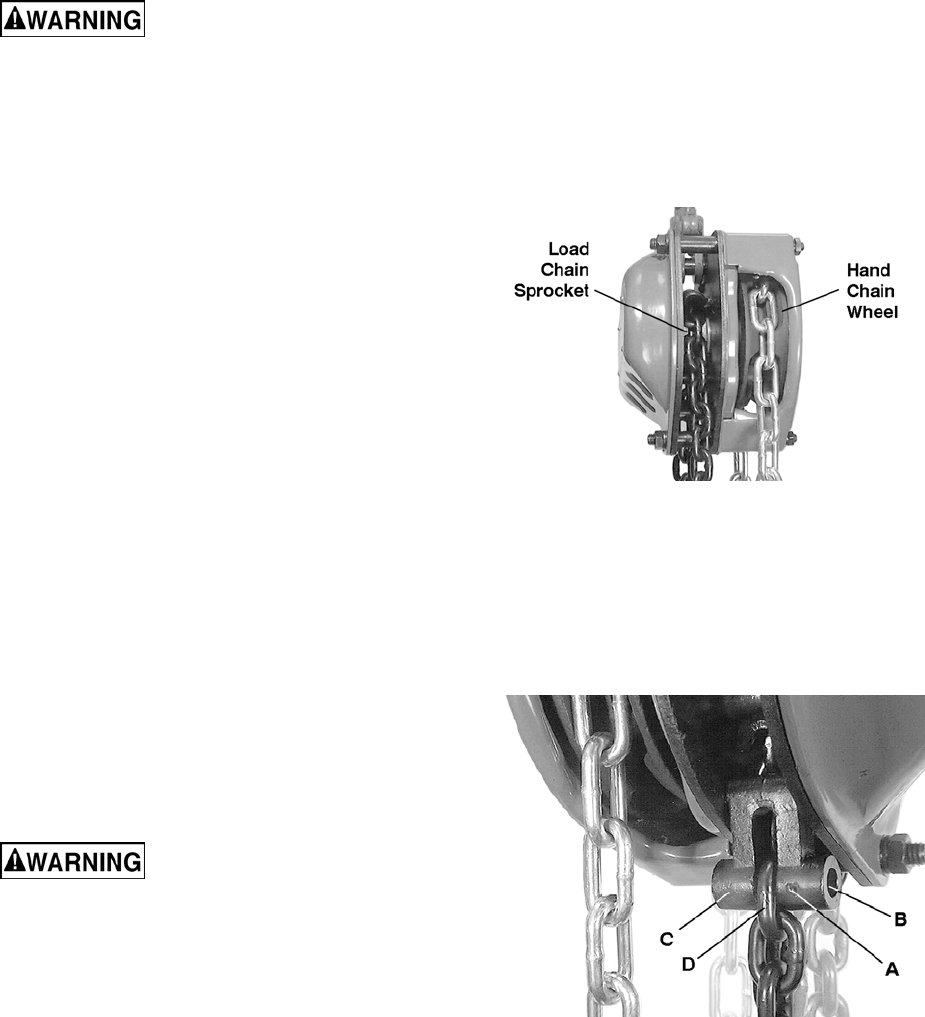
Remove the old load chain as follows while
referring to Figure 11:
1. Remove the split pin (A) and the pin
stopper (B) on the chain anchor C), allowing
the end of the chain to fall free.
2. Pull the hand chain (Fig. 5) until the load chain
is completely removed from the gear assembly.
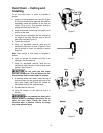
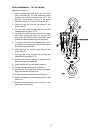
Attaching Load Chain to Load Chain
Sprocket (all models)
Install the new load chain onto the load chain
sprocket as follows , referring to Fig. 10:
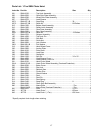
1. Position the load chain sprocket by rotating the
hand chain wheel so that the wide and narrow
grooves show.
2. Insert the load chain into the sprocket grooves
so that the chain will wind up and back over the
sprocket. Welds must face away from the
sprocket.
3. Rotate the hand chain wheel so that the load
chain falls six to eight inches at the back of the
sprocket.
Figure 10
Referring to Figure 11:
4. Insert one end of the chain link (D) into the
chain anchor (C).
5. Insert the pin stopper (B) through the chain
anchor (C) and chain link (D) and secure with
the split pin (A).
Figure 11
Continue with Load Chain and Bottom Hook
Installation on the following page, proceeding to the
section that applies to you, 1- and 2-Ton hoists or
3- and 5-Ton hoists.