


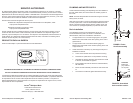
Water Supply
Consult local authorities for plumbing code requirements in your area.
IMPORTANT: Proper installation of the ll spout plumbing and compliance with local codes are the
responsibility of the installer. Jacuzzi
®
does not warranty connections of water supply ttings and
piping, ll systems, or drain/overow systems. Nor is Jacuzzi
®
responsible for damage to the bath that
occurs during installation.
CAUTION: A nonammable protective barrier must be placed between soldering work and the bath to
prevent damage to the bath.
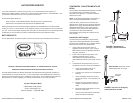
CLEANING AND MAINTENANCE
WARNING: Do not use corrosives as paint thinner or acetone to clean the bath or remove stains.
Irreparable damage to the bath nish will occur.
Always clean your bath immediately after use. This makes it easier to clean and provides best results.
Use a soft cotton cloth with a mild soap. Harsh or abrasive cleaners can harm the nish.
CAUTION: Use soap to clean the bath and never use a harsh or abrasive cleaner. Soap is effective to
clean the bath and it does not harm the bath nish.
REPAIR THE FINISH
To repair a mild scratch to the bath nish, use the following methods to remedy it.
1. Polish the surface of the scratch with a metal or car polish to work up the bright surface.
2. Use a 1000 grit sand paper to polish the surface of the scratch. If necessary, repeat Step 1 above.
NOTE: For major scratches, please consult the Jacuzzi
®
Customer Service for a provider in your area.
Jacuzzi
®
Morphosis Freestanding Bath 9 GB11000 ~ 9/08Jacuzzi
®
Morphosis Freestanding Bath 36 GB11000 ~ 9/08
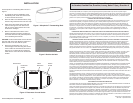
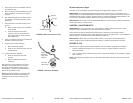
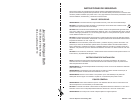
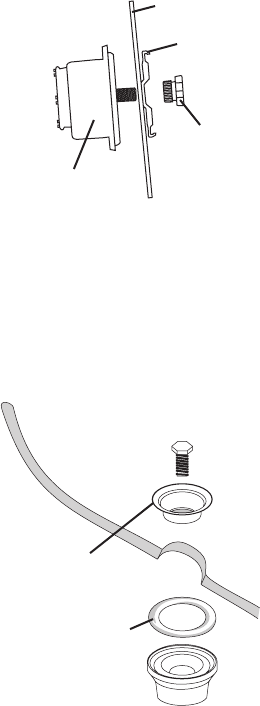
FIGURE 7. Asamblea de tamiz
FIGURE 6. Montar el
desbordamiento a la tina
Pared de la tina
Reborde
Tuerca
Dispositivo de
desbordamiento
Aplicar la masilla del
fontanero bajo el tamiz
El lado redondo
hacia arriba
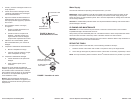
4. Insertar y conectar el desagüe reunido en la
P-trap expuesta.
5. Colocar la tina sobre el desagüe reunido,
y asegurar la alineación tanto al desagüe
como al desbordamiento.
6. Adjuntar el reborde de desbordamiento al
desbordamiento (Sección A) utilizando la
tuerca proporcionada (Figura 6). Apriétese
sólo a mano.
7. Atar el desagüe al baño como sigue,
ver Figura 7.
a. Aplicar la masilla del fontanero a la
parte oculta del tamiz.
b. Insertar el tamiz en la apertura de
desagüe, y atornillar el tamiz en el
lugar usando el tornillo de desagüe
proporcionado. Apriétese sólo a mano.
8. Utilización de un destornillador, apriete
bien el desbordamiento y las uniones de
desagüe.
9. Completar la asamblea de desbordamiento.
a. Montar el adaptador de mango.
b. Cerrar el mango de vuelta en el lugar
sobre el adaptador de mango.
10. Completar la asamblea de desagüe.
a. Colocar al émbolo en la apertura de
desagüe.
b. Hacer cualquier ajuste que es
necesario.
Después de que el desagüe es totalmente
instalado, prueba para el avenamiento apropiado.
Si la unidad no drena correctamente, rectique
esta condición antes de seguir con la instalación.
El Jacuzzi
®
no es responsable de gastos de
nueva instalación o retiro.
NOTE: El sello hermética del desagüe es la
responsabilidad del instalador. Un agujero en el
desagüe es excluida del Jacuzzi
®
garantía para
este producto.