


4. Insert and connect the assembled drain into
the exposed P-trap.
5. Place the tub over the assembled drain, and
ensure alignment to both the drain and the
overow.
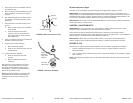
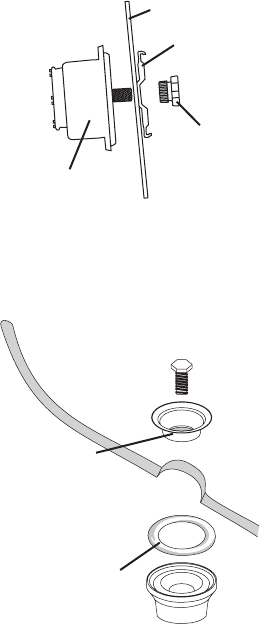
6. Afx overow ange to the overow (Section
A) using the nut provided (Figure 6). Hand-
tighten only.
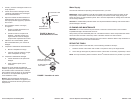
7. Attach the drain to the bath as follows, see
Figure 7.
a. Apply plumber’s putty to the underside
of the strainer.
b. Insert the strainer into the drain
opening, and screw the strainer into
place using the drain screw provided.
Hand-tighten only.
8. Using a screwdriver, tighten the overow and
the drain connections securely.
9. Complete the overow assembly.
a. Mount the handle adaptor.
b. Snap the turn handle into place over the
handle adapter.
10. Complete the drain assembly.
a. Place the plunger into the drain
opening.
b. Make any adjustments that are
necessary.
After the drain is fully installed, test for proper
drainage. If the unit does not drain properly,
rectify this condition before proceeding with
the installation. Jacuzzi
®
is not responsible for
removal or reinstallation costs.
NOTE: Watertight installation of the drain is the
responsibility of the installer. Drain leakage is
excluded from the Jacuzzi
®
warranty for this
product.
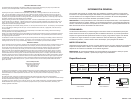
Apply
plumber’s
putty under
strainer
Rounded
side face up
FIGURE 7. Strainer assembly
Jacuzzi
®
Morphosis Freestanding Bath 37 GB11000 ~ 9/08Jacuzzi
®
Morphosis Freestanding Bath 8 GB11000 ~ 9/08
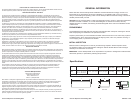
Abastecimiento de Agua
Consultar con los autoridades de plomería locales para exigencias de código en su área.
IMPORTANTE: la instalación apropiada de la fontanería de canalón llenar, y conformidad con los
códigos locales, es la responsabilidad del instalador. El Jacuzzi ® no garantiza uniones de accesorios
de abastecimiento de agua y tubería, sistemas de llenar, o sistemas de desagüe/desbordamiento. Ni
es el Jacuzzi
®
responsable del daño al baño que ocurre durante la instalación.
PRECAUCIÓN: una barrera protectora ininamable debe ser colocada entre la soldadura del trabajo y
el baño para prevenir el daño al baño.
LIMPIEZA Y MANTENIMIENTO
ADVERTENCIA: no use corrosives como pintura thinner o acetona para limpiar el baño o quitar
manchas. El daño irreparable se occurrirá al supercie no del baño.
Siempre limpie su baño inmediatamente después del uso. Este hace más fácil para limpiar y
proporciona mejor resultados. Use una tela de algodón suave con un jabón suave. Los encargados de
limpieza ásperos o abrasivos pueden dañar daño al supercie no.
PRECAUCIÓN: Utilizar jabón suave para limpiar el baño y nunca usar a un limpiador áspero o
abrasivo. El jabón suave es ecaz para limpiar el baño y no dañará el supercie no del baño.
REPARE EL FIN
Para reparar un rasguño suave al suprcie del baño, usar los métodos siguientes de remediarlo.
1. Tratar el supercie del rasguño con un pulir para coches o metales hasta que resulta una
supercie brillante.
2. Usar un papel de lija de 1000 arena para pulir la supercie del rasguño. Si es necesario, repita el
Paso 1 encima.
NOTE: Para rasguños principales, favor de consultar al abastecedor Jacuzzi
®
de Servicio de Cliente
en su área.
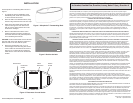
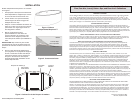
FIGURE 6. Mount Overow to Tub
Tub wall
Flange
Nut
Overow piece