


Form 10590149-Edition 2 3
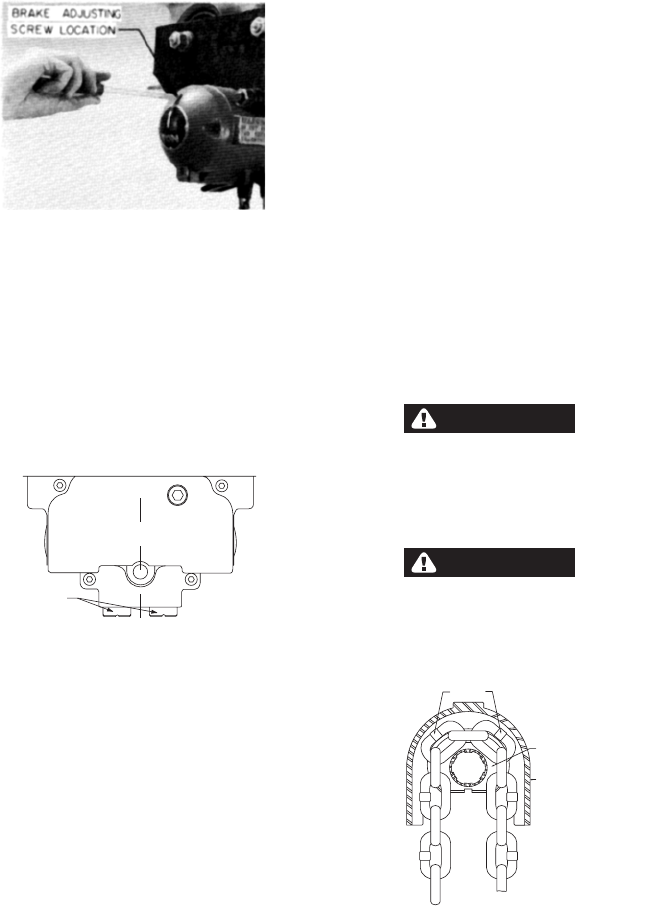
Adjusting Brake
• Properly attach rated load of hoist to load chain hook.
• Slowly raise load to 6” height above floor by slowly pulling
pull chain handle or depressing pendent control.
• Release pull chain handle or pendent control.
• If load starts to lower, tighten brake adjustment by turning
counter-clockwise until load stops lowering.
• Do not over tighten brake. If brake it too tight, the lifting
and lowering of load will be eratic, not smooth.
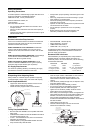
Setting Maximum Up and Down Speeds
• Never attempt to adjust speed regulator valves on spark
resistant hoists. They are preset by ARO.
• Attach rated load of hoist to load chain hook.
• Turn speed regulator valves clockwise until they stop.
This is lowest setting.
• Lift load by pulling pull chain or depressing pendent
control completely. As load is being lifted, turn up speed
regulator valve counter-clockwise to set the hoist at the
desired maximum “lift” speed.
• Lower load by pulling pull chain or depressing pendent
control completely. As load is lowered, turn “DN” speed
regulator valve counter-clockwise to set the hoist at the
desired maximum “lowering” speed.
• The pull chain or pendent control is used as the variable
control of lift and lowering speeds up to the maximum
speed set by the speed regulator valves.
Chain Stop
• Do not operate hoist unless chain stop is properly
attached to hoist load chain.
• Do not use chain stop to limit the distance the load is to
be lifted. The function of the chain stop is to keep the
lower hook components from striking the control arm
should an over-run condition ever occur.
Installation instructions should be completed before
attempting to operate the hoist.
Before Securing Load to Lift Chain
• Perform routine inspection and lubrication procedures.
Securing Load to Lift Chain
• DO NOT WRAP LOAD CHAIN AROUND LOAD.
Approved slings or other approved devices should be
used to provide adequate single point securing of load to
hoist load chain hook. Be sure safety latch on hook is
closed.
• Be sure load chain is not twisted or kinked.
• Hoist should be centered over the load. Always secure
load chain hook to center of load. Never lift a load from
the side or end.
• Allow only a sufficient amount of slack in load chain to
permit attaching hook to load.
Lifting and Lowering Load
1. Pull (pull chain models) or depress (pendent control
models) controls slowly to eliminate abrupt, jerky
operation.
2. Take up slack in chain slowly.
3. Speed of load lifting can be controlled by the pull chain or
pendent control. Pulling the chain further or depressing
the pendent further will result in a faster speed.
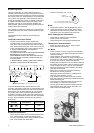
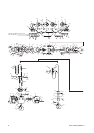
Load Chain Removal
- Drive out roll pin (106) and remove clevis from chain.
- If a chain basket is being used with hoist, remove
chain stop from end of chain.
- 2-Ton models with double reeved chain; remove
retaining ring (110) and pin (111) from anchor bracket
(112).
- Pull down on one end of control arm (68) to release
brake and pull chain from housing.
Load Chain Installation
-
A new chain should never be used on a worn
pocketwheel. Replace chain and pocketwheel as a pair.
- Place hoist in vise and clamp on upper hook mount.
- Remove housing cap (95), brake spring (94) and brake
shoes (92).
- Turn brake wheel (93) by hand to rotate pocketwheel
while carefully feeding chain thru chain guide and
around pocketwheel (64).
- Pull sufficient chain thru housing to allow end link to be
attached to anchor lug on housing.
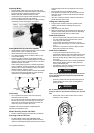
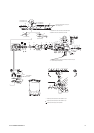
CAUTION
Chain must be positioned around pocketwheel so weld
on the standing links face outward from pocketwheel -
see illustration.
- End link of chain must also be positioned properly to
permit attaching to anchor lug on housing without
twisting of chain.
WARNING
Do not attempt to feed chain over pocketwheel by air
power as chain will be pulled thru housing at a very fast
rate.
- Attach other end of chain to lower hook (or anchor
bracket on 2-Ton models).
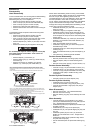
REGULATOR
VALVES
UP
UP
DN
DN
POCKET WHEEL
CHAIN GUIDE
CHAIN WELD