Instruction Manual
IB-106-300NH Rev. 4.2
July 2002
4-8 Calibration Rosemount Analytical Inc. A Division of Emerson Process Management
World Class 3000
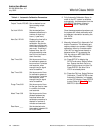
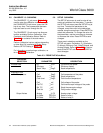
Table 4-1. Automatic Calibration Parameters
Auto Cal YES/NO Set to YES
Output Tracks YES/NO Set as desired to con-
figure analog output
tracking.
Cal Intvl XD XH Set the desired time
between calibrations in
number of days and
hours (1 year max).
Next Cal. XD XH Displays the time left to
the start of the next
calibration. Set the de-
sired time until the start
of the next calibration (1
year max). If nothing is
entered here, the unit
will automatically enter
the Cal Intvl and count
down from that.
Gas Time 0:00 Set the amount of time
for calibration gases to
be turned on in minutes
and seconds; allow
enough time for signal
value to stabilize.
Gas Time 0:00 Set the amount of time
for calibration gases to
be turned on in minutes
and seconds; allow
enough time for signal
value to stabilize.
Purge Time 0:00 Set the amount of time
for the gas lines to clear
in number of minutes
and seconds.
Abort Time 0:00 Set the amount of time
allowed between key
functions before the
calibration procedure is
aborted in number of
minutes and seconds.
Res Alarm ____ Set the desired resis-
tance alarm between 50
to 10,000 ohms.
2. Fully Automatic Calibration Setup. In
order for the IFT system to calibrate
automatically, the parameters from the
CALIBRATE sub-menu (shown in
Table 4-1) in the IFT have to be
entered.
Once these parameters have been set,
the system will initiate calibration with-
out operator intervention as set by the
CAL INTVL
parameter.
3. Manually Initiated Fully Automatic Cali-
bration Procedure. The following pro-
cedure relates to an operator initiated
calibration, either by a remote switch
(CAL INIT on interconnect board) or
selected at the IFT by pressing the
CAL key using an MPS 3000 Multi-
probe Gas Sequencer.
(a) Press SETUP to display the
SETUP sub-menu. Select Calibra-
tion. Ensure that Auto Cal is en-
abled. Set the cursor on Auto Cal.
Press ENTER. Set Auto Cal to
YES if not already done.
(b) Press the CAL key. Select Perform
Calibration. "Press ENTER to start
Automatic Calibration" will appear
on the LCD display. Press ENTER
to start. Refer to Table 5-5, CALI-
BRATE O
2
Sub-Menu.


