Removing An Internal SD Card
CAUTION: Many repairs may only be done by a certified service technician. You should only perform
troubleshooting and simple repairs as authorized in your product documentation, or as directed by the online or
telephone service and support team. Damage due to servicing that is not authorized by Dell is not covered by your
warranty. Read and follow the safety instructions that came with the product.
1. Turn off the system, including any attached peripherals, and disconnect the system from the electrical outlet and
peripherals.
2. If applicable, rotate the system feet inward and lay the system on its side on a flat, stable surface.
NOTE: For systems installed with the wheel assembly, ensure that you lay the system on a sturdy, stable
surface with the wheel assembly extending off the edge of the surface.
3. Open the system.
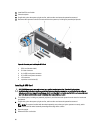
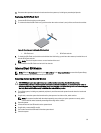
4. Locate the SD card slot on the internal dual SD module.
5. Press inward on the SD card to release it from the slot and remove the card.
6. Close the system.
7. If applicable, place the system upright on a flat, stable surface and rotate the system feet outward.
8. Reconnect the system to its electrical outlet and turn the system on, including any attached peripherals.
Installing An Internal SD Card
CAUTION: Many repairs may only be done by a certified service technician. You should only perform
troubleshooting and simple repairs as authorized in your product documentation, or as directed by the online or
telephone service and support team. Damage due to servicing that is not authorized by Dell is not covered by your
warranty. Read and follow the safety instructions that came with the product.
NOTE: To use an SD card with your system, ensure that the Internal SD Card Port is enabled in the System Setup.
1. Turn off the system, including any attached peripherals, and disconnect the system from the electrical outlet and
peripherals.
2. If applicable, rotate the system feet inward and lay the system on its side on a flat, stable surface.
NOTE: For systems installed with the wheel assembly, ensure that you lay the system on a sturdy, stable
surface with the wheel assembly extending off the edge of the surface.
3. Open the system.
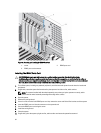
4. Locate the SD card slot on the internal dual SD module.
5. Orient the SD card appropriately and insert the contact-pin end of the card into the slot.
NOTE: The slot is keyed to ensure correct insertion of the card.
6. Press the card into the card slot to lock it into place.
7. Close the system.
8. If applicable, place the system upright on a flat, stable surface and rotate the system feet outward.
9. Reconnect the system to its electrical outlet and turn the system on, including any attached peripherals.
Processors
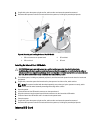
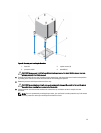
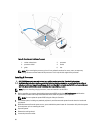
Your system supports up to two Intel Xeon E5-2400 series processors.
Use the procedures in this section to replace or upgrade your processor.
95


