


E-13
A&D Medical (Toll-Free): 1-888-726-9966
E-14
In Canada - Auto Control Medical (Toll-Free): 1-800-461-0991
TAKING YOUR BLOOD PRESSURE MEASUREMENT USING TRICHECK
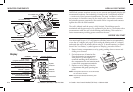
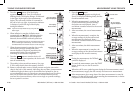
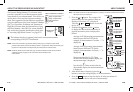
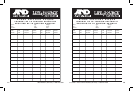
5. Press the
START
button. All of the display
segments are displayed. Zero (0) is displayed
blinking briefly. The display changes, as indicated
in the figure at the right, as the measurement
begins. The cuff starts to inflate. It is normal for
the cuff to feel very tight. A pressure bar indicator
is displayed, on the left edge of the display,
during the inflation.
Note: If you wish to stop inflation at any time, press the
START
button again.
6. When inflation is complete, deflation starts
automatically and
START
Measurement
in progress
Systolic pressure
Diastolic pressure
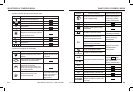
WHO classification
Pulse rate
Exhausts remaining
air automatically
Press
Pressurizing
Zero display
Starts inflation
All of the display
segments displayed
blinks, indicating that the
measurement is in progress. Once the pulse is
detected, the mark blinks with each pulse beat.
Note: If an appropriate pressure is not obtained, the device
starts to inflate again automatically. To avoid re-inflation,
see “Measurement with the SET Pressure” on the next page.
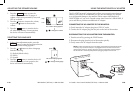
7. When the measurement is complete, the systolic
and diastolic pressure readings and pulse
rate are displayed. The device announces the
measurement results. The cuff exhausts the
remaining air and deflates completely.
8. Press the
START
button to turn the device off.
After one minute of non-operation, the device will
turn off automatically.
9. The reading is then stored into memory. See page
E-18 for more details about the memory function.
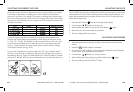
10. Remove cuff and make a note of blood pressure and pulse rate on the
chart in the back of this manual, indicating date and time of measurement.
Additional logbook charts can be downloaded and printed for free at
www.andmedical.com or in Canada at www.autocontrol.com. We advise
that you record the date and time after each measurement becaue an
accurate blood pressure history relies not on single or sporadic readings,
but on a pattern over time.
START
Measurement
in progress
Systolic pressure
Diastolic pressure
WHO classification
Pulse rate
Exhausts remaining
air automatically
Press
Pressurizing
Zero display
Starts inflation
All of the display
segments displayed
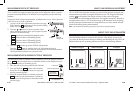
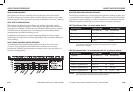
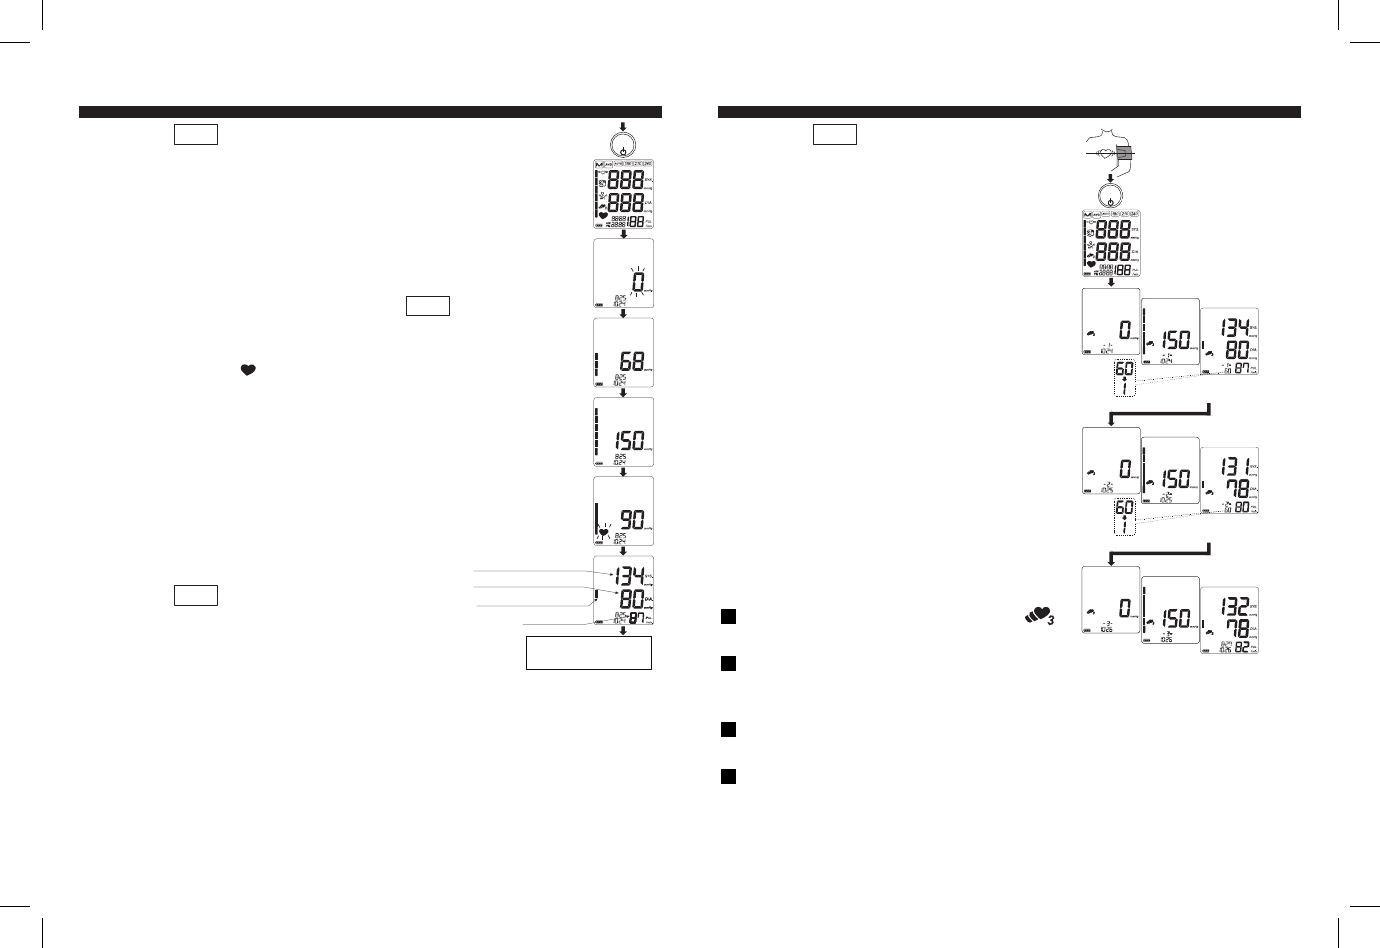
1. Press the
START
button.
All of the display segments are displayed.
Zero (0) is displayed blinking briefly and the
first measurement starts.
2. When the measurement is complete, the
systolic and diastolic pressure readings
and pulse rate are displayed, then a
one-minute countdown starts for the second
measurement.
3. After one minute, the second measurement
starts.
4. When the measurement is complete, the
average readings of the first and second
measurements are displayed, then a
one-minute countdown starts for the third
measurement.
5. After one minute, the third measurement
starts.
6. When the measurement is complete, the
average readings of the three measurements
are displayed and stored in memory.
Notes:
During the measurement, the TriCheck
symbol is displayed.
To cancel the measurement, press the START
button. In this case, no data is stored in
memory.
When the cuff fit error symbol appears during the first measurement, cancel
the measurement, reapply the cuff correctly and start a new measurement.
After measurement, the average data of the three measurements is stored in
memory. No data will be stored, when canceling the measurements, or before
completion of the third measurement.
START
At heart level
Press
All of the display
segments displayed
First measurement
Second measurement
Third measurement
Results of the
first measurement
Average of the first and
second measurements
Average of the
three measurements
One minute after
One minute after