ENGLISH
116116
You can use your Memory Camcorder as a PC camera for video chatting, video conference and
other PC camera applications.
Before your start!
◆ For PC Cam use, it is required to install the DV Driver.➥page 119
1. Press the [POWER] button to turn on the Memory Camcorder.
◆
The Movie Record screen appears.
2. Set the System Settings mode by pressing the [MODE] button.
◆
The System Settings screen appears.
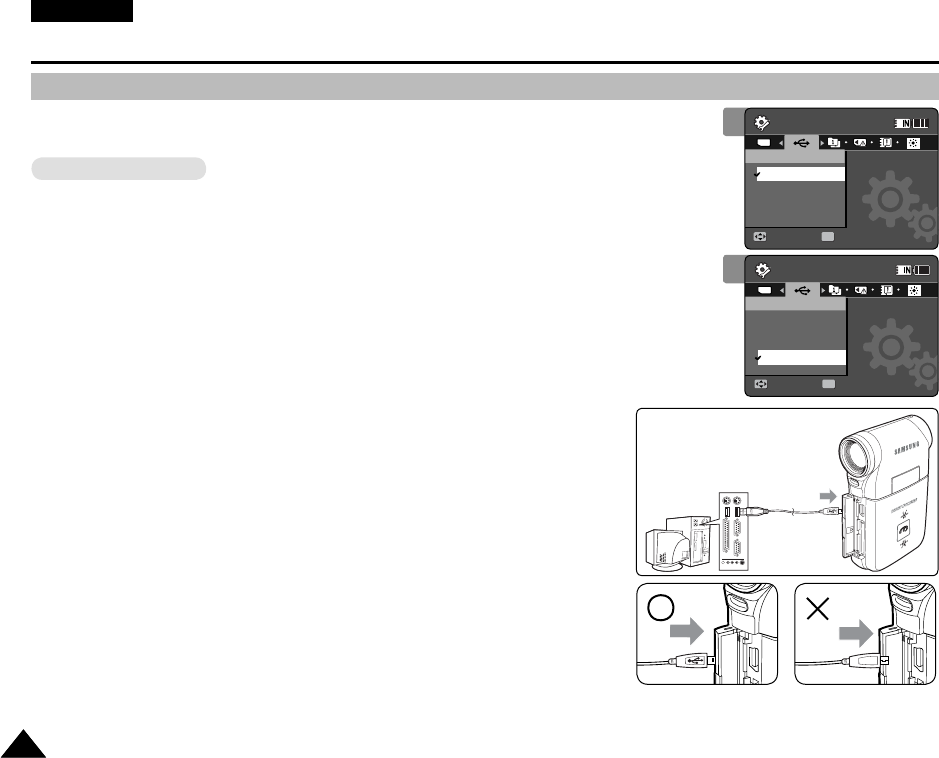
3. Move the [Joystick] left / right to select <USB Mode>.
4. Move the [Joystick] up / down to select <PC-Cam> and then press the
[Joystick(OK)].
5. Turn on your PC.
6. Connect the Memory Camcorder to your PC with the USB cable.
7. The Memory Camcorder can be used as a PC Cam for programmes
such as Windows Messenger.
◆
Various applications take advantage of the PC Cam function. Refer to
respective product documentation for further details.
8. When finished, disconnect the USB cable.
[ Notes ]
✤
You must install the DV Driver. ➥page 119
✤
When the USB port connection changed, it may require DV Driver re-installation.
➥page 119
✤
It is recommended to use an AC Power Adapter during data transfer to avoid
unintended power outages.
✤
Microsoft Windows 98 SE or later operating systems support the PC Cam
function.
Setting the Memory Camcorder : Using USB Mode
Using the PC Cam Function
USB cable
Open the front cover and
connect the USB cable.
3
System Settings
Move Select
OK
USB Mode
PictBridge
PC-Cam
Mass Storage
System Settings
Move Select
USB Mode
Mass Storage
PictBridge
PC-Cam
TYPE
4
System Settings
Move Select
USB Mode
PictBridge
PC-Cam
Mass Storage
System Settings
Move Select
OK
USB Mode
Mass Storage
PictBridge
PC-Cam
TYPE
VP-MM11-01064E-IB-UK.indb 116VP-MM11-01064E-IB-UK.indb 116 2006-05-22 오후 1:59:252006-05-22 오후 1:59:25


