WinCHAP User’s Manual Office Management 29
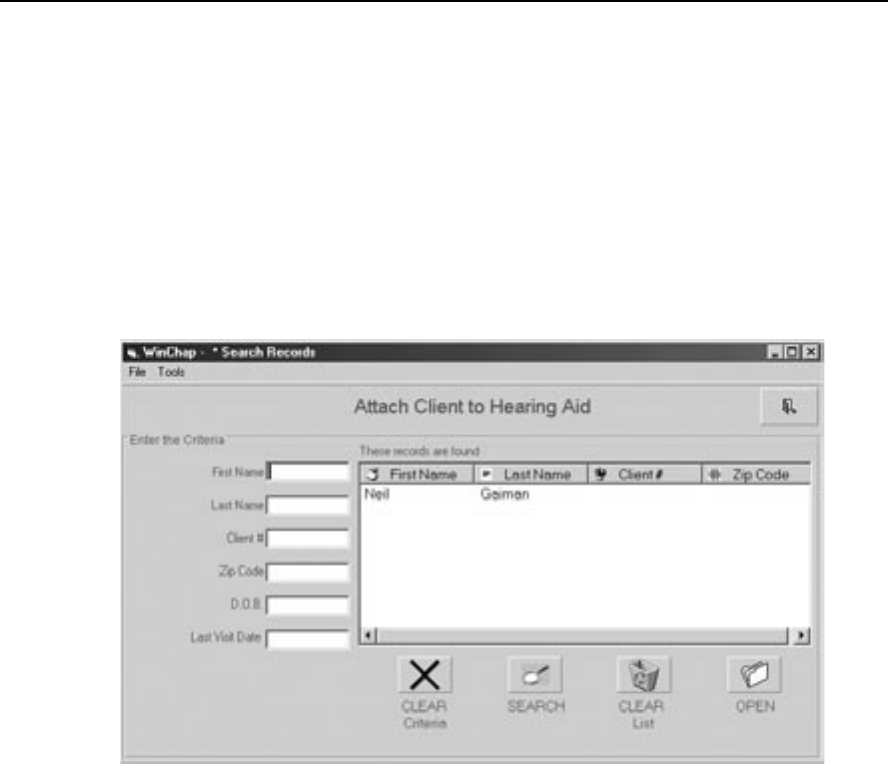
3. Click Attach Client. This will bring up a client search window. See Figure
3.3.2.3.
4. The current client will be automatically listed in the client search win
-
dow. If you would like to attach the aid to a different client, type the
client’s name into the appropriate boxes.
5. Select the client’s name to attach the hearing aid and close the search
window.
6. Click
Save to save your changes.
7. Click
Back to close the Hearing Aid Information window.
Figure 3.3.2.3—Client Search window
3.3.2.4 To record hearing aid repairs:
You can create a hearing aid repair log for each individual hearing aid. This will
record useful information such as when it was sent to the repair lab, when it
was returned, and any comments you would like to make about the repair. See
Figure 3.3.2.4A. Whenever a repair is recorded for a hearing aid, an asterisk will
appear next to the aid’s listing, indicating the existence of the repair record.
1. Locate and highlight the hearing aid being repaired. Use the
Search but-
ton if necessary. (See Section 3.3.6.1.)
2. Click Repair Info on the right side of the hearing aid list. This will open
the repair record window.


