Ẅ Exit Details
NAVIGATION TOOLS Exits
62
To view an exit’s services:
1.
After sorting to organize the Exits List (see “Sort the Exits List,” page 60), select an exit Ẅ.
2. Continue your previous activities.
To navigate or GoTo an exit:
1.
After sorting to organize the Exits List (see “Sort the Exits List,” page 60-61), select an exit.
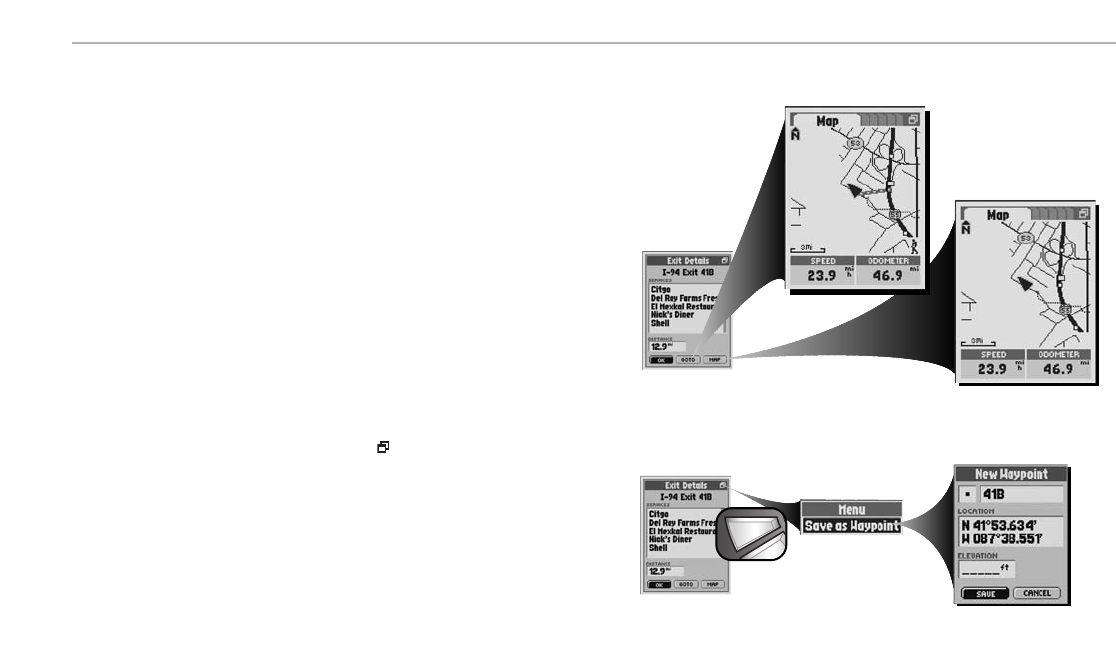
2. On the Exits Details Screen Ẅ, select “GOTO.” This will jump you to the Map Page and show you the
straight-line path between your current position and your selected exit
ẅ.
To see an exit or exit’s service on the Map Page in relation to you current location:
1.
After sorting to organize the Exits List (see “Sort the Exits List,” page 60-61), select an exit.
2. On the Exits Details Screen Ẅ, select “MAP.” This will jump you to the Map Page and show you the relationship
between your current position and your selected exit
Ẇ.
To save an exit or exit’s service as a waypoint:
1.
After sorting to organize the Exits List (see “Sort the Exits List,” page 60-61), select an exit.
2. On the Exits Details Screen ẇwhen you see the menu icon , press the MENU button.
3. Select “Save as Waypoint”Ẉ.
4. A New Waypoint Screen will appearẉ. Choose from the following:
• Edit the default name, default symbol, current location or current elevation (see “Editing or Entering Text or
Symbols,” page 25.) Accept the changes by selecting “SAVE.”
• Accept the default name, default symbol, current location and current elevation by selecting “SAVE.”
NOTE: Elevation does not need to be entered to save an exit as a waypoint.
ẈMenu Option
ẇ Exit Details
ẉNew Waypoint
ẆMap Page
ẅMap Page


