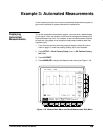
Example 3: Automated Measurements
TDS 620A, 640A, & 644A User Manual
1. Press Low Ref (side).
2. On the numeric keypad, press the 2, the 0, and the ENTER (
) but-
tons, which sets the low measurement reference to 20%. Observe that
the rise-time value has changed.
3. Press Remove Measrmnt (main) ➞ All Measurements (side). That
returns the display to its original state.
You have seen how to display up to four individual automated measurements
on screen. You can also pop up a display of almost all of the automated
measurements available in the Select Measrmnts side menus. This snap-
shot of measurements is taken on the waveform currently selected using the
channel selection buttons.
As when displaying individual measurements, you must have a stable display
of your signal, and that signal must have all the segments necessary for the
measurement you want.
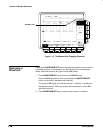
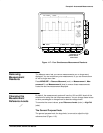
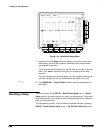
1. Press Snapshot (main) to pop up a snapshot of all available single
waveform measurements. (See Figure 1-19).
Figure 1-19: Snapshot of Channel 1
The snapshot display includes the notation Ch 1, meaning that the mea-
surements displayed are taken on the channel 1 waveform. You take a
snapshot of a waveform in another channel by first selecting that channel
using the channel selection buttons.
Displaying a
Snapshot of
Automated
Measurements


