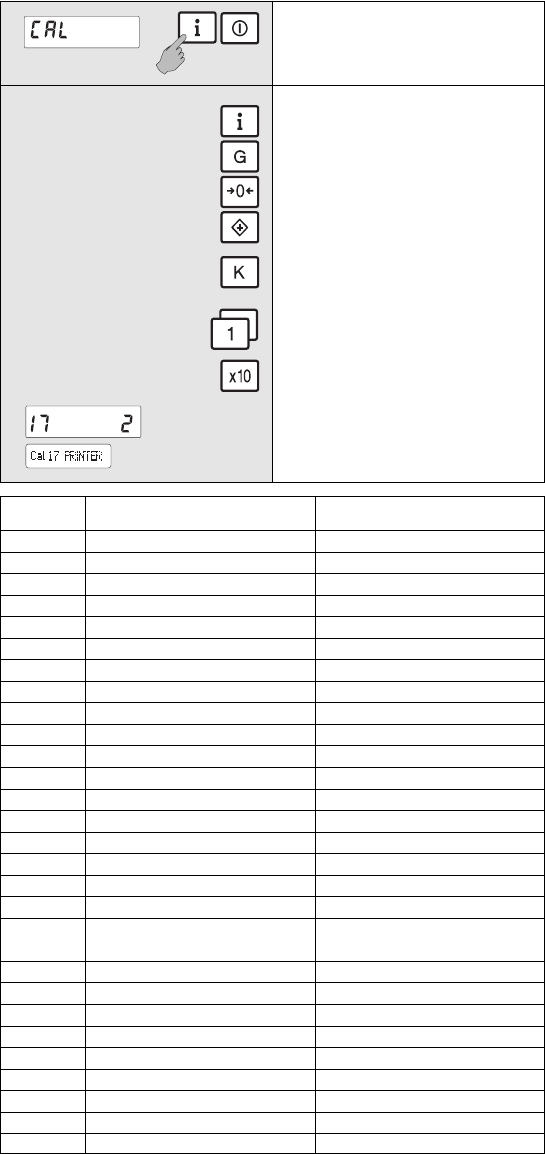
Activating user modification
Press the ”i” key and ”On/Off” at the
same time.
User modification functions
Calibration step selection, forwards
Calibration step selection, backwards
Moving the tens column forward within a
program step, from left to right
Moving pre-assigned values forward
Confirm and transfer the value of the
main indicator and proceed to next CAL
step.
Enter/overwrite values /date,etc.) with the
numeric keyboard. Enter the digits in the
flashing tens column.
Store changes and return to weighing mode.
Main display shows the CAL step and the
pre-assigned value for tape printer.
Secondary display shows help text to
guide the user.
CAL-Step Standard settings Secondary display
1 Hour/Minute Time
2 Day/Month/Year Date
3 0=DD.MM.YY 1=MM.DD.YY Print type
4 00050 empty message
5 0 TAadd.
6 2 Default weighing value
7 3 Default counting value
8 10 Ref. pc.
9 09600 Baudrate
10 0 Parity
11 37/8 Bit
12 0 CR/LF
13 0 STX/ETX
14 1 DIM.on
15 0 Dec.
16 0 EDP
17 2 Printer
18 1 Backlight on/off
19
20 dto.
+- key
21 dto.
CL+- key
22 dto.
K- key
23 dto.
CLK- key
24 dto.
EDP- D
25 2 Timer
26 0 Reset Serial.-No.
27 - not relevant
28 1 Optimization of number of pieces
15
Parameters for printer and interface configuration, data and time and much
more are permanently stored in an internal memory. Access to user modification
is by means of the keyboard and LCD display.
Enter Code-No. as described in
print image definition
P- key


