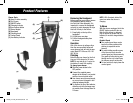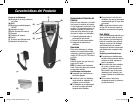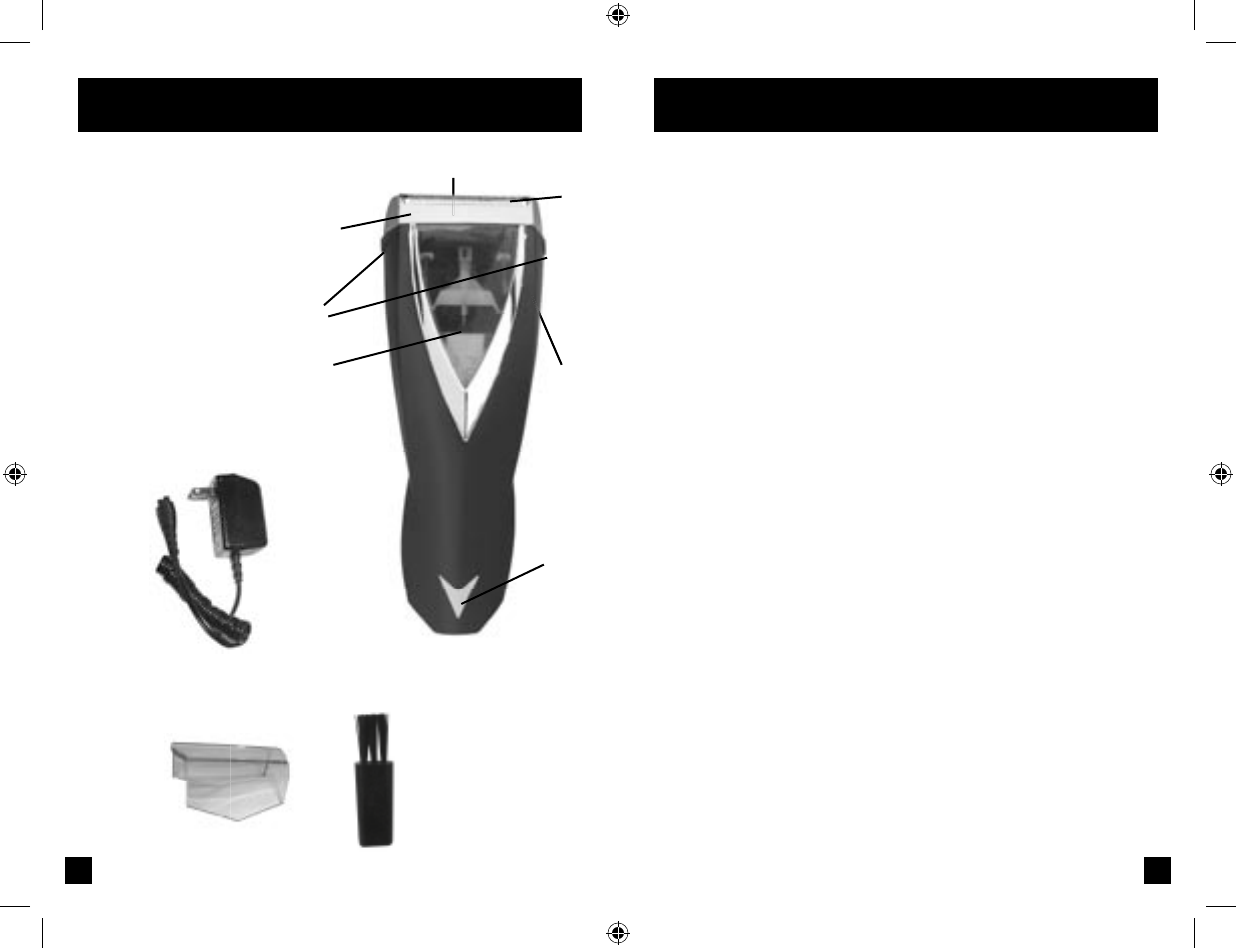
Shaver Parts
(A) Head & cutter assembly
(B) Foil Screen
(C) ON/OFF button
(D) Charging Indicator
(E) Head release button
(F) Power Adapter
(G) Headguard
(H) Cleaning brush
(I) Comfort Guard
(J) Low Battery Indicator
4
Product Features
5
(B)
(I)
(G)
(A)
(H)
Removing the Headguard
Before operating your shaver, remove
the Headguard, which protects
the Foils and Cutter Assembly. It is
important to remove the Headguard
correctly to avoid damaging the clips
that hold it firmly to the shaver.
1. Press lightly on the top of the
headguard.
2. Lift the lower rear edge.
3. Pull the Headguard away from
the shaver.
Operation
Use of this shaver at voltages other
than the ones specified below will
cause damage and will void the war-
ranty. Model XT-100 uses 105-130
VAC, 60 Hz.
Charging
Before using your shaver for the first
time, put it on charge for 24 hours.
NOTE: It may take up to 3 cycles for
the battery to reach full capacity.
To charge your shaver:
■ Slide the power button to the
OFF position.
■ Connect the supplied power
adapter to the shaver’s cord socket
and then to an electrical outlet.
■ Your shaver cannot be overcharged,
so you can leave it plugged in and
charging between shaves.
■ To preserve the life of the batteries,
allow them to fully discharge every
six months, then recharge them for
24 hours.
NOTE: LEDs illuminate behind the
green lens when the shaver is
charging.
To Shave
With the shaver unplugged, slide the
ON/OFF button upward to turn on.
Note that this shaver is designed
only to operate on power from its
batteries; it must be charged before
using.
Comfort Guard
■ The comfort guard lever can be
kept in the down position while
shaving to expose the entire
trimmer.
■ To avoid irritating sensitive areas
of the face and neck, raise the
comfort guard and shave normally.
The guard will allow hair to pass
through and be cut, but will keep
the trimmer away from the skin.
■ To trim facial hair, simply lower the
comfort guard.
(J)
(E)
(D)
(F)
(C)
33236_XT-100_IB-Revised.indd 4-5 2/1/07 3:04:30 PM


