


Quantum 6000 Series www.pridemobility.com 37
VII. CARE AND MAINTENANCE
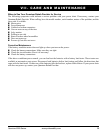
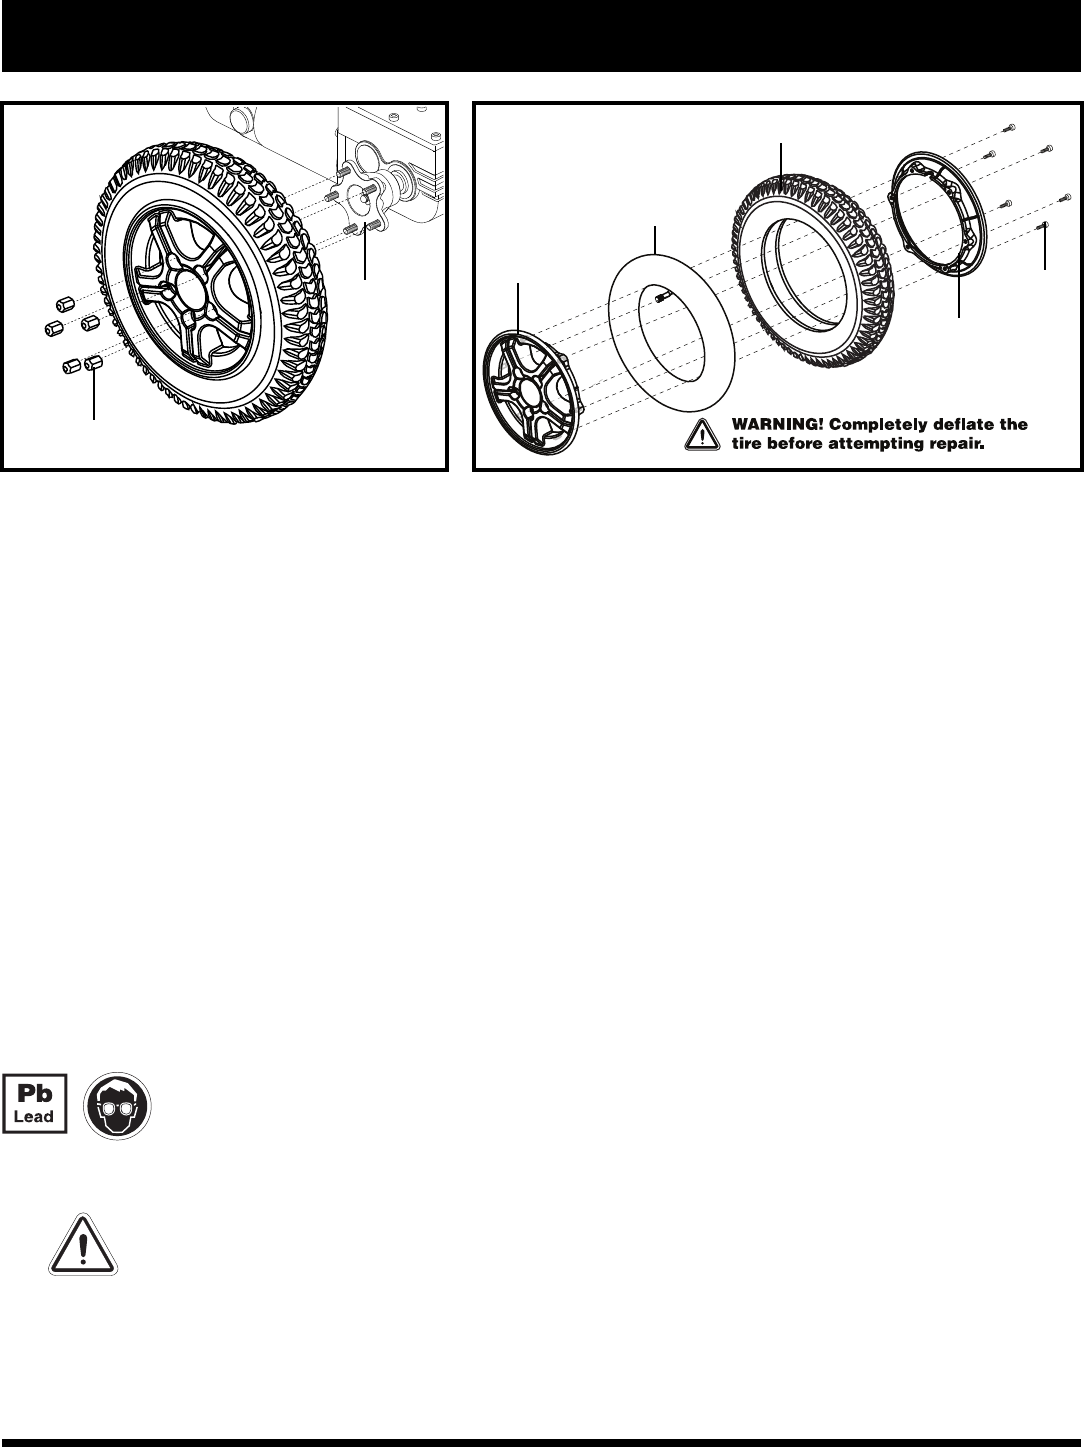
Follow these easy steps for a quick and safe repair for both pneumatic and solid tires:
1. Turn off the power to the controller.
2. Set the power chair up on blocks.
3. If you are changing a pneumatic tire, completely deflate it before removing the wheel.
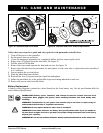
4. Remove the (5) lug nuts from the wheel hub. See figure 25.
5. Pull the wheel off of the hub.
6. Remove the screws and separate the front and rear rim. See figure 26.
7. Remove the old tube from the pneumatic tire and replace it with a new tube or replace the entire assembly if
it is a solid tire.
8. Screw together the two rim halves.
9. Slide the wheel back onto the hub.
10. Reinstall the five (5) lug nuts onto the wheel hub and tighten.
11. Inflate the pneumatic tire to the psi/bar/kPa air pressure rating indicated on each tire.
12. Remove the power chair from the blocks.
Battery Replacement
A battery wiring diagram is printed on a decal located on the front battery tray. See the specification table for
correct battery specifications.
MANDATORY! Battery posts, terminals, and related accessories contain lead and lead
compounds. Wear goggles and gloves when handling batteries and wash hands after
handling.
WARNING! The batteries in your power chair should only be serviced or replaced by an
authorized Pride Provider or a qualified technician.
WARNING! Do not replace batteries when seat is occupied.
WARNING! Power chair batteries are heavy. See specifications table. If you are unable to
lift that much weight, be sure to get help. Use proper lifting techniques and avoid lifting
beyond your capacity.
WARNING! Do not mix old and new batteries. Always replace both batteries at the same time.
Figure 26. Quantum 6000 Drive Wheel Disassembled
TIRE
SCREWS
FRONT RIM HALF
LUG NUTS
REAR RIM HALF
Figure 25. Quantum 6000 Drive Wheel
WHEEL HUB
TUBE