


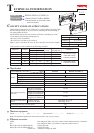
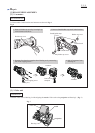
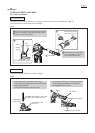

Repair
DISASSEMBLING
ASSEMBLING
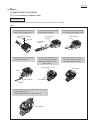
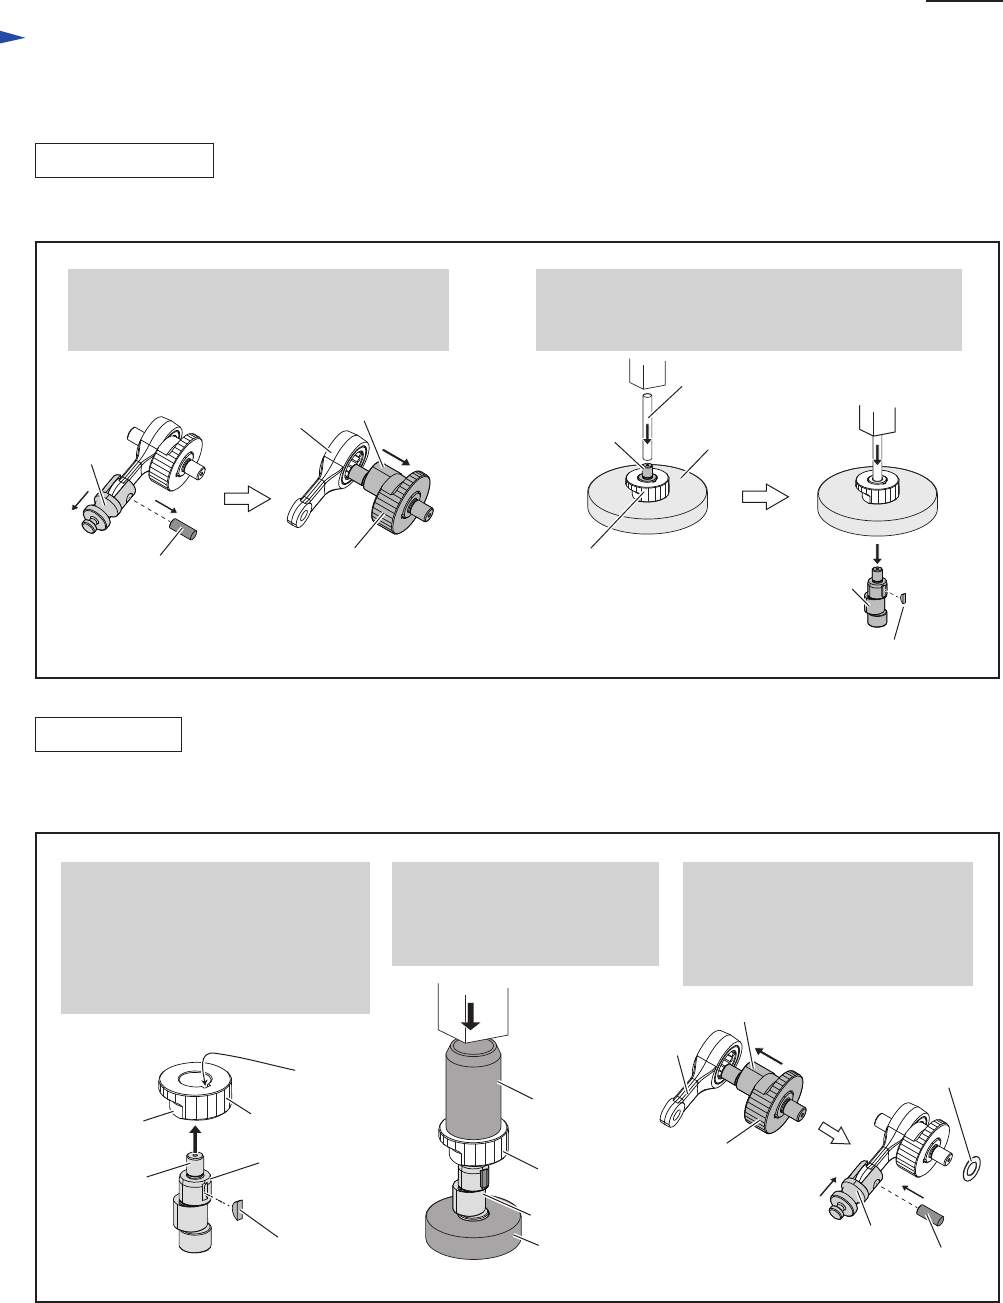
(3) Disassemble Spur gear 31 and Crank section as drawn in Fig. 4.
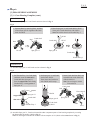
(1) Assemble Spur gear 31 and Crank section as drawn in Fig. 5.
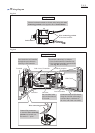
(2) Assemble Spur gear 31, Crank section and the other component parts to Gear housing complete by reversing
the disassembly procedure. (Refer to Fig. 3)
Note: Do not forget to mount Flat washer 6 to Gear complete 16-36. (Refer to the center drawn in Fig. 3)
Fig. 4
1. Separate Ram by removing Pin 6, and then
remove Spur gear 31 together with Crank
shaft from Rod.
2. Place Super gear 31 and Crank shaft on 1R217.
Then, press Crank shaft down with 1R282.
Note: Be careful not to lose Woodruff key 3.
Woodruff key 3
Pin 6
Ram
Ram
Spur gear 31
Spur gear 31
1R282
1R030
Crank shaft
Crank shaft
Rod
Crank shaft
1R217
Woodruff key 3
Crank shaft
Crank shaft
1. Set Woodruff key 3 to Crank shaft.
And then, insert the slim end of
Crank shaft into Spur gear 31
from its stepped side while fitting
Woodruff key 3 to the groove of
Spur gear 31.
2. Put Super gear 31 and Crank
section onto 1R032.
Then, Press the Gear down
with 1R030 until it stops.
slim end
stepped side
Spur gear 31
Spur gear 31
groove
1R032
3. Insert Crank shaft into Rod, and
assemble Ram to the other end
of Rod with Pin 6.
Note: Do not forget to mount
Flat washer 8.
Rod
Spur gear 31
Crank shaft
Pin 6
Flat washer 8
Fig. 5
[3] DISASSEMBLY/ASSEMBLY
[3] -1. Gear Housing Complete (cont.)
P 4/ 8