


2
USA/UK ENGLISH
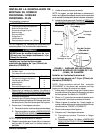
Installation on Wheelchairs with 1-inch
(25mm) Diameter Back Canes (FIGURE 2)
Have the following tools available:
1/8-inch Allen Key
3/8-inch Crescent or Box Wrench
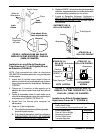
Parts Required: Quantity
Multi-Position Mounting Plates 2
1-inch (25mm) Half-Clamps 4
Clamp Inserts 4
Long Bolts 4
Nylon Locknuts 4
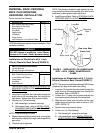
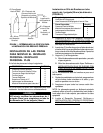
1. Determine back height. Refer to DETERMINING THE
MOUNTING POSITION FOR INSTALLATION OF
PERSONAL BACK in this instruction sheet.
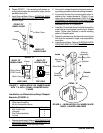
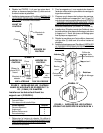
2. Insert two (2) long bolts (from the inside) through the
small holes on the mounting plate, then through the
half-clamps. Tighten down nuts to secure clamp.
3. Perform one (1) of the following:
A. Half-clamps tight - proceed to next step.
B. Half-clamps loose - refer to
INSTALLATION
ON WHEELCHAIRS WITH 7/8-INCH (22MM)
DIAMETER BACK CANES.
NOTE: Clamp should dig into cane.
4. Repeat the procedure for the other side, ensuring that
both sides are matched for height, and are parallel to
each other.
5. Check all nuts for tightness.
FIGURE 2 - INSTALLATION ON WHEELCHAIRS
WITH 1-INCH (25MM) DIAMETER BACK
CANES
PERSONAL BACK/PERSONAL
BACK PLUS MOUNTING
HARDWARE INSTALLATION
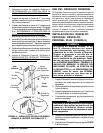
This kit includes the following:
DESCRIPTION QUANTITY
Multi-Position Mounting Plates 2
Short Bolts-Phillips Head 4
Nylon Locknuts 4
Long Bolts 4
Regular Nuts 4
L-Brackets 2
Clamp Inserts 4
Half-Clamps for 1-inch (25mm) Tubes 4
WARNING
DO NOT attempt to modify the 1-inch (25mm)
clamps to fit ¾-inch (19mm) diameter tubing.
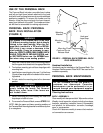
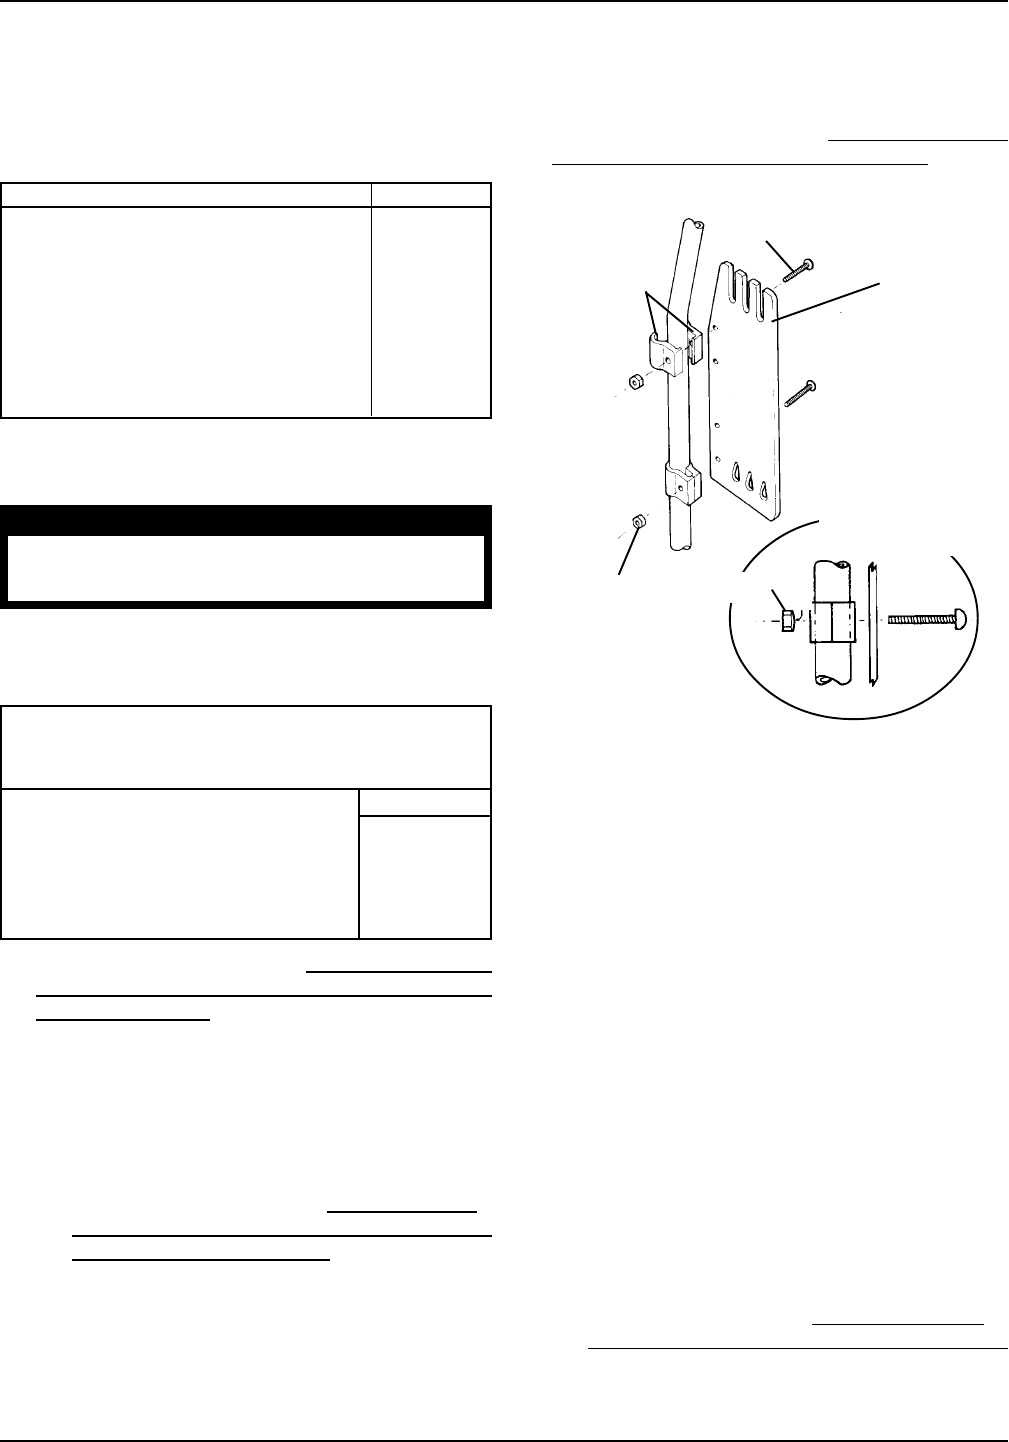
Installation on Wheelchairs with 7/8-Inch
(22mm) Diameter Back Canes (FIGURE 3)
NOTE: This procedure should be performed ONLY if cane
clamps are too large for the back cane tubing.
1. Insert two (2) long bolts (from the inside) through the
small holes on the mounting plate, then through the
half-clamps. Refer to FIGURE 2.
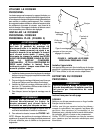
2. Position one (1) insert onto the back cane with the
insert opening facing the back of the wheelchair.
3. Slide the cane clamp over the insert until the cane
clamp halves surround the insert as shown in FIG-
URE 3, DETAIL "A".
4. Tighten down nuts to secure clamp.
5. Perform one (1) of the following:
A. Half-clamps tight - procede to next step.
B. Half-clamps loose - refer to
INSTALLATION ON
WHEELCHAIRS USING L-SHAPED BRACKETS.
Long Bolt
Inside
Outside
View from Rear
(Users Left)
Mounting
Plate
NOTE: The clamp-on bracket is easily adjusted by loos-
ening the bolt and sliding the brackets up or down on the
back cane to obtain proper height adjustment.
6. Install Personal Back. Refer to PERSONAL BACK/
PERSONAL BACK PLUS INSTALLATION in this in-
struction sheet.
Half-Clamps
Nylon Lock Nuts
NOTE:Not all parts are required for each installation. Read
instructions carefully.