43
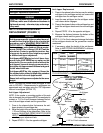
Anti-tipper Replacement
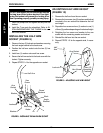
1. Press in the release button that secures the existing
anti-tipper to the anti-tipper socket and remove the
anti-tipper from the anti-tipper socket.
2. Insert the new anti-tipper into the anti-tipper socket
until release button engages.
3. Press in the release button on the anti-tipper bar and
install the anti-tipper wheels onto the new anti-tipper
bar.
4. Repeat STEPS 1-3 for the opposite anti-tipper.
5. Measure the distance between the bottom of the
anti-tipper wheels and the ground floor.
NOTE: A 1-1/2 to 2-inch clearance between the bottom
of the anti-tipper wheels and the ground/floor must be
maintained.
6. If necessary, adjust the height of the anti-tippers.
Refer to
ANTI-TIPPER ADJUSTMENT in this sec-
tion of the manual.
This Procedure includes the following:
Anti-tipper Adjustment/Replacement
WARNING
After ANY adjustments, repair or service and BE-
FORE use, make sure all attachment hardware is
tightened securely - otherwise, injury or damage
may result.
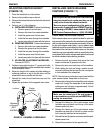
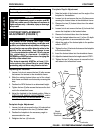
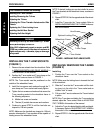
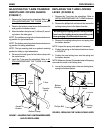
1-1/2 to 2-inch clearance
Anti-tipper
Release
Buttons
Anti-tipper
Bar
FIGURE 1 - ANTI-TIPPER ADJUSTMENT/REPLACEMENT
A
N
T
I
T
I
P
P
E
R
S
ANTI-TIPPERS PROCEDURE 7
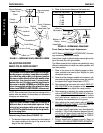
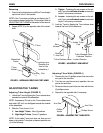
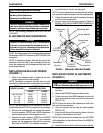
Anti-tipper Socket
Camber
Clamp
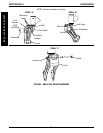
DETAIL "A" - ANTI-TIPPER
ADJUSTMENT HOLES
SIZE* REAR PART MEASUREMENT
WHEEL NUMBER
A 22-inch 1093991
B 24-inch 1100916
26-inch
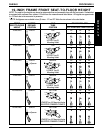
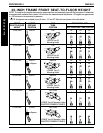
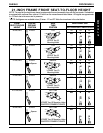
*Size refers to the charts in
ADJUSTING FRONT SEAT-
TO-FLOOR HEIGHT in PROCEDURE 5 of the manual.
Hole
TOP adjustment hole
ANTI-TIPPER ADJUSTMENT/
REPLACEMENT (FIGURE 1)
WARNING
Anti-tippers are specific to the rear wheel size and/
or seat-to-floor heights. Refer to the charts in this
procedure and in
ADJUSTING FRONT SEAT-TO-
FLOOR HEIGHT in PROCEDURE 5 of this manual
for correct usage and adjustment. If these require-
ments CANNOT be achieved, DO NOT use the
wheelchair. Contact a qualified technician. Any
changes to the seat-to-floor height may require
a different anti-tipper adjustment.
Anti-tippers MUST BE attached at all times. Inas-
much as the ANTI-TIPPERS are an option on this
wheelcahir (You may order it with or without the
anti-tippers), Invacare strongly recommends or-
dering the anti-tippers as an additional safeguard
for the wheelchair user.
Anti-tippers MUST be fully engaged. Ensure the
the release button of the anti-tipper fully protrudes
out of the hole in the anti-tipper socket.
Ensure both anti-tippers are adjusted to the same
height.
NOTE: To ensure the correct model anti-tipper is used
refer to FIGURE 1. Measurements for anti-tippers are
approximate and are taken using the TOP adjusment
hole ont he anti-tipper (DETAIL "A").
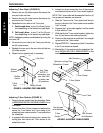
Anti-tipper Adjustment
NOTE: If the camber or mounting position of the axle
tube is changed, the anti-tippers MUST be readjusted to
maintain a 1-1/2 to 2-inch clearance between the bot-
tom of the anti-tipper wheels and the ground/floor.
1. Press in the release button that secures the anti-
tipper wheels to the anti-tipper bar.
2. Adjust the height of the anti-tipper wheels to between
1-1/2 and 2-inches of the ground/floor. Refer to the
charts in ADJUSTING FRONT SEAT-TO-FLOOR
HEIGHT in PROCEDURE 5 of the manual to deter-
mine the proper adjustment hole.
3. Repeat STEPS 1-2 for the opposite anti-tipper.
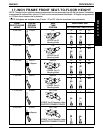
17-inches
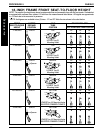
19.5-inches


